Quantcast
Channel: drawing tablet reviews
Viewing all 230 articles
Browse latest View live

Review 2: Huion GT-185 HD Pen Display Tablet Monitor

$
0
0

This review is written by Bret Melvin.

INTRODUCTION

Hello everyone, my name is Bret Melvin. I'm a senior character artist in Orlando, FL, specializing in licensed character art, merchandise illustration, and caricature art. I've been working digitally for over a decade and am always on the lookout for innovation that makes the work we all love just a bit easier, more efficient, and (importantly) more affordable.

WHAT IS IT?

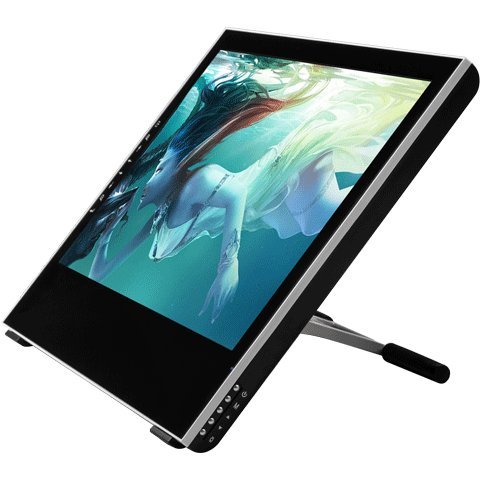
Today I'll be introducing and discussing a product I've had the privilege of working with over the past few weeks - the Huion GT 185 HD tablet monitor.


Just for full disclosure's sake, and to show that I, like so many of you, have actual skin in the game, I want you all to know that I purchased this tablet with my own, hard-earned money. This is not a review unit that has been hand-selected by the manufacturer and sent for review. The unit I have is as off-the-shelf as it comes.

I only say that so that folks know that any positives I report and any issues I report are based on a genuine desire to get the unit working as well as possible so that I can use it for actual work. This is not a "review unit" that will be scribbled on for a few hours and then set aside. I have every intention of using it to accomplish the kind of 2D illustration that I do every day.

For the sake of this review, I'll be focusing on the kind of work about which I'm most qualified to discuss - 2D illustration using mainstream software like Photoshop, Illustrator, and Manga Studio. Of course, this is a great time to be a digital illustrator and the sheer wealth of software options available to us who work digitally is immense - so immense that for the sake of this being a "hardware" review, I think it's best if I stick to the software that I'm most familiar with. That way, I can quickly recognize the distinctions between this and my Cintiq 22HD.

With that in mind, let's take a quick tour.

WHY WOULD I WANT IT?

The blunt answer for many as to why you would want to buy a Huion tablet over a Wacom tablet is simply affordability. That is in no way a criticism of either company or the customers to whom they market. Huion, Yiynova, etc. are all focused on appealing to a market that is often simply priced out of buying Wacom hardware. This has typically included students, hobbyists, smaller studios, and individuals who are either just learning digital art or simply use it as part of a larger art creation process that doesn't require the best of the best.

There is much passion on both sides of this kind of comparison, but there doesn't really need to be. Wacom is the best and also the most expensive. What is exciting, however, is that there are companies like Huion that are actually CREATING a new market - products featuring competent equipment with mid-tier specifications. That's the way I look at hardware like Huion, Yiynova, etc. Every brand has their place within the market.

What is even MORE exciting, however, is that many of the mid-priced manufacturers are moving from being perceived as mere "Cintiq-clones" to being "Cintiq-alternatives". That means, that they are beginning to offer unique, innovative, and sometimes even tempting features that are actually "drawing" some of the market away from Wacom. (pun intended)

A good example of this kind of phenomenon is the growing popularity of Manga Studio 5. When Adobe switched to Creative Cloud and by extension, the subscription model, that alone wouldn't have been enough to cause a wave of disgruntled artists to migrate to Manga Studio. But, combine the unpopular pricing model of CC with the innovative, artist-centered features of Manga Studio, sweetened with a rock-bottom retail price and we've seen artist after artist migrate out of the "cloud" toward a genuine alternative, not just a clone that they could afford.

So, is the Huion GT 185 HD a genuine Cintiq "alternative" or is it just a "clone"?

Let's find out!

SPECS

The Huion is a full HD monitor boasting 2048 levels of pressure and broad compatibility. Its screen size at 18.5" combined with 1920x1080 resolution makes it a genuinely unique product in the tablet monitor marketplace in size, specs, and price. It utilizes Huion's own proprietary driver that is purported to work with both WINDOWS and MAC. For this review, I'll be focused on testing it with WINDOWS.

There's much more technical information about the specs, which are available on Huion's website here.

What's more important for this review is how these features actually work. So let's take a look at those.

INITIAL IMPRESSIONS

I will say that Huion has done a good job of understanding that thorough packaging and presentation are not everything, they are not inconsequential to how your brand is perceived. Their website is definitely the most well-designed and current looking of any of the popular Cintiq-alternatives'. The packaging is very professionally made and there's no hint whatsoever of the cheap, brown cardboard that you'd expect when you consider the price point. Nice, full color graphics envelope the packaging edge to edge and the box itself even has a sturdy carrying handle.

Inside, the tablet is swaddled with a very premium foam that is flexible and reusable (important for me since I often have to take my tablet home with me on the weekends from the office). Inside, they included a few nice extras like a screwdriver for attaching the monitor to the stand... YES, A FULL SIZE SCREWDRIVER...and also a 2 finger glove that looks conspicuously similar to a Smudge Guard.

Also included is a matte "screen protector". Mine came pre-installed (if you can call two pieces of double sided tape "installation"), but it didn't do much for me and seemed to make the image a little blurry, so I pulled it off within the first 30 minutes of testing. I didn't take any points off for this since technically it's just a bonus item and it's completely removable. If it was stuck on there for good, we'd have a problem.

If I decide to purchase a screen protector, I'll go with Photodon. They make the best screen protectors out there and I give them a 100% endorsement on their products. They are more of a commitment to put on, but the performance is simply beyond anything else on the market (and I've tried several expensive versions).

Huion has also included a pen stand with LOTS of replacement pen tips. I don't see any significant pen wear yet, but it is comforting to know that they were so generous with accessories like these.

Now, none of this would cause you to keep a tablet that is terrible, but it says something about a company when they include these things. It says that they're at least making the effort to think through their product and though you know (and they know that you know) what you paid for it, they're doing their best right out of the box to make you feel like you got a really great deal.

First impressions matter and on this, Huion scores.

Cintiq Alternative or Cintiq Clone? ALTERNATIVE!

4 STARS - Great job on feeling like you belong in the league with the big boys, Huion. 4 stars out of 5 on presentation.

PEN

The one non-negotiable aspect of any tablet monitor is the pen. No matter what the other specifications are, without a competent and accurate pen, it doesn't matter how good the rest of the specs are.

Huion's pen is both a bit shorter and a bit lighter than Wacom's previous or current generation pens. It requires charging (though not very often) and comes with two programmable side buttons. It does not, however, have an eraser as the top of the pen is used as the USB charging port.

As a keyboard junkie, I could go the rest of my life without using the eraser on the top of a pen. It's just never been a part of my workflow. Much of that is due to the fact that it's nearly impossible to do any sort of work in Adobe Illustrator without the keyboard. Since Illustrator accounts for at least 35% of my workflow, I've just gotten used to using it. If you're solely a digital painter and need the basic controls for brush resizing, zooming, undo, etc. then the hotkey setup on the tablet itself will be great news. But, more on that later.

The pen tip itself is definitely different than any other I've tried. You're either going to love it or absolutely hate it. The tip is somewhat springy and retreats into the pen body by about 1/16 inch until you reach full pressure. The pen registers with a very light touch (though not quite as light as a Wacom Cintiq pen) and requires very little initial activation force. From there, the pressure curve is very linear and predictable. It's actually a pretty intuitive system once you get used to it and for subtle inking, I'd say it qualifies as a genuine Cintiq ALTERNATIVE. You can feather the pressure in and out of its 2048 levels with ease since you always have a pretty good idea of how hard you're pressing based on the feedback of the pen tip. It's subtle, but I found my line weight getting much more confident as I learned to sense the tip almost like feathering the throttle on a motorcycle.

The pen features 2 programmable buttons on the side which can be programmed to a number of different commands. Right click is an obvious choice, but a feature that Huion has recently added is the ability to switch screens. In other words, on a 2 monitor setup, if I’m drawing on the Huion, but I need to click something on my other screen, rather than reach for my mouse, I can just click the "switch screen" command and it switches the brush tracking from the Huion screen to the second screen...WITH PRESSURE.

(Picture Above - The Huion Driver Menu allows you to program the pen button to switch control from the Huion screen to a second screen with a simple button press. Excellent!)

That last part is HUGE. One of the great features of Wacom's Cintiq is the ability to switch screens and use the Cintiq as a tablet to control your secondary screen. Until you've had that functionality, you might not realize how much you end up using it. Huion, though not copying that functionality completely, has given the best ALTERNATIVE to that functionality that I've seen yet. They deserve a lot of credit in that area and so far, that part has worked wonderfully!

Now to a few issues...

This is not a deal breaker, but the pen has a few things about it that remind you of its budget price. There's no rubber grip, though the pen fits in your hand very comfortably. Its light weight is a virtue in the sense that it isn’t “tip heavy”, but it is also a vice in the sense that it feels a bit hollow and not particularly robust. It’s a bit of a double-edged sword, I know. It doesn't feel cheap by any means, but it doesn't feel expensive either.

It also tends to make a strange squeaky noise when drawing directly on the screen. It's not present when I tested it with the included screen protector, but since I didn't care for the screen protector, I was left to draw on glass. It's not a major issue and usually just getting some skin oil on the tip will remedy it, but it does add to the "budget" feeling of it.

Cintiq Alternative or Cintiq Clone? ALTERNATIVE!

4 STARS - Competent and unique. It's different than a Cintiq pen, but it delivers where it needs to.

SCREEN

The screen on the Huion is, at first glance, as advertised. It's bright, crisp, has wide viewing angles, and feels like a premium product. This, however, on my unit, was a short-lived impression. Within the first hour or so, I noticed that out of the box, the color, brightness, and contrast were in desperate need of drastic calibration. This is necessary for any monitor on which you'll be doing professional work, but even after 3 hours trying to calibrate it manually via menus and calibration software, it just was not getting the colors where they needed to be.

After calibrating with an XRite Colormunki calibrator, however, the color issues were remedied and the display represented the colors very faithfully. I did notice, however, that when the display goes to sleep, I have to go back into my color profile menu and reset the profile back to the calibrated one. This is, surprisingly, despite the fact that I have the calibrated profile set as default. Nonetheless, if I'm away at lunch and come back, I have to go back each time it turns off and select the correct color profile again.


(Picture above: If you’re considering the GT 185 HD because of its budget price, make sure to factor in the cost of a professional color calibrator...you’ll NEED it!) X-Rite ColorMunki

The only reason I bring all of this up is that if you're someone who, due to monetary restrictions, is purchasing a budget friendly tablet monitor like the Huion, you need to factor in another $165 or so for a proper color calibrator. The color is simply WAY too difficult to calibrate using the menus included.

Another issue that I noticed pretty quickly was that there were 12 distinct, evenly spaced "bright spots" across the entire monitor. I can't say for sure, but based on their location and size, it looks like the tips of the LED backlights are actually showing through the display. It's VERY difficult to capture on film, but they are easily perceived by the naked eye. I've been in contact with Huion about this problem and we're still working on a resolution to it.

I also noticed that, when working on a white canvas, there are several dark spots in the screen where the lighting is uneven or perhaps where the display has a problem. It is not a perfectly smooth, even appearance across the monitor. Instead, there are several subtle "splotches" where the lighting varies, regardless of the monitor settings.


Most disappointingly, there are several places where dust was trapped under the screen.

This is where I would advise Huion to address quality control before adding features. Features are what you add once you have a consistently reliable product to add to its appeal. I've found that artists are willing to live without fancy features in favor of something that is reliable and consistent. Look at how many artists are even creating great art on an iPad as evidence for that. It is a piece of hardware with literally NO features that facilitate art, but it is still immensely popular in part because of its reliable hardware. Of course, iPads are not directly comparable to the Huion, and I don’t mean to suggest otherwise. I only use that as an example to illustrate the point that artists are more accepting of LIMITED hardware that is RELIABLE than UNRELIABLE hardware with lots of interesting features.

At their core, these Cintiq-alternatives are tablet-monitors. Before adding features, the necessity of being a competent tablet and a reliable monitor is paramount.

I'm not alone in this, sadly, as several other artists who have bought the GT 185 have also encountered serious, though varying quality control issues.

Huion, as a company, has been gracious and helpful to try to help me troubleshoot the problems, but it looks to me as though there are still some quality issues that need to be dealt with.

Cintiq Alternative or Cintiq Clone? CLONE

2.5 STARS - Screen is bright and sharp, but quality control issues tarnish the otherwise positive experience. Unquestionably requires a professional color calibrator (at least $150). Forgets color profiles each time the screen goes to sleep.

DRIVERS, HOTKEYS, AND EVERYTHING ELSE

Photoshop

The driver software was easy enough to install. I'd followed the advice of Ray Frenden to CAREFULLY follow the instructions and install the driver BEFORE plugging in the USB cable. Since I did that, I had no initial driver conflicts which was a relief.

Then I opened Photoshop CC 2014...

It looked like I was drawing while sitting on top of an old washing machine. The jitter in the line at any speed was extremely surprising.

I’d like to think that after several years as an illustrator that I have a pretty steady hand. I'm not "Disney animator" fast, but I'm not slow either. I make pretty deliberate marks and I've never had a lot of issues before. The line jitter that I've seen in other "budget" tablet monitors was often remedied by making faster strokes. Not so here. The jitter was present regardless of speed.

In Photoshop CC 2014, while the pressure sensitivity was registering adequately, the line fidelity was simply unworkable. I've been back and forth with Huion over the past 3 weeks trying to find out what the problem is, but we still have yet to find a solution that stabilizes the jitter in Photoshop CC 2014.

They recommended I download a 3rd party app called "Lazy Nezumi Pro" onto my Windows machine that would add a stabilization effect. But, that is not, strictly speaking, a fix to the problem.

Interestingly, Photoshop CS6 works fine...beautifully even. The pressure curve and line fidelity is wonderful. It's a genuine Cintiq-Alternative in terms of performance.

When it works...

Again, here's where the budget side starts to show. While drawing in CS6, the experience is smooth and frankly surprisingly comparable to my $2000 Cintiq. But then, for no reason, the pen / software will simply stop registering strokes. The pen, though fully charged, stops registering on screen. It usually takes around 10 seconds to 1 minute to catch up with itself, either trying to replicate all the strokes I was trying to make, or by simply making a giant ink blob on the screen (see pictures).

Quick, repeated strokes seem to upset the tablet as well. Rather than staying up with quick hatching, you start to see a little "splash" effect start to appear, registering your mark as a "mouse click" rather than a stroke. You have to slow down and be more deliberate to minimize this happening, but truthfully, your hardware should make you more efficient, not slow you down.

The driver has a "support tablet PC" box you can check or uncheck depending on the program, but neither one remedied the issues in CC2014.

Manga Studio

If your primary method of art creation is exclusively Manga Studio, I'd say that this tablet has been almost purpose-built for you. The Huion's performance in Manga Studio is probably its strongest asset of all. The hotkeys work right out of the gate and I found myself, for the first time ever, taking my hands off of my keyboard and sketching quickly and confidently with the intelligently placed hotkeys.


It was great! I found I had the best luck by going to File, Preferences, Tablet, and selecting "Wintab" within Manga Studio.


The tablet would still lose contact with the pen from time to time, but it was far less often than with Photoshop.

Adobe Illustrator

Not much to say here. There's very little use of pressure sensitivity in Adobe Illustrator, but you need a tablet to be very precise given the technical nature of the software. The Huion performed competently. I didn't put it through a very extensive test here, but it did register pressure where applicable, and it was definitely precise enough to create some great vector art.

Driver: Cintiq Alternative or Cintiq Clone? Clone

2 Stars - Awesome when it works, but buggy and unpredictable. Works best in Manga Studio. Very unpredictable performance in Photoshop.

HOTKEYS

The hotkeys are actually pretty great overall. They are well placed and seem to do exactly what they are meant to do. They have little icons on them to illustrate their pre-programmed function which does take some of the initial guesswork out of the equation when using it right out of the box.

It's a small gripe, but the hotkeys are a little noisy. They're not "keyboard click" noisy, they're "clicking a metal ballpoint pen" noisy. It actually gets a little annoying if you're the one using it, but even more so if you're in the office next to someone using it. It's a small thing, but I honestly think that if you were using it in an environment with other people, it might drive them crazy. It's hard to call that a quality control issue, since they do work as advertised. It's more of a "fit and finish" issue, almost like the way doors close on a cheap car vs. a more expensive one.

4 STARS - Noisy, but they work as advertised
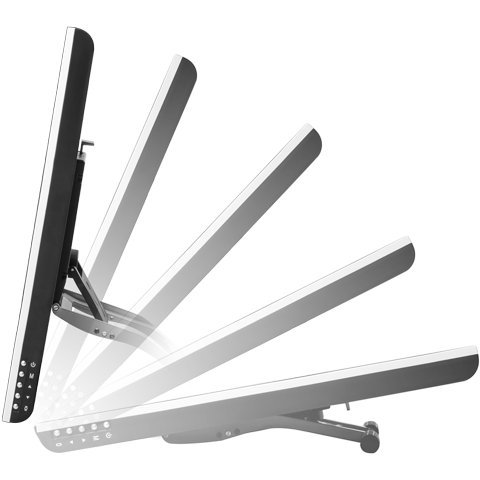
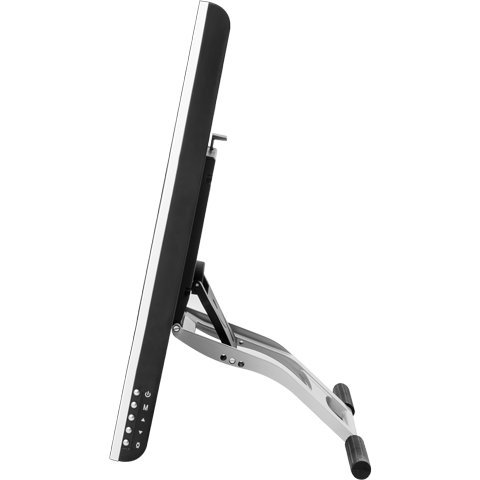
STAND

There's not much to say about the stand, honestly. It does what it's supposed to do overall. It holds the tablet securely which is most important, and (a welcome change), Huion has intelligently moved the cables to the SIDE of the tablet so that they are no longer pinched when adjusting the tablet up and down.

It has a full range of motion up and down and lays fairly flat at full recline. One major difference that I have yet to see on any “Cintiq Alternative” is a stand that allows the screen to rotate like an animation disc. That might be something that is patented by Wacom, but now that you can rotate your canvas digitally in almost every piece of software except for Adobe Illustrator, the need to rotate your actual tablet is something of an anachronism.


Honestly, despite embarrassingly installing the stand upside down the first time (it still works that way, just not as well), I have to admit that the stand is actually not bad. It works and seems to be robust enough for the weight of the tablet.

If you’re used to the smooth, spring-assisted stand of the Cintiq, then you may have to get used to Huion’s. It travels up and down in small, gradual notches, adjusted by pulling the lever up while you raise or lower the tablet into the notch you prefer. It’s not exactly easy to adjust, but it’s not difficult either. You don’t have the easy-to-reach paddles like you do on a Cintiq, but since I don’t tend to change the incline of my tablet too much once I’m working, it’s hardly a “problem”.

4 STARS - Functional, no frills, and does what it says it does. It holds the tablet solidly and reclines fairly low. Not particularly smooth or ergonomic operation, but it works.

FINAL NOTES AND CONCLUSION

The Huion, out of the box, makes a great first impression. It’s clear that Huion is taking their hardware very seriously and from what I’ve read over the past few years as I’ve followed their products, they’ve shown steady improvement.

The GT 185 is truly a unique product in the marketplace. It has a combination of form, functions, and features that no other product in this price range offers. For that, Huion deserves immense credit.

Also, Huion has shown a good commitment to customer service. My experience with them so far has been that they are prompt overall and very polite. Compared to the horror stories of another “budget” tablet manufacturer that will remain unnamed, Huion stands out as a small company that can also offer consistent support for their products. You don’t feel as if you might get stranded with an “off brand” product that is no longer supported because the company no longer exists. Huion seems to be very committed to this product category and it shows.

All of that, however, cannot outweigh the frustrating software issues and quality control issues that I, and several others I know, have encountered with this model in particular. It’s probably most disappointing because I think that the concept behind this model is SO good. While Wacom offers a gigantic 27” model, a desk filling 22” model, or a cramped 13” model, Huion comes in at the Goldilocks size of 18.5”. Big enough to do serious work, but not so big that you have to buy a bigger desk. It’s almost (dare I say)...portable. They fitted it with specs that make the budget conscious artist (aren’t we all) drool. A full HD IPS display, 2048 levels of pressure, hotkeys...all of these features that would make this product a home run are tripped up as they round the bases by poor quality control on the hardware side and frustrating compatibility issues on the software side.

I am rooting for Huion because I think they’re really on to something here. But, for now, if I’m looking out for the best interests of my hard-working artists friends out there, I’d have to say that it would be best to wait on purchasing this model - at least until they get some of these quality issues worked out.

If your work revolves around Manga Studio 5 and little else, then you really can’t go wrong here. If, however, your work requires integration with a wider range of software like Photoshop CC, then it’s probably worth it to either wait or save up for a Cintiq.

The GT 185 isn’t quite ready for the big leagues yet, but it is good enough for the minors. I think with a renewed focus on quality control and software integration, Huion can move from being “most improved player” to MVP and I for one, am rooting for them.

3 Stars Out of 5 Overall

- Bret Melvin

p.s. If, after hearing from Huion / other users, I’m able to solve or find answers for some of these issues, I’ll be more than happy to update this review. Your experience may vary and I look forward to hearing about other artists’ experiences on Mac as well.

God bless!

Availability

You can find the Huion GT-185 HD at the following Amazon product pages. The Huion GT-185 HD is available in USA, Canada, UK, Germany, France, Italy, Spain and Japan.

Amazon.com | Amazon.ca | Amazon.co.uk | Amazon.de | Amazon.fr | Amazon.it | Amazon.es | Amazon.co.jp

Check out other graphics tablet reviews at http://www.parkablogs.com/tags/drawing-tablet-reviews

Tags: 


Review: Yiynova MVP10U Pen Display Tablet Monitor

$
0
0

This review is written by Lesleigh.

Hello there, My name is Lesleigh! Pleasure to meet you, this is my review on the MVP10U!


The Yiynova MP10U is a recent purchase of mine and it has been a learning experience so far. I have a lot of experience using Wacom tablets (Intuos and Bamboo) but this one is quite different. I have purchased several graphics tablets over the years and also used off-brand tablets that don’t withstand my use. I love the fact that I can see what I am drawing on my tablet instead of looking up at it compared to screen-less tablets. I am able to do with this tablet what I was doing with the older Lenovo X61 tablet PC that I was using.

The Yiynova MP10U is Windows/Mac compatible. I have been using it on the new Windows 10 technical preview.


The construction of the tablet is sturdy. Its dimensions are 12.8 x 7.6 x 0.7 inches (32.5 x 19.3 x 1.8 cm) ; It weighs at 1.6 pounds (0.72 kg). It's a convenient size to work with.

Be careful of the driver
I had difficulty installing the driver initially, but after installation it works great.

I had to download the software from the website. The disc did not come with the latest driver.

This only happens if you're on the new Windows 10. You have to let Windows 10 install the display driver itself through the update function or it will not let you install tablet drivers.

If you are using the older windows OS , You can install the tablet driver from the disc or from the one downloaded from website.

The disc comes with the Display and Tablet drivers, e.g. DisplayLink Driver and TabletDriver 5.02.


The Yiynova has a Mode Switch Between Digitizer and Monitor. The Monitor mode allows you to draw on it like a screen tablet. The Digitizer mode allows you to use it like a regular graphics tablet where you have to look at your computer screen. The screen turns black like a regular graphics tablet. You can switch between the modes easily with the switch.


The LED monitor is smooth to the touch and has a decent display area to work on. I was impressed with size of the 10.1-inch display area.

The backlight in the monitor does not have a glare as you would think.

The 10.1-inch screen has a resolution of 1024x600(4000 LPI), colors are vivid, clear and beautiful. The colors do not change from different angles. Even from drawing at a comfortable point(3ft to 4ft ), it still has the colors and images very clear to see.


The unit as two micro-USB ports to connect to the computer for the graphics input. It does not have a VGA Input and does not require external power. It is powered by the USB cable, Type A to Mini 5-Pin Type B. The two ports make it easier for the user to choose from either the right or left side. This cable is replaceable if it is lost.


That's the USB to Micro cable, It comes in sets of two, two micro-ports and two USB connectors, though you only need one plugged in at a time to use this tablet if your port is a USB 3.0.

The two micro-ports are from left to right, each side has a wire holder, So you can plug the wire from the left or to the right side of the tablet, using either the left or the right micro-port.


This is the hot key panel with 8 shortcut keys. I use many of the shortcut keys. You can change the Express keys to any other buttons you need to.


The stylus is battery powered and can only be used with this tablet. It's not compatible with any other tablet. It uses one AAA small battery which are provided in the box.

Replacement pens are available for purchase if you lose or break the one you have.

The screen supports 2048 levels of pressure sensitivity and I do not have any problems with the pressure so far. It’s been responsive and smooth to the touch. I used to draw on a tablet with fewer levels of pressure sensitivity, so having more levels of pressure sensitivity to work with makes it easier on my wrist, as I can adjust the pressure, to how soft or hard i can press the pen.

I am currently using Clip Studio software. While using Clip, the screen resolution has enough room for me to draw comfortably, and i can draw with my tools and swatches. With Photoshop, depending on your workspace, it might be too cramped to draw with this tablet.

Pros

  • It's affordable. For those who use Photoshop, Clip studio, Open Canvas, Krita, etc, this tablet is an alternative to the Wacom if you cannot afford one.
  • It's convenient, small enough to carry around
  • Easy to use without having to have a lot of extra software or attachments.


Cons

  • The screen jitters at corners of the screen when using Photoshop 6. This can be easily remedied by adjusting the settings in it. It does take some calibrating with it.
  • Sai users beware! If you do not have the full version of Sai, this tablet might not work for you!
    - There is a workaround but you must have it installed on your PC on the desktop, this tablet uses wintab settings.
    - But if you are a Sai user and want to get it anyway, I recommend getting Clip, as it is just a user friendly! I know of artists who use Sai but they have the full version and the installer and all the Setup files in MISC file.

The Yiynova MVP10U does work with Sai but only with the version or trail of 1.2.1.0 only and with the settings below. The Yiynova MVP10U does not work on Sai 1.1.1.

I've had this tablet for about a month and have gotten used to the pressure and screen. Drawing with it makes my life easier.

I'm still working with it and learning about it.

I recommend getting one if you want a tablet that's small and easy to carry around to work or on the go with your laptop. This is a tablet for those who want something at a decent price.

Check out their other tablets, they are worth a glance if your looking into getting one for a loved one or as a gift!

Availability

You can find the Yiynova MVP10U on Amazon at www.amazon.com/gp/product/B00MAPLSG8.

A newer model, the Yiynova MVP10UHD+IPS, is also available. It has a better resolution of 1280 by 800 pixels. You can check it out at www.amazon.com/gp/product/B00KRWOJF8

Check out other graphics tablet reviews at http://www.parkablogs.com/tags/drawing-tablet-reviews

Tags: 

Review: Samsung Galaxy Tab A with S Pen for Artists

$
0
0

This review of the Samsung Galaxy Tab A 8-inch is written by Jose Cua.

Hello my name is Jose Cua. I'm a concept artist working in the games industry and I'll be reviewing the Samsung Galaxy Tab A. I use a Cintiq 24hd at work and a Cintiq Companion at home so I have fairly high expectations when looking for a mobile sketching device.

I've previously owned an iPad 3 as well as a iPad Mini 2 but after having gone through a few 3rd party styluses and having to read countless reviews online to hunt for the perfect pen, I never found one that delivered a satisfactory result.

I decided to sell the iPad off and give the Samsung's Galaxy Tab A a shot. I've been using it for around 2 weeks as of now and I absolutely love it.


It's a no nonsense solution that comes with its own stylus which uses wacom technology, the pen itself also doesn't require any batteries or charging. It is little thin compared to other styluses out there but I didn't have a problem adjusting to it after a few sessions.


There is a handy little slot on the tablet to slot the pen in when not in use so there's very little chance of you forgetting or losing it.

Accuracy and pressure sensitivity works great which seems like a basic feature, but it was a nightmare looking for a pen that just worked for the iPad. Performance of pressure sensitivity is highly dependent on the apps themselves so having tried a few I highly recommend Sketchbook pro (which comes as a free download when you register an account at the Samsung app store). I’ve also recently tried Artflow which I quite like as well. These apps give great pressure range and perform very well on the device.

Being a mid-range tablet the specs seem to be on the low side. It comes with a 1.2GHz quad-core Qualcom Snapdragon, 1.5GB of RAM and 16GB of internal storage but there is an available micro-SD slot so you can expand your storage to up to 128GB.

The screens resolution maxes out at 1024 by 768 which worried me at first, but in the end being only 8 inches, it was actually sufficient for such a small screen. Video’s look sharp and crisp, text can sometimes be pixelated in certain situations, however it doesn’t make it hard to read so it wasn’t really a dealbreaker for me.

As I said, the specs are definitely on the low side especially when comparing to the higher end Samsung tablets out there which come with twice the firepower so I was very doubtful at first. But after making numerous trips to the electronics stores to sketch with it I was pleasantly surprised. The device seems to be optimized enough that I don't experience much lag in Sketchbook Pro or Artflow, even when working at a 2048x2048 image. And at only 0.69 pounds (312 grams), the 8-inch model is light enough to hold up with one arm while drawing with the other, making it great for creating artwork on the go. I’ve used it while standing up in the subway, sitting inside buses, or rested on a table and it has been a joy to sketch with.


Note that there are two versions of the Galaxy Tab A, one that comes with the s-pen and one that doesn’t so make sure you double check before your purchase. S Pens that are sold separately will have compatible models listed alongside.

I got the 8.0” Inch, Wifi version of the device at a local “Challenger” outlet (Singapore) for 398 SGD. It came with a free 16GB micro SD card, as well as a Samsung Smart Foldable Case. If you fancy a larger size you can the tablet also comes in a 9.7” (keep in mind the specs are exactly the same so the low 1024x768 resolution will become even more apparent, and it will also be on the heavier side)

All in all, at a very affordable price the tablet delivers as a no nonsense, portable, digital sketching solution. Despite its low specs It allows me to sketch on the go with zero or minimal lag. Although the slightly lacking resolution was kind of a let down, I quickly forgot as soon as I started sketching. The 8.0” model is so compact and easy to use, just whip out the tablet, pull the pen out from the dock and boom your sketching in no time! I’m very satisfied with my purchase, and I truly believe that this is a bang for buck sketching device. I highly recommend my fellow artists or hobbyists out there give it a try.

Extra notes from Parka:

An important point to note is there are versions of the Samsung Galaxy Tab A that comes without the S Pen. And the S Pen for this model isn't easy to find, so check out eBay if you can't find one. Also, the tablet that do not come with the S Pen is not going to have that dedicated pen slot to keep the pen.

I've personally tried the Tab A before at a local shop and I like the drawing experience on it. The fine point nib makes it easy to see what you're drawing. The pressure sensitivity works well even though I was just using the default note taking application. The only downside is perhaps the small size of the pen. That will need time to get used to. But comparing it to the iPad and many styluses I've used, I prefer the Samsung S Pen.

The S Pen usually comes with the Note series, and not the Tab series of tablets from Samsung. So this particular Tab A with the S Pen is sort of an exception.

The other tablet models with S Pen that are good for drawing would be the Galaxy Note 10.1 and Galaxy Note Pro 12.2 (artist review). They have much better specifications but are also much more expensive, like USD $474 and $647 respectively (as currently listed on Amazon). The Galaxy Tab A is more than $200 cheaper, but doesn't come with S Pen on Amazon.

The Galaxy Tab A with S Pen is a great portable drawing device, and if you can find it with the S Pen it should be a good deal.

Availability

Check out more reviews on Amazon with these direct links. Make sure it comes with the S Pen before you buy.

Amazon.com | Amazon.ca | Amazon.co.uk | Amazon.de | Amazon.fr | Amazon.it | Amazon.es | Amazon.co.jp

Check out other graphics tablet reviews at http://www.parkablogs.com/tags/drawing-tablet-reviews

Tags: 

Review: ASUS PT201Q 19.5-inch Digitizer Tablet Monitor for Artists

$
0
0

This review is written by Bret Melvin.

Hi again, everyone. Today we'll be taking a look at a unique and likely somewhat polarizing tablet monitor - the ASUS PT201Q. This is a written review that accompanies my more extensive video review (further) below.

THE ASUS WHAT?

Ok, let's get the obvious questions out of the way early, the first of them being..."the what?".

When I said that this tablet was "unique", I meant it in every sense of the word. Those of you who have seen the photos have either stopped reading already or are intrigued enough to at least see what this product is all about. Judging by appearances alone, there really isn't another product like this on the market. Some of that, as you will see, is good. Some of it is...well...quirky.

ASUS isn't exactly a household name in the world of Cintiq-alternative tablet monitors. The usual names are brands like Huion, Yiynova, Bosto, and UC Logic. But, ASUS has been a player in the tablet PC world for a number of years where their excellent EP121 / B121 Windows 7 tablet PC had a loyal following for some time (myself included). So, they have some credibility in integrating the functionality of pen and screen, but the EP121 used older, albeit more ubiquitous technology from Wacom. The PT201Q, however, uses an altogether proprietary technology that, based on my experience so far, functions only with its own unique digitizer pen (more on that later). Also, strictly speaking, this is not an ASUS design, but rather a SHARP product from overseas with a similarly (un) catchy product name - the Sharp LL-P202V. As best I can tell, they’re identical products, the only difference being that the ASUS is available in the U.S. and the Sharp is / was available internationally.

For the purposes of this review, I’ll be approaching it from a similar standpoint as my previous review of the Huion GT185 HD. I am currently a senior character artist working in the merchandise design field, so much of my work revolves around 3 pieces of software: Adobe Photoshop CC 2014, Adobe Illustrator CC 2014, and Manga Studio 5. We live in an amazing time as digital artists where the options for software and hardware seem almost limitless. On the user side, this makes the world of art creation very exciting, but on the hardware review side, it makes it very daunting. So, just for the sake of brevity and my own sanity, I’m going to focus my test on those 3 apps mentioned above about which I’m most familiar and most qualified to test.

MY SETUP

Just to preface this review, I wanted to give a word about my particular setup. For my full time job, I use a Apple Mac Pro workstation with a Wacom Cintiq 22HD. My purpose for purchasing the ASUS was for the 25% of my work that I do outside the office on a windows machine - specifically a Microsoft Surface Pro 2 (SP2). The ASUS, being a driverless tablet, had no conflict with the Surface Pro and also no conflict with the Wacom FEEL drivers I had installed when I originally purchased the unit. Since that is my primary purpose for purchase and testing, this review will be focused on my experience in Windows 8.1 rather than Mac.

The important feature for me was to be able to extend my screen to a second tablet monitor whose drivers wouldn’t conflict with those already installed on the SP2. The SP2 is wonderful for sketching and conceptualising, but can be very cramped for finished work, and near impossible for detail work in Adobe Illustrator. Since the ASUS fit that unique qualification for my needs, it was a no brainer to at least give it a try since it boasted compatibility with the 3 apps I use every day for my art.

Without getting too far ahead of myself, I will say that in the specific areas for which I bought the ASUS, it has been a home run. It seamlessly integrated with Photoshop CC 2014, Illustrator CC 2014, and Manga Studio 5 with no interruptions or problems right out of the box.

There are some caveats to my experience on which I’ll elaborate, but let’s get started with the most obvious and most polarizing feature of this tablet...the pen!

THE PEN

THAT CRAZY TETHER - Will A Tether Tie You Down?

Let’s go ahead and just get this out of the way. The tether on the pen is going to be a deal breaker for some artists and that’s ok. It’s entirely understandable, but based on my experience with this tablet over the past 5 months or so, it’s perhaps also unjustified. The question is, “does it interfere with your work or slow you down?”, and the answer to that for me is “no”.

Not that it doesn’t take a bit of getting used to, but as far as being an interference or impedance to productivity, after the first week or so, I’d say it’s like any other corded peripheral like a mouse or headphones - you basically forget it’s there.

For those of you who’ve ever used an airbrush, the technique for dealing with the tether is going to be second nature. Just wrap the tether loosely around your wrist like you would the air pressure hose of an airbrush and get going. It’s probably the one thing that most people think would be the problem with the pen, but it’s also the one thing that ultimately matters the least when it comes to satisfaction with the pen overall.

I’ve had a few questions from artists in regard to using a 3rd party stylus and as best I can tell, there are no other pens that are compatible with this particular tablet. The tether carries both information and power to the stylus, so there’s no need for a battery.

THE GOOD

Boasting an industry accepted (though not industry leading) 1024 levels of pressure, I’d say that right out of the box, the pen performs as promised. There’s a generous and linear pressure curve from light to full pressure and its overall feel is comparable to the previous generation Cintiq models, the 21UX and 20WSX (which I use on my Mac at home).

The rubberized grip is nice and there are two programmable buttons which you can assign in the “Digitizer Pen Utility”.

I really liked the length of the stylus tip. Wacom pens tend to be rather fat towards the front and can block your view of your drawing cursor. With the ASUS, it feels almost like drawing with a Sharpie with a long, black, very visible tip you can follow. It’s not a selling point or a deal breaker, but it is a distinction I haven’t seen on any other competitors.

Also, because it isn’t as “front heavy” as the typical Wacom pen, you can grip the ASUS stylus differently. This allows you to adjust your grip to variations other than the typical “handwriting grip” you’re forced to use with Wacom.


The “Digitizer Pen Utility” is the only piece of software you’ll have to install for the ASUS. It isn’t a “driver” per se as the ASUS uses the standard Windows Tablet PC drivers to register pressure. It’s more of what it claims to be - a utility where you can tweak the pressure curve and program the 2 stylus buttons.

THE BAD (ish)

The one caveat to the pressure sensitivity, however, is that the initial activation force for the pen, where it registers the lightest touch, is a bit too stiff for my liking. After the first hour or two of use, I noticed that my wrist began to ache because I was having to exert additional pressure on the pen, causing strain.

TWEAKING THE TIP
This issue can be remedied, I found, but not via the “Digitizer Pen Utility” menu where you adjust the pressure curve once the initial activation has been registered. Instead, it was solved by unscrewing the tip and reconfiguring the springs, by adding slightly more tension to the front spring. It would be difficult to describe this process in writing, but here’s a link to the section in my video review that shows how I accomplished the simple modification. It’s nothing that would void a warranty or break anything, so don’t worry. It’s more like tightening a shoelace than “hacking”. It’s also completely undoable and redoable, so you can adjust the tension to your liking.

REPLACEMENT PEN TIPS
Update 22 September 2015: ASUS are now selling replacement pen tips

The other negative I’ll point out from the onset is the questionable availability of replacement pen tips. Ask 10 different times and you’ll likely get 10 different answers. On one of the recent reviews on Amazon, an ASUS rep replied to a negative comment about the lack of replacement tips with the following:


You be the judge. I think it really depends on who you talk to and which day you ask. So far, however, I don’t have a firm answer one way or another as to if / how to actually procure a replacement tip. I’ll update the review if / when I find out.

OTHER PEN FEATURES

HOVER DISTANCE
The hover distance on the ASUS is incredibly generous. Whatever technology they’re using for pen tracking provides between 1”-2” of hover distance at least.

PARALLAX
The lack of parallax on the ASUS was probably the most pleasant surprise overall. I’ve used Wacom products in one form or another for years and I’ve simply gotten used to drawing “off the cursor” a bit and simply tracking my movements by the cursor rather than the actual pen tip.

With the ASUS, the cursor tracks so closely to the pen tip, that there have been several times where I’ve chosen to draw with the cursor either completely hidden or reduced to a single dot. On parallax, the ASUS might be one of the best in terms of connecting the tip to the cursor.

EDGE FIDELITY
Edge fidelity, like parallax is another area where the ASUS really shines, tracking with the tip of the pen all the way to the very edge of the screen without drifting. It’s really pretty remarkable. I test this a bit in my video review here (6min 18s): (apologies ahead of time for the camera...it was trying to focus on the screen and my hand simultaneously)

PHOTOSHOP
As with ALL, yes ALL tablet monitors, there will be some line jitter when drawing slowly, especially diagonally. This is present to one extent or another, even on my Cintiq 22HD. On the ASUS, the diagonal jitter is present, but workable. It’s slightly more pronounced than the top end Cintiq, but as you can see, by simply speeding up the strokes slightly, the jitter all but disappears. There are times when painstaking marks need to be made, but I’ve found that they are always difficult, regardless of tablet monitor.

For slow, meticulous, mechanical linework, I use Adobe Illustrator. If you need a bit more stabilization, Manga Studio is always a great alternative due to their built in stabilization.

For my purposes, it hasn’t been a huge issue. The ASUS performed FAR better than the Huion GT185 HD in Photoshop CC 2014. I’ve migrated most of my sketching to Manga Studio over the past year because of Ray Frenden’s amazing brushes, so for my purposes, it’s not a deal breaker either way and has been completely workable.

MANGA STUDIO 5
The ASUS really shines brightest in Manga Studio. As you can see, even the slightest adjustment on the stabilization slider yields a dramatic decrease in jagged edges and jitter without slowing the brush tracking down. As MS5 grows in popularity, there are increasing numbers of artists who use Manga Studio 5 exclusively.

For those artists, I’d say that the ASUS PT201Q might be a near perfect fit, especially if you can get it on sale (more on that towards the end).

ILLUSTRATOR
There’s really not a lot to say about the ASUS’ performance in Illustrator. After tweaking the sensitivity of the pen tip, it’s perfectly workable in precisely placing and editing vector paths. A tablet monitor isn’t everyone’s choice for vector work simply because the pen tip tends to cover the control points. Personally, I prefer using a combination of pen and mouse. But, for everything I’ve needed it to do, the ASUS has proved itself perfectly competent for my routine Adobe Illustrator work including vector character inking, type layouts, etc.

PEN SUMMARY
Great sensitivity after pen tip tweaks. Questionable availability of replacement tips. Tether might be a deal breaker, but is easy to adjust to. No 3rd party pens. Strongest performance in Manga Studio 5. Feels different than a Cintiq, but lives up to its expectations.

3.5 STARS OUT OF 5

UNIQUE FEATURES

TABLE MODE / LAP MODE / EASEL MODE...NOT CONNECTED TO THE STAND MODE
This, for me, is a PHENOMENAL feature that I wish more tablet monitors had. The ASUS allows you to productively use the tablet detached from its base so it can lay virtually flat on a desk, propped up slightly by the convenient pop-out kickstand.

This is a feature that Wacom has adapted into their most recent 27” Cintiq flagship monitor as well. It may not be something that you use all the time, but it is really cool. The lay-flat position combined with the extremely low parallax gets me as close as I’ve ever gotten to that “sketchbook” feeling while drawing digitally.

Interestingly, the ASUS is light enough that you can also flip it vertically and set it onto a desktop easel or full size easel. I’ve begun exploring its use for live digital caricatures and have found that it’s actually a very natural fit. The ability to hold the pen in different positions allows you to more comfortably and practically work in a vertical setup than you otherwise would with a heavier monitor and stylus designed for the “handwriting grip”.


(Pictured Above) The ASUS can be removed from its stand and laid flat with its built in “pop-out” kickstand. Great for capturing that “sketchbook” feeling of drawing.

MULTI TOUCH - 5 out of 5
Multi-touch on the ASUS works as you’d expect. In software that supports multi-touch, it worked the first time with no problems. There’s not much on which I can elaborate since it honestly works exactly like it says it will.

One surprising feature that I also wish other manufacturers would adopt, however, is that the menu system, including color adjustments, brightness, and even volume for the built in speakers is ALSO multi-touch.

Anyone who’s gotten frustrated with endless button-based menus on every other tablet monitor on the market will appreciate this immediately. Press the menu button on the side to bring up a touch menu where you can toggle between the 3 modes of pen / touch, brightness, color temp, volume, etc.

Its smartphone-like controls immediately make the menu system on other tablet monitors seem antiquated. Want to adjust the brightness? Touch the menu button and just slide the brightness slider on the screen, just like your smartphone. It’s really great.

Summary: Multi-touch works exactly as described. Unique smartphone style touch menus are unique and incredibly useful!

NON-PROPRIETARY CABLES
Proprietary cables as a means of gouging the customer are just one of those things that we’ve gotten used to over the years. So, it was refreshing that the ASUS uses standard HDMI, Displayport, and Micro-USB to USB cables for their PT201Q.

CABLE MANAGEMENT
Again, here is a nice touch on the ASUS. Well thought out clips to hold and secure the cables in place are a welcome and user-focused feature to help contain an otherwise overwhelming tangle of cables.

THE SCREEN
The screen is refreshingly matte. In an age of gorilla glass and shiny everything, for actual graphics work, the screen on the ASUS is phenomenal. It has a scratch resistant coating on the screen itself, so there’s no need for an additional screen protector. Even with overhead fluorescent lighting in an office environment, the screen reduced glare significantly better than any other tablet monitor I’ve used.

The colors are rich and bright, especially after calibrating them with an X-Rite ColorMunki.

Although a potential deal breaker for some, the monitor is TFT rather than IPS. Though IPS is, on the whole, a superior technology, the quality of the image on this monitor is actually VERY good and I’ve already done quite a bit of very color-sensitive professional work on it. The viewing angles are quite generous as well and I haven’t found a comfortable working position yet that has caused the image to begin showing signs of washing out or color banding.

You’ll notice that the bezel is also quite small, giving the monitor itself a small footprint on the desk and an elegant look overall.

There are no hotkeys, however, as a trade off for this streamlined appearance.


DISPLAY SUMMARY - 5 STARS OUT OF 5
Amazing color after calibrating, despite being TFT. Great viewing angles. No hotkeys. Small bezel and small overall footprint on desk. VERY matte coating on screen. VERY resistant to fingerprints. TIP: Using a higher quality HDMI cable impacts image quality DRAMATICALLY.

THE STAND - 4.5 STARS OUT OF 5
The stand is competent and sturdy. It attaches via 4 allen-wrench style screws.

It holds itself in place by its own internal tension, so there’s no adjustment levers to worry with. It’s somewhat similar to what you’d find on the Surface Pro 3, but the tension is VERY firm. I’ve yet to find that the screen bounces or flexes with pressure. The rubberized feet on the stand prevent it from slipping once it’s in place. It can lay VERY flat or stand VERY straight.

Overall, the stand is probably one of the best, easiest to use stands I’ve ever used. There is no option for rotating the screen once it’s attached to the stand. With the ability to spin the canvas in virtually all graphics software, however, the need to physically spin your hardware is less important. The stand on the ASUS is not as robust as what you’d find on a Cintiq, but it’s stable and MUCH lighter.

PRICE
Probably the most inconsistent aspect of the ASUS is its price, ranging anywhere from $500-$1000 on Amazon depending on anything from the time of day to wind direction. I have yet to be able to discern how or why the price fluctuates so much, but if this seems to be a product you’re interested in trying, I’d recommend checking the price at least once, maybe twice a day until it gets into the low $500 range.

I don’t know that it’s worth $1000, but it is MOST DEFINITELY worth the $545 I paid for it, especially given my specific, albeit limited needs (Photoshop, Illustrator, Manga Studio).

IS IT WORTH IT?

For me, the answer is an easy “yes”. It has added significant functionality to my Surface Pro 2 setup and has allowed me to create a true “mobile office”. It works reliably and without conflict on the 3 apps I use most - Photoshop CC 2014, Illustrator CC 2014, and Manga Studio 5. Full list of compatible apps here.

Is it worth it for you? It really depends. My advice is always that if you can afford it, you should buy the best Wacom Cintiq you can. If you can’t afford new, find a factory authorized refurb from a retailer like MacMall. They are, quite simply, the best products money can buy and will work with virtually every software available. If your needs are for the widest compatibility across Windows and Mac, 2D and 3D, just do yourself a favor and spend the extra money on the Cintiq. They are absolutely worth every penny.

But, if your needs are a bit simpler and more modest, there are products available like the ASUS that integrate with industry standard graphics software competently, reproduce colors accurately, and provide professional level pressure sensitivity for 75% less than a Cintiq 22HD touch (which retails around $2000).

In conclusion, the thing I’ll say about the ASUS is that I wouldn’t call it a “Cintiq-Alternative” or a “Cintiq Clone”. With the unique combination of multi-touch, original design, smartphone-like controls, and the lowest parallax I’ve ever seen, I’d say the ASUS deserves to stand on its own. It really stands apart from the competition of clones in a lot of ways - some good and useful, some quirky and polarizing.

It won’t fit everybody, but for those whose needs it does fit, it fits them VERY well. I sincerely hope that ASUS continues development of this product. If they’re willing to respond to customer feedback and make some necessary tweaks to availability of replacement parts and greater software compatibility, I think the ASUS PT201Q may start popping up on a few more desks.

Is it enough for you to “cut the cord” with Wacom only to reattach it with an ASUS? I’d love to hear you experience in the comments section!

For more info, please check out my comprehensive video review below or check out the ASUS site.

Video review

Thanks for reading, everyone!

God bless!

Bret Melvin

Availability

Check out more reviews for the ASUS PT201Q Digitizer Tablet Monitor on the Amazon product pages below. The ASUS PT201Q is also available in UK, Germany, France, Italy and Spain.

Amazon.com | Amazon.co.uk | Amazon.de | Amazon.fr | Amazon.it | Amazon.es

Check out other graphics tablet reviews at http://www.parkablogs.com/tags/drawing-tablet-reviews

Tags: 

Review: Yiynova MVP20U+RH Pen Tablet Monitor

$
0
0

This review is written by a guest artist Dan Nelson.


Hi everyone, today I’ll be reviewing a new Yiynova tablet monitor, the MVP20U+RH.

Over the course of a few years, I’d been looking at a variety of digital tablet monitors. Having used a Wacom Graphire tablet for over a decade, and reading various reviews of other Wacom products, I knew that Wacom’s products generally had great reliability. However, I really wanted to lose the disconnect that comes from drawing on a tablet while looking up at a screen, and feel more connected to whatever artworks I was creating.

Before purchasing this tablet, the only drawing on a screen using a stylus experience I’d had was with my phone, a Samsung Galaxy Note3, using Sketchbook for Android. It works great, especially when traveling, but I really wanted more screen space and to be able to use a full version of a drawing program.

In looking at tablet monitors, the Wacom 22HD seemed a logical choice (screen larger than 13”, smaller than 24”, Wacom reliability), yet I could not justify spending that much on a tablet (reduced this year to $1799 USD). From researching various tablet monitors through several art and technology blogs, I observed that there were several Chinese companies making tablet monitors that performed the same functions as the Wacom Cintiq, for far less money.

Enter the new Yiynova MVP20U+RH. This monitor has a 19.5” diagonal SMVA panel under the front glass. I had considered the new MVP22U+RH with its 21.5” IPS panel, but after considering the size, where Yiynova’s tablet monitor technology is at the moment, and the pricing, decided on the MVP20U+RH.

The MVP20U+RH is $699.00 USD when I bought it, while the MVP22U(V3)+RH is $999.00 USD (both prices before $33 - $35 USD in shipping). This tablet monitor was bought online from The Panda City, Yiynova’s US distributor, via Amazon.com.


Included in the box are:

  • The MVP20U +RH with undetachable 2-in-1 DVI IN and USB cable and detachable stand. USB plugs into laptop/computer, and the DVI connects to your choice of...
  • HDMI to DVI Adaptor, VGA to DVI Adaptor, and MiniDisplayPort to DVI Adaptor
  • AC power brick
  • Cord from AC brick to outlet
  • The USB 3.0 Remote Hotkey
  • Two artist gloves
  • Two P2X digital pens
  • An ‘AAA’ battery for one of the pens
  • The installation CD
  • User Manual
  • Panda City warranty
  • Various documentation / quick guide
  • Pen holder (snaps into back of monitor)

Key specifications

  • Panel - SMVA
  • Backlight - LED
  • Native Resolution - 1920 x 1080
  • Brightness - 250 cd/m²
  • Contrast Ratio (Typical) - 3000:1, Dynamic 50.000:1
  • Response Time (Typical) - 20ms
  • Number of Colors - 16.7 Million
  • Tablet resolution - 4000 LPI
  • Tracking Speed - 200 points per second
  • Pen Pressure Sensitivity - 2048 levels
  • Pen Detectable Tilt - ±45° (from vertical angle of pen)
  • Pen Power - 1.5V AAA battery
  • Video Input - DVI

My setup

The laptop I use is a 17” MacBook Pro running OS X Yosemite 10.10.5.

Before installing the Yiynova tablet drivers, I deleted all Wacom drivers from my laptop, as is recommended in the Yiynova installation guide. Once done, I installed the driver for Mac onto my laptop and rebooted the system. After doing so, I went to Yiynova’s website and installed the latest Mac driver ( the drivers on the CD were already surpassed by newer driver versions) and restarted the computer again, just to be sure. Then, I plugged in the MVP20U+RH and turned on the monitor.


A look at the unremovable DVI IN cable, as well as the 12V connector from the power brick. Cables attach at the sides to keep them out of the way on a desk. One of the two rubber feet on the monitor base to keep it from sliding on a desk can be seen at bottom left

Calibrating the screen and pen was relatively straightforward. There was a screen test where one touched various targets on the screen to calibrate the pen, and a section where one could program the various buttons on the RemoteHotkey. I’ve kept the scroll wheel (for zooming in or out) and page up and down buttons active, as those are the ones I’ve found most useful.

The laptop didn’t automatically set the tablet monitor up as a second screen, just an extension of my laptops’s screen instead. Of course, you can drag your workspace palettes over from the laptop screen onto the Yiynova screen, but then if you have to find various files, you have to switch from the pen to the laptop trackpad to find anything in a folder on the desktop. The menu bar at the top can be dragged over to the Yiynova in the Apple System Preferences Displays section. However, it doesn’t go back to the laptop screen by default if the tablet monitor is turned off.


Tablet monitor being used as extension of current laptop screen, with program palettes and windows moved onto the Yiynova

Selecting “Mirror Displays” in the Apple System Preferences ‘Displays’ section turns the Yiynova into a second screen of your desktop, complete with files, folders, and dock. Doing this ensures that you don’t need to look at your laptop’s screen at all, everything you need is mirrored exactly on the tablet monitor. There’s a bit of an oddity, where since my laptop screen is 1900x1200 and the Yiynova is 1900x1080, the screen of the laptop shrinks by about an inch combined with empty space on the top and bottom of the screen to match the lower resolution of the tablet monitor. Not a major issue, just a bit of an inconvenience to have to go turn off the “Mirror Screen” option when I’m not using the Yiynova.


Used as a Mirrored Display - orange bars show how laptop screen has shrunk to match Yiynova display

The stand attached to the Yiynova appears to be the same stand used in the Huion, and Ugee tablet monitors as well. It works well enough to stand the monitor up on a desk, but since I planned on mounting it to a monitor arm, I took the stand off. The MVP20U+RH will fit the VESA 75 mounting points on a monitor arm. However, the screws supplied with the arm (mine’s by VIVO) while the right length, were too thick for the holes in the back of the monitor. I used the screws from the Yiynova stand to attach the tablet to the arm mount, as I didn’t want to drill larger holes in the back of the monitor.


You can see the pen holder, along with the VESA mount where the stand used to be. The buttons at left control the monitor and any menu specific functions. Power On/Off, Menu, Up, Down, Exit


Closer look at the RemoteHotKey, as well as that fantastic front screen

The surface is smooth glass, and the construction is similar to that of the MVP22U (all versions) i.e., a glass front set into a plastic base, with six visible molded clips holding the display in place. Like its larger twin, there’s an active/standby light in the middle of the panel, where there is no drawing screen. Visually, if the front was all white, instead of black with a white border, this tablet could easily be mistaken for the MVP22U+RH.

The drawing pens included are both the same model, so I’ve kept one as a spare. With the drawing glove, your hand slides over the glass screen without sticking, great for dramatic strokes. The pen’s pressure sensitivity results in brush strokes going from very light to heavy in a smooth manner, depending on how much pressure you are pressing down with on the pen’s point.


Test samples from various programs


Parallax - when drawing normally it’s not really noticeable - bring your face almost level with the edge of the glass and then it becomes apparent. Pen is touching glass in image on the right

There’s a bit of parallax, but that’s to be expected. For the majority of the time, the cursor lines up exactly with the pen’s point when it’s touching the screen. The only time it doesn’t is when one is either quickly covering a large surface area, or making a large amount of strokes very rapidly. Then, the cursor onscreen lags behind the physical pen’s point by a few millimeters. It’s a visual difference, but it doesn’t affect the actual onscreen drawing experience enough for me to not recommend this tablet.

The tablet’s SMVA panel maintains even color throughout the drawing process, whether one has the tablet almost flat infront of them, or, like I often do, stand and draw with the monitor at an almost 36 degree angle. The only time the panel changes color is if one has rotated the panel on its axis (via the VESA mount) from a flat horizontal position to about 45 degrees left or right, and at the same time has the monitor angled towards themselves at almost 90 degrees. Then, there’s a warm color shift. However, that’s the only extreme occurrence that seems to result in non accurate colors.


Pretty much the only extreme angle that will cause the SMVA panel to color shift- Draw while standing, have the monitor at nearly 90 degrees, and rotated up to 45 degrees

When drawing with virtual pens, paints, and various brushes, the Yiynova really shines. With some changes to the brush density/opacity within the drawing program, one can easily replicate actual drawing or painting materials with various drawing pressure with the pen. It’s simply amazing to observe, and the results for line art are often like drawing on paper with a pencil or pen. When painting digitally, with an oil brush, it’s like one really is painting in oils ( especially if you are putting multiple shades of color within the same layer) without the solvents, mess, and the option to undo mistakes with a simple command.

Conclusion

In conclusion, I would recommend this tablet monitor to anyone who has seen or heard of Wacom’s Cintiq line, but balked at the enormous markup in price.

The Yiynova MVP20U+RH fills the gap that existed near the top of Yiynova’s tablet monitor range. Before, if one wanted a decent sized tablet monitor there was the MSP19U ( that uses older technology and a TFT screen) and the MVP22U+RH (using Yiynova’s latest technology and with an IPS panel screen) which while significantly less than a Wacom of equal size, might have been out of the price range for some. Now, one can sacrifice an inch and a half of screen space and save a decent amount of money, and still buy a tablet monitor that is fantastic to work off of, and view artwork on.

The Graphire? It’s being packed away for a well deserved retirement.

Availability

You can find the Yiynova MVP20U+RH on Amazon.com | Amazon.co.uk

Check out other graphics tablet reviews at http://www.parkablogs.com/tags/drawing-tablet-reviews

Tags: 

Review: Bosto Kingtee 14WX Pen Display Tablet Monitor

$
0
0

First off, thanks to local Singapore distributor One Thirty Five for lending me the Bosto Kingtee 14WX for review. You can order this in Singapore from Basheer Graphic Books or contact Bosto Singapore at bosto-singapore.com or www.facebook.com/BostoSingapore. Those overseas can get the 14WX on Amazon.com.

The Kingtee 14WX is the little brother of the Kingtee 22HDX. If you have read my review for the 22HDX, you'll find that I was reasonably pleased with the performance for Windows and not so much on Mac.

Important notes

Before using the 14WX, you should uninstall all Wacom drivers and install the lastest Bosto drivers from the Bosto website. There will be driver conflicts if you have multiple tablet drivers.

The drivers for 14WX uses the same one for 14WA-22HD-22HDX. There's a separate driver for the keyboard shortcuts.

I tested the 14WX on two Macs, one at home running Mac OS (10.10.5) and one in the office with Mac OS (10.9.5). The one at home was not able to detect the stylus. The one in the office worked fine. When the drivers do not work, it's frustrating. Maybe the Mac drivers have not been updated for Mac OS 10.10 yet.


After you install the drivers, the driver files will appear in the Applications folder. You can change the settings from the System Preference.

Unfortunately, I did not have the time to test it on a Windows machine before I had to return the unit.

Video review

Bosto Kingtee 14WX

The Bosto Kingtee 14WX is a pen display tablet monitor. It's like a Cintiq. It's a monitor and you can draw directly on the screen. It's a Cintiq alternative and it competes Wacom Cintiq 13HD.

The 14-inch screen is a 1920 by 1080 resolution IPS LED panel (72% Adobe RGB gamut) with fantastic viewing angle. It supports 2048 levels of pressure sensitivity. The pen does not require batteries. For the full specifications, just visit Bosto's website.

The unit came in a cardboard box without any packaging art. That's how they save money.


The items included in the box are:

  • The monitor
  • HDMI-DVI cable
  • VGA cable
  • USB cable
  • Stylus
  • Glove
  • Cleaning cloth
  • A cloth case for monitor
  • Power cable

I checked the Bosto website and some of the items I have aren't listed there, such as the cloth case. In any case, check the listing from the website you're buying from.


The main thing to take note is the HDMI-DVI cable. The monitor has a DVI and VGA port. The DVI end of the HDMI-DVI cable is just actually an HDMI-DVI adapter.


Build quality is good and the monitor feels solid. The black plastic body is matte with smooth surface.


Corners are rounded off. There are two rubber feet beneath to prevent the unit from sliding while working on it.

There are 20 shortcut buttons and two dial wheels on the front. The buttons feel a bit mushy but works. The 14WX is a small unit and comparable to the size of 13/14-inch laptops in the market, except that it's much lighter.

The screen is glossy so reflections is to be expected with you have lights behind you.

Bottom part of the unit becomes slightly warm after half an hour but it's not a big issue or unbearable.


Unlike larger tablet monitors, the 14WX does not have a big stand. There are only two short plastic legs behind that you can release to prop up the screen. There are three working positions to choose from: flat and two inclined positions.


Ports for the 14WX are at the top, so are the physical menu buttons. There are ports for 2 USB, power, DVI and VGA. The cables come out from the top neatly. If you need a VESA mount, this uses the 7.5cm.


Main issue is when you plug in the USB port, the cable will block access to the menu. In real life, after you have fixed the settings, then chances are you won't be needing to access those menu buttons any more, so this is not going to be really a problem.

When plugged in, the 22HDX should automatically detect your system (Mac and Windows). There's no need to choose which cable connection before powering up the screen.


When I first plugged in the display, the Mac went into extended desktop mode. You can also choose the Mirroring mode if you want to, from the System Preferences. The screen is IPS so colour accuracy and viewing angles are great. You might not need an extra monitor for colour checking. If you don't mind the small size of the screen, you can use this as the main screen.

As mentioned above, this is a small tablet. I've a small table and I can still put it on my table and still have space for the keyboard.

The stylus


The wireless stylus is thinner than I expected. The design feels like a ballpoint pen and it feels like drawing with a normal ink pen.

There's only one button on the side. The back has an eraser. It is not battery powered.

The tip is hard and firm, and glides smoothly on the glossy screen.


There's a convenient pen slot at the back of the monitor.

The shortcut buttons


There are 10 shortcut buttons and a scroll wheel on each side of the screen. You can configure the shortcut buttons to any keys on the keyboard, or commands (e.g. show desktop). The drivers for the shortcut key customization has to be downloaded and installed separately. It's not included with the drivers provided.

Performance


These are some test strokes in Photoshop.

Slow strokes has some jitter. I'm not sure if it's due to the difficulty of controlling pressure at such slow speed. Actually, I wrote the words "SLOW STROKES" slowly as well and they don't display the same amount of jitter compared to the strokes I drew slowly.

The pressure curve settings by default is a bit too sensitive. It was too easy to get thick strokes. You can adjust that in settings. The main issue is the transition between thin and thick strokes is quite fast. It will take some time to get used to it.

Overall, for drawing purposes, it performs well and satisfactory. Parallax is not a problem.

Selecting the menus that are near the edge of the screen can be tricky because the screen is small and that makes the menu small so you have a smaller surface area to click on the menus. Again, it will take time to get used to it. There's no crazy cursor jumps and skips near the screen edges.


These are sample strokes from Illustrator. With the Bosto 22HDX on Mac, I had serious issues with drawing. The 14WX has improved tremendously.

There are still some stray strokes but generally speaking most of the time it performs predictably. The stray strokes may be caused by the hovering stylus. The screen can actually detect the stylus almost an inch away.

A 14-inch screen is not optimal for working with Illustrator because the control points (those small squares) for the anchor points are a bit too small. It can be difficult to click right on top of the control points.

I only use Photoshop and Illustrator for drawing. Both software work well with the 14WX.

There's little to no noticeable lag. Everything feels responsive.

Conclusion

If the driver works, then this is really a decent alternative to the Wacom Cintiq. There could be a problem with my Mac at home because I tested too many drivers, or maybe the drivers just aren't compatible with Mac OS 10.10.5 yet.

My office Mac uses OS 10.9.5 and the Bosto 14WX performs very satisfactory except for the occasionally Adobe Illustrator stray strokes.

Shortcut keys which did not work for the 22HDX have now worked for the 14WX. Those are quite convenient. But I still prefer using the keyboard for shortcuts.

Unfortunately I did not have the time to test it on the Windows OS. If you have experience with this on Windows, share your thoughts in the comments section below.

Currently the Bosto Kingtee 14WX is selling at USD $549. The Bosto 22HDX and Wacom Cintiq 13HD are both USD $899 each. It's quite a significant savings compared to the Cintiq 13HD. If you're using it for digital painting, it's really a tablet monitor worth considering.

My overall rating would be 4 out of 5 stars. One star deducted because of the issue with drivers on my home Mac.

Availability

Just check out more reviews of the Bosto 14WX on the Amazon product page at
www.amazon.com/Graphics-Tablet-Bosto-Kingtee-14wx/dp/B00UFG3YG6

Those in Singapore can get it from Bosto Singapore at bosto-singapore.com or www.facebook.com/BostoSingapore or Basheer Graphic Books.

Check out other graphics tablet reviews at http://www.parkablogs.com/tags/drawing-tablet-reviews

Tags: 

Review: Yiynova MVP10UHD+IPS USB Digitizer Tablet Display

$
0
0

This review is written by guest artist Joel Watson.


BIG improvement over the previous version. Great for the traveling digital artist, but still has room for improvement.

About Yiynova and the MVP10UHD+IPS+IPS

Yiynova is a Chinese manufacturer of budget-minded tablet monitors. They are most know for their 19” model, the MSP19U which, in my opinion, was the first real competitor to the Wacom Cintiq line of products. The MVP10UHD+IPS is 4th version of Yiynova’s 10.1” USB powered, portable tablet monitor.

Specifications

  • 10.1" USB Tablet Digitizer/LED Monitor
  • IPS panel
  • USB powered, no VGA Input, no DC Power
  • Mode Switch Between Digitizer and Monitor
  • Active display/drawing area (H x V): 216.96 (W)X135.6 (H) mm (10.1" diagonal)
  • 8 Hot Key
  • Digitizer:Tablet resolution at 4000 LPI
  • Tracking speed at 200 PPS
  • Pen pressure sensitivity at 2048 levels
  • LCD:16.7M Colors,1280x800 Resolution, View angle: H:160°(80°/80°), V: 160°(80°/80°) ( CR >=10 ), 0.1695(H)X0.1695(V) mm Pixel pitch, 650:1 Contrast
  • Warranty: 1 Year with The Panda City (Warranty will be voided if the prodcuts are used outside USA)
  • Support OS:Win8/7/Vista/XP, Mac OS 10.4.x-10.10.x.

Initial Impressions and Build Quality

The MVP10UHD+IPS is a little longer than a full sized iPad and a little shorter. If you’re used to holding Apple, Android or Kindle tablets, it’s quite thick. Of course this device doesn’t do what those items do and isn’t intended to compete with them, but it does feel bulky by today’s electronics standards. It’s both powered and received its video/input signal from a dual ended USB Y cable. It has white bezel around it’s modest screen which hold 8 user programable hotkeys. There’s an adjustable stylus holder on the side opposite the buttons. The back of the unit has 3 flip out feet, controls for monitor brightness and a power switch.

Unfortunately, the overall build quality is sub par. It's very plastic-y and creaks and flexes when you hold it. The hotkey buttons do have a nice solid click, but the housing seems like it needs more bracing between the screen surface and the outer shell. There is nothing sleek or stylish about the utilitarian design. It’s well made, but not EXTREMELY well made. The MVP10UHD+IPS looks and feels like a prototype that was made from off the shelf components.

The detachable USB cable can be routed to either the left or the right of the device through channels in the back of the case which makes keeping it out of your way much easier than if it were in a fixed position. The fact that the cable is detachable is also nice, considering the USB cable is typically the first thing to go bad in a tablet from repeated bends, winding and being taken in and out of a carry bag.

The left and right flip out feet on the back allow the tablet to rest on a desk at a comfortable drawing angle. They're tall enough that I can get my left hand under the tablet while still operating the hot keys with my thumb. There's a 3rd flip out foot on the back of the device, in the center. If you try to use this to stand up the tablet while drawing, it will just fall over. Perhaps it's for displaying the tablet like a picture frame, or if you are just using it as a secondary monitor.

Connectivity and Driver Setup

As I mentioned, the MVP10UHD+IPS connects to your computer via a single USB Y cable. One end of the cable transmits video and tablet input signal, and the other supplies the unit with an extra 5v of power. On some of the computers I tested it with everything seemed to function fine with only one end of the cable plugged in. This was not the case on my primary testing computer, an 11” Macbook Air. Since that computer only has 1 USB port on each side, I had to purchase a 1ft USB extension cable to connect the tablet.

Two drivers are required to get the MVP10UHD+IPS up and running: one DisplayLink driver to run the USB video, and one from Yiynova for tablet functionality. I had no issues installing either driver (again, all of these tests were performed on a Mac under OSX and do not necessarily reflect what potential performance on a Windows PC would be like), and I was able to get the computer to recognize the tablet as a tablet and monitor relatively easily, save for occasionally having to unplug/replug the USB Y cable. It seemed like my Macbook Air was particular about which half of the device (tablet or monitor) was recognized first.

Video

I was using the earlier (non-IPS display) version of the MVP10UHD for a few months before I replaced it with this updated version. The difference in screen quality is astounding. This is less of a testament to the quality of the current version (which is high), and more of an admonishment of the previous version. The non IPS display had the most minimal viable viewing angle of any monitor of any size that I've ever used. You had to get exactly in the right spot when working on it. Any deviation to the right, left, top or bottom and the colors would shift until they became inverted. I was able to pencil and ink with the old one, but color work was impossible due to the color accuracy being non existent.

I am happy to say that the new IPS version has solved essentially all of these problems. The image and resolution is MUCH sharper, the viewing angles are respectable, and the color accuracy is workable. I can't speak for those that need custom color profiles, but I am able to do color work in my illustrations and comics using my predefined color palettes with no issues. The screen could be brighter, but I assume the brightness is a power limitation of the USB cable connection to provide sufficient power for a truly bright screen. I’m also happy to see there was little to no parallax effect when drawing.

The 1280x800px screen is about 2" to 3" too small to really make this a killer device. I would love to see a 12" or 13" version of this tablet in a 4:3 aspect ration instead of 16:9, so I didn't feel so cramped when I had all of my Photoshop tools and menus on the screen. Even compared to a full sized iPad, the 16x9 aspect ration makes the usable space feel minimal.

Stylus hardware


The MVP10UHD+IPS comes with a full sized stylus, comparably sized to a Wacom Cintiq or Intuos stylus. It’s glossy plastic, but has a rubber grip surrounding the two rocker switches. These switches can be programmed to perform right or left clicks and a few other predefined commands, but are not user assignable to any keyboard presses or macros. The stylus is battery powered, but the battery is said to last for 4 months. In the several months I was testing the unit, I never had to replace the battery. There is no eraser tip on the opposite end of the stylus, as this feature still seems to be a Wacom exclusive. It comes with a hard plastic tip and a couple of extra replacement tips.

Tablet Functions

Cursor tracking, lag, overall responsiveness are all on par with your typical Wacom tablet product. More accurately, they are identical to every Yiynova tablet I’ve ever used (or any other tablet that uses UC Logic internal hardware, such as Huion made tablets). If you are used to Wacom products, there is a difference in “feel” but not function. You will notice that the pressure curve is looser than expected, even after adjusting the brush firmness in the drivers. You blow past the first 50% of the pressure curve with little to no applied pressure, then the real variation is in the upper half of the curve. The specs claim 2048 levels of pressure sensitivity, but that number is rather arbitrary when there seems to be a discrepancy between the settings you choose in the drivers and the actual performance of the device. It takes some getting used to, but didn’t impair my ability to get a decent range or brush stroke widths with varying pen pressure.

An unexpected and positive feature of the MVP10uHD+IPS was the dual tablet mode. With the power switch in the “on” position, it functions as a tablet monitor. With the switch in the “off” position, it functions as a stand drawing tablet where you draw on the blank screen and view your work on your laptop or computer monitor. I found this useful for color work since my laptop screen was a little bigger and I could see more of my image at once.

Hotkeys

The 8 hotkeys are great for speeding up your workflow. They are user assignable to basically any key or key combination you could think of. There is, however, some difficulty in setting them up. The hot keys are not "in numerical order" in the drivers. Going down the side of the device, from top to bottom, the keys are actually labeled 7,1,2,5,6,4,3,8 as far as the drivers and set up software are concerned. This means if you are in the drivers and you tell it to make button 1 perform an “undo,” you are actually assigning this function to the second button from the top. This issue is further complicated by the fact that the buttons are permanently labeled with little graphics of what they expect you to use them for (zoom in, zoom out, enter, etc.). I actually ran a strip of white electrical tape down the device next to the buttons so I could label their number and their intended function with a Sharpie.

There's also a driver issue that after you press a hotkey, you lose stylus connectivity for a half a second or longer. If you are someone like me who uses "space" and "undo" constantly while drawing, this requires a bit of an adjustment. I usually have to pick the stylus up from the monitor while pressing a hotkey to negate this effect. Yiynova confirmed both of these driver issues to me and said they hoped to fix them in a future release. Since I only tested on a Mac, I do not know if these issues exist when using the tablet on a PC.

The placement of the hotkeys at the very edge of the case was a bit of an issue for me. Holding the tablet in my left hand meant my thumb naturally fell about a half inch to the right of the buttons. I had to strain to both hold the tablet and keep my thumb above the buttons. After an hour or so, this caused some fatigue in my left hand.

Portability

I didn’t care for the included draw string carry bag. It's not form fitting, and the material is very rough to the touch. I replaced it with a neoprene generic tablet zip case with a pocket on the front to hold the stylus and cable. It had more padding, and storage and it holds the device much more securely. I paid about $20 for it.


In order to fit the tablet into the new case, I had to remove the stylus holder from the right side. It seemed like an unnecessary and bulky protrusion at first, but once I removed it I missed having somewhere easy and convenient to store the stylus.

Since the device is USB powered there’s no power brick required. This is a big plus for portability. Everything needed to use this tablet (the tablet itself, the stylus and the USB Y cable) fit in the iPad sized carrying case I bought.

Final Thoughts

If you are a traveling digital artist and you need a set up for working in a hotel, an airplane or a coffee shop (and you don't want to put up $1000-$2500 for a Surface Pro 3 or a Cintiq Companion... ESPECIALLY if you are a Mac user like me), it's hard to argue with the utility and capability of the MVP10UHD+IPS. I take my 11" Macbook pro and this tablet in a tiny bag and I can literally do my job from anywhere in the world. There is certainly room for improvement, but if you need a light, portable, very functional tablet monitor for digital art WITH MINIMAL CABLES, I can definitely recommend this tablet. When it’s available (it is almost always sold out on Amazon), it sells for $399.

I would note that if you are just looking for a digital tablet monitor for art and you DO NOT intend to travel, I do not consider this a stepping stone towards larger tablet monitors. Save your money for a Yiynova 19" or 22" stationary model. The MVP10uHD+IPS really only makes sense for the traveling artist, or someone that is more comfortable working in their lap as opposed to a desk.

Availability

Read more reviews at http://www.amazon.com/gp/product/B00KRWOJF8?tag=artprdus-20

Check out other graphics tablet reviews at http://www.parkablogs.com/tags/drawing-tablet-reviews

Tags: 

Review: Yiynova UC-logic SP-1001 Pen Digitizer Tablet Monitor

$
0
0

This review is written by guest artist Joel Watson.

About Yiynova

Chinese tablet manufacturer Yiynova has been providing affordable and serviceable alternatives to the Wacom Cintiq line of tablet monitors for roughly 4 years. Since they released their popular 19 tablet monitor, the MSP19U, in 2012 artists looking to expand their digital tool set without breaking the bank have flocked to the brand. Most of their product line lacks the spit and polish of Wacoms offerings, but at 1/2 to 1/3 the price, its hard to argue with Yiynova's affordability and functionality.

Yiynova were the first to market with a portable 10.1 tablet monitor that received power, pen input and video from a single USB cable when they released the DP10 in 2012. The first version of this hardware suffered from a lackluster screen with a sub HD resolution, but subsequent versions have gradually improved on the screen and overall build quality. I recently reviewed the most recent Yiynova branded 10.1 tablet monitor, the MVP10UHD + IPS. It seems this may be the final version of this tablet to bare solely the Yiynova brand name, as the newest version released in March of 2015, the SP1001 Penates, is now branded as a joint venture between Yiynova and UC-Logic, the Chinese manufacturer that has long been providing the internal components for Yiynova’s tablets.

Specifications

  • Digitizer: Tablet Resolution (5080 LPI), Tracking Speed (200 PPS), Pen Pressure Sensitivity (2048 levels)
  • 6 User Assignable hot-keys; USB & HDMI 2-in-1 Cable; Battery-less Pen
  • Support OS: Windows 8.1 / 8 / 7 (32/64bit); Mac: OS X 10.6.8 or later (Intel processor)
  • 10 Interchangeable Soft and Hard Nibs
  • Active display/drawing area (H x V): 216.96 (W)X135.6 (H) mm (10.1" diagonal).

Initial Impressions and Build Quality

Before you even plug the SP1001 in and switch it on, there are several, immediately apparent upgrades from the previous models. I say previous models because the SP1001 appears to have nearly identical internal components to the MVP10UHD +IPS. More on that later.

Right off bat, it's obvious the case and overall aesthetics of the SP1001 have been completely redesigned. The case is about half as thick as the previous version. It features smooth, tapered edges as opposed to the 10UHDs sharp corners, and the back is coated with a nonslip rubber, common in many Wacom products, that provides excellent grip and adds to the overall feel of the build quality. Speaking of build quality, the SP1001 is the first in this line of products that FEELS like a finished product. All of the previous Yiyova portable tablet monitors flexed and creaked in your hands. They felt like they were built from off the shelf products that didn’t quite fit together properly. The SP1001 is SOLID. Its well balanced and has a decent heft, but isn’t heavy or uncomfortable to hold.

Hotkeys


They have also completely redesigned the 6 hotkeys built into the face of the tablet. On the previous versions the buttons were hard plastic, had a very click feel and were placed right on the outer edge of the monitor bezel. This placement made it difficult to hold the tablet in your hand while drawing and also easily access the hotkey buttons without setting the tablet down. I tend to use it in my lap with my left hand holding the tablet (the buttons would be directly beneath my left hand palm) and drawing with my right hand. In order to access anything but the top two hotkey buttons with my left thumb, I had to contort it not a weird position which often left me with hand cramps after repeated undo or drag tool presses. The SP1001 has moved to the button placement about a half inch in towards the screen leaving a nice border between the buttons and the edge and allowing for much easier thumb access. They buttons are also spaced further apart and now made of raised rubberized plastic, instead of flat, hard plastic keys that are placed one immediately after the other. This makes finding the button you’re looking for without looking MUCH easier.

As I mentioned earlier, the internals of the SP1001 appear to be nearly identical to its predecessor. I don’t know specifics on the exact model of digitizer used, but the screen resolution and pixel density are identical (1280x800px, 5080 LPI), and the hotkey buttons are in the same configuration (and have some the same software problems which I will go into shortly). The only main difference in the hardware besides the look and feel of the case and buttons is the method of connecting the tablet to a computer. Previous Yiynova 10.1 tablets passed power, signal and video through a single (albeit double ended) usb cable. The SP1001 uses USB for power and signal, but is now equipped with a mini HDMI port for video. HDMI has much higher bandwidth for video throughput than USB 2.0, and this the video is much smoother. This is most prevalent when just using the SP1001 as a second monitor to play a video. With USB video, the host computer would typically fire up all the fans when playing video over a USB monitor due to the low bandwidth and increased processor power required. That said, just drawing in Photoshop there is little difference in the video experience over USB or HDMI. The screen is so small (think just a bit shorter, and a bit wider than a standard iPad), that you really don’t notice any sort of lag or refresh rate issues. Either way, my brain knows that the HDMI connection is much better for video, but my eyes don’t perceive it much at all. Still, my laptop’s fan and battery appreciate the new connection option.

Connectivity and Driver Setup

Here's where the SP1001 stops shining and need further refinement. I must point out that all tests were conducted on a Macbook Air, and I have no idea what the setup, driver configuration or overall performance are like on a Windows PC.


USB cable, display cable and the stylus

Previous Yiynova 10.1 tablet monitors needed a tablet driver as well as a DisplayLink video driver to handle the usb video connection. The SP1001 just needs a tablet driver, as video is handled by the internal video card of your computer just like any external monitor would be. If you install the driver without the tablet connected, then attempt the open the tablet monitor configuration app, you will be present with a blank screen that simple says “No Tablet Detected.” Upon connecting the SP1001 there are at least a dozen different things that might happen depending on what order you plug the cables in and what kind of mood the tablet and your computer are in on that particular day. Installing the drivers was painless (at this time there is a standard driver for this tablet monitor on both UC-Logics and Yiynova’s websites, but the UC-Logic website also have a beta driver for OS X). Getting the SP1001 hooked up and usable, however, was a frustrating mess.

If I plugged the USB cable in first (the pressed the power button just beneath the USB connection on the tablet), the tablet configuration appreciated would detect the tablet after a few seconds and allow me to see the various options for video calibration and hotkey and stylus settings. Sometimes, at this point, the tablet would function as a standard no-monitor drawing tablet. This was how the other Yiynova 10.1 tablet monitors worked as well, and the feature often came in handy, especially when connected to a computer with a much larger screen. Other times, when connection the USB cable, the tablet wouldn’t register the stylus at all, and still other times it would register the stylus but no matter where you placed the point, the cursor would jump to the bottom or the corner edges of the screen.


Plugging in the HDMI cable (the tablet has a dual cable with mini HDMI and micro USB on one end and standard HDMI and USB on the other end) which I was connection with an adapter to the mini DVI/Thunderbolt port on my Macbook Air, provided a similar bevy of undesirable and unpredictable results. Sometimes the screen on the SP1001 would come on and show digital snow. Other times it would come on and display a mirror of my laptop screen (per the display settings on my Macbook Air), but the stylus issues listed above would persist. I spent about 30 minutes installing and uninstalling the drivers, plugging and unplugging the tablet cables in different orders while pressing the power button at different times, and rebooting my laptop either with the tablet already plugged in or not yet plugged in. Eventually I ditched the beta OS X driver, reinstalled the current one, rebooted the laptop twice, then plugged in the usb cable followed by the HDMI cable. 13th to 14th time must have been the charm, because eventually I got it to work as it is intended.

Once I was at this point, I opened the configuration utility and tried to set up the hotkeys, and stylus. I first performed the monitor calibration, which takes you through the stand array of click the stylus tip on these various points tests. I should note that the first few times I tried to run the monitor calibration, the button in the application simply didn’t respond. I do not remember if this was with the beta driver or not.

Next I attempted to set up the monitor and stylus hotkeys. The options for the two buttons on the stylus are limited to a few presets like right-click, left-click, and none. It would be preferable to be able to set one of the stylus buttons to a macro like undo or the drag tool. The monitor hotkeys have more options, but this is difficult to realize if you don’t know what you’re looking for. You can select from a long drop-down list of preset key presses and macros for each button. All of the most common tool functions for Photoshop are included in this list. However, whereas they do offer an undo option, they do not have a step back or multi-undo (cmd+option+Z on a Mac or cntrl+alt+Z on a PC) option in the default list. There is a user defined item in the dropdown list, but selecting this does not lead to a logical next step. In Wacom tablet drivers, if you select user defined you are given a new dialog box to name the macro, press the key or keys for the hotkey to emulate and save. I assumed this feature was just broken in the drivers because it was not apparent what I was supposed to do in order to set up my own macro. After emailing back and forth with my contact at UC-Logic a few times (it took awhile to explain my issue due to a language barrier), I realized that I was just supposed to click inside an empty box that was not labeled and press the keys I wanted. I explained that this confusion could be easily solved by labeling the empty box and adding a single instruction like, click inside the box and press the key or keys you desire, etc. They indicated that they would consider this for future software revisions.


There is also a tab for setting up the stylus pressure curve. This tablet monitor is listed as 2048 levels of pressure sensitivity. The pressure curve calibration is designed to allow the artist to choose how stiff they want their stylus to feel. With a soft setting, the stylus (using a brush size of 30 pixels, and the width set to pressure in the drawing application settings) should move very easily from 1 pixel wide to 30 pixels wide when drawing with little to no pressure. With a firm setting (still at a 30 pixel brush size), the artist should be able to comfortably sketch with a very small line of 1-10 pixels, then apply more pressure to achieve a larger line width of up to 30 pixels. I found the pressure curve settings in the setup application for the SP1001 to make almost no difference regardless of what I set them to. I was able to test the pressure curve in a small preview box in the setup application which simulates a drawing app like Photoshop. At the lowest or softest setting the brush blew through the pressure curve with little to no pressure from my hand at all (which is to be expected). At the highest or firmest setting, the performance was only slightly different. There should be a decent range of settings available in this tool, but it seems to only go from extremely soft to pretty soft. This doesn’t make it unusable, but it does differ so greatly from almost every other tablet I've tried that I suspect most artists will have a steep learning curve when applying pressure to achieve a desired line width.

Video

Video quality on the SP1001 is impressive for such a small screen. It’s no Retina iPad, but it’s bright and viewable from any angle. My opinion may be swayed by how terrible the viewing angles were on previous versions of this tablet, but it’s quite usable. If anything, I wish I had the option of making it a bit brighter, but I would assume this was a limitation of the unit being USB powered.

The resolution is lacking (again, comparing to a retina iPad for reference), and I found it difficult to fit Photoshop’s menus within the 1280X800 pixels and still have room to draw on my canvas. Eventually, I settled on leaving all of my tools and menus on the laptop’s screen and using the Penates just as a canvas. Switching from pen input back to my trackpad and keyboard to change layers or tools was a but frustrating at first, but I got used to the new workflow with time. I did not attempt to watch any videos on the monitor, but I would assume if you have a stand for it, or a way to prop it up, it would make a decent second screen for your laptop while on the go. There was nothing about its performance to indicate otherwise.

Stylus hardware


The included stylus is another area in which the SP1001 differs from previous Yiynova 10.1 tablets. The bundled stylus is, I believe, their first battery-less model. Previous models have required internal AAA batteries or USB rechargeable batteries. This one takes a cue from Wacom and requires no battery or recharging to function.


There are two rocker-style buttons for performing right click or pan/zoom features (these functions can be configured in the drivers, but options were limited to a few manufacturer’s presets) and decent overall ergonomics. It’s quite light. Adding a bit of heft wouldn’t hut it, but it seems to be about the same weight as my Wacom Cintiq stylus. It is coated in a similar soft touch rubber to that which coats the body of the tablet, so keeping a grip on it is not difficult. There is no eraser on the opposite tip. Wacom seems to still have a firm lock on this technology.

The stylus comes with a weighted, rubberized holder for keeping it vertical and out of the way on your desk, and a very nice rubber lined storage case for when you need to toss it in a bag or backpack. The storage case also stores 9 additional hard plastic stylus tips.

Tablet Functions


With all of my hotkeys set up to zoom, pan, undo, switch between pen and eraser and save my file, I was ready to go. I opened a new Photoshop document, picked my standard inking brush and got started sketching.

When you have used one particular digital tablet or tablet monitor for years and years, it’s impossible to not immediately compare any new hardware to whatever you are used to. The difficult part is distinguishing if the new hardware is LESS than your current set up or just DIFFERENT. The SP1001 does not feel like a Cintiq. Then again, I don’t think it’s supposed to. It does, however, feel exactly like a Huion tablet I reviewed a few years back (The GT-190), which also used UC Logic internals. The pressure curve was very soft and unlike what I was used to, but it only took a few minutes of doodling to adjust my stroke and my expectations. In almost no time I was able to sketch and ink with my standard brushes and get nearly identical results to those I would expect on my Cintiq. Cursor tracking was similar to every UC Logic based tablet I have ever used. The cursor APPEARS to lag behind the stylus tip about 1/4” as you move the stylus around the screen, but as soon as you make a mark it catches up immediately and the mark is where you intended it to be. If you can learn to ignore the position of the arrow/cursor and just draw where you want to draw, your results will be excellent. It took a bit of training to ignore the cursor position, but eventually it was hardly noticeable.

Wacom tablet users should be aware that the distance above the tablet at which it notices the stylus (how high above the tablet surface you can “hover” the pen and still register cursor movement or input) is much shorter than you are used to. I’d say it’s roughly an inch, maybe a little more. You have to keep your stylus very close to the tablet to register movement. I learned to just pick my hand up, move it where I wanted to place the cursor, then put it back down. The cursor always jumped immediately to where I wanted it. I just didn’t get to drag it along with my hand the way I was accustomed to.

My biggest disappointment with the SP1001 was in using the hotkeys. Having to move all of my tools to my other monitor to save drawing space meant being able to use frequent commands like undo, pan, zoom, etc. with the hotkeys was integral to my workflow. There is a flaw in either the hardware, the drivers or both where after repeated presses (think of pressing “undo” 5 or 6 times in a row) the buttons stop responding, and the stylus no longer registers on the tablet. The only way I found to “reset” normal function was to lift the stylus away from the screen, wait a few seconds, then put it back down. I encountered this exact same issue with both the MVP10UHD and the MVP10UHD+IPS, and I am surprised the manufacturers haven’t been able to fix it by now. With the previous tablets I emailed Yiynova back and forth several times about this issue and they admitted that it was a known bug, and they would attempt to fix it in the future. I wonder if this bug only occurs on Macs, and perhaps that is why they don’t receive enough complaints to take care of it.

Final Thoughts

Overall this tablet is a great alternative for the traveling digital artist.

Honestly, everything that is wrong with this tablet could and should be fixed with driver updates. The initial setup/connectivity issues and the hotkey problems make it difficult for me to recommend it as an artist’s primary tool, but as a backup, or travel-only device it gets the job done. It’s almost always sold out at Amazon, but when you can purchase it, it’s less than 1/4 the price of the cheapest Cintiq companion. It’s almost unfair to compare it to a device like the Companion that contains an entire Windows computer, have much larger, higher quality screen, and doesn’t suffer from buggy drivers, but there just aren’t really any other products on the market that the Penates SP1001 would compete with. If your goal is to draw on a digital tablet monitor on the couch, on a plane, in a hotel room or at a coffee shop and you don’t have $1600+ dollars to spend, this is pretty much it. Is that a resounding endorsement? Not really.

The SP1001 has a lot of room for improvement, but once you fight with the drivers, get it set up, ignore the hotkey problems and get to work, you can actually create finished production quality digital art with it. For $350 (assuming you have your own laptop to hook it up to) and a minimum of cables, you can take your art game on the road with relative ease.

A 13.3” version of this tablet is slated to be released later this year, but it will require a dedicated power supply. I’d be interested to see if Yiynova/UC Logic are able to iron out some of the wrinkles in their software by the time it is released.

Availability

You can check out more reviews of the Yiynova SP1001 at www.amazon.com/Yiynova-UC-logic-SP-1001-Digitizer-Tablet-Display/dp/B00P7J6NL4

Check out other graphics tablet reviews at http://www.parkablogs.com/tags/drawing-tablet-reviews

Tags: 


Review: Wacom Intuos 2015 tablet: Draw Art Photo Comic

$
0
0

Wacom Intuos 2015 tablet: Draw Art Photo Comic - 01

Wacom has just refreshed their Intuos product line in September 2015 with the release of 4 new tablets, namely Intuos Draw, Art, Photo and Comic.

Note that Wacom has the Intuos Pro and Intuos product lines. Intuos is more budget friendly while the Intuos Pro is more expensive and targeted at professional digital artists.

I bought the Intuos Art tablet and it arrived the next day as they had it in stock here in Singapore.

Comparison between Draw, Art, Photo & Comic

Before we get into the actual review, let's take a look at the differences between the Intuos Draw, Art, Photo and Comic using this comparison table below.

ModelSoftwareSizeMulti-touchColoursOfficial price
DrawArtRage LiteSmall, mediumNoWhite, Blue$70, £55 / $150
ArtCorel Painter EssentialsSmall, mediumYesBlack, Blue$100, £75 / $200, £150
PhotoCorel PaintShop Pro, AfterShot Pro (Windows);
Macphun Creative Kit, Corel AfterShot Pro (Mac)
SmallYesWhite$100, £75
ComicClip Studio Paint Pro, Anime StudioSmall, mediumYesBlack, Blue$100, £75 / $200, £150

Three things to note.

1. The names of the models are related to the software they are bundled with
2. Intuos Draw does not have the Multi-touch feature
3. Intuos Photo only has one size which is Small (6 by 3.7 inch working surface)

If you use your own drawing software and don't need multi-touch, you can just get the Intuos Draw which cost USD $70 and $150 for Small and Medium. That would be the cheapest option.

Specifications

Here are the key specifications

  • Small size: 6 by 3.7 inches working surface
  • Medium size: 8.5 by 5.5 inches working surface
  • ExpressKeys: 4
  • Pressure levels: 1024
  • Tilt: No
  • Spare nibs: 3
  • Resolution: 2540 lpi
  • Reading speed (pen): 133pps
  • Connection: USB
  • Wireless support: Sold separately
  • OS: Windows 7,8,10, Mac 10.8.5 or newer
  • Warranty: 2 years in Europe, 1 year everywhere else

It supports 1024 levels of pressure sensitivity and the pen does not support tilt recognition. If you need 2048 levels of pressure sensitivity or tilt recognition, then you have to go with the Intuos Pro.

The Intuos line is for beginners and budget conscious people. Personally, I think they are good enough for production work as well, but that's just me.

What's in the box

Wacom Intuos 2015 tablet: Draw Art Photo Comic - 02
Included in the box are the tablet, USB cable, stylus, manual and driver CD. I would advise you to download and install the latest drive from Wacom's software while waiting for your tablet to be shipped.

The password for the bundled software is pasted on a sticker on the box.

Wacom Intuos 2015 tablet: Draw Art Photo Comic - 04
The tablet design is quite cute with the placement of the 4 ExpressKeys. You can set the button functions in the Wacom settings panel.

Wacom Intuos 2015 tablet: Draw Art Photo Comic - 07
Buttons are functional and has a nice click to them.

The overall build quality is good even though it is plastic throughout. The blue coloured top part has a nice rougher textured surface while the working area is smooth. In addition to Mint Blue, you can also choose from white or black coloured tablets. Colour availability depends on which model you're getting.

Wacom Intuos 2015 tablet: Draw Art Photo Comic - 05
That's my old Intuos3 with rather similar specifications compared to the Intuos Art.

Wacom Intuos 2015 tablet: Draw Art Photo Comic - 06
The new Intuos 2015 is smaller, thinner and lighter. By smaller, I mean the areas outside the working areas are reduced. I like that because my table space is limited.

The tablet is also thin and light. It weighs about 480g. It's as thin and light as an 10-inch iPad. This means it's convenient to pack up the tablet to bring to your office, school or home. The USB wire is detachable for packing.

Wacom Intuos 2015 tablet: Draw Art Photo Comic - 08
The tablet's back is textured and there's a rubber feet at each corner.

Wacom Intuos 2015 tablet: Draw Art Photo Comic - 09
You can slide open the top flap to reveal the internals.

Wacom Intuos 2015 tablet: Draw Art Photo Comic - 10
Under the flap, you can put in the optional wireless module and a battery to power the tablet in wireless mode. There are instructions carved onto the surface so you'll know exactly what is what.

The spare nibs are also located under the flap, so is that little round metal nib extractor.

Wacom Intuos 2015 tablet: Draw Art Photo Comic - 11
All the ports are located at the top of the tablet. At the top right of the tablet is the hole for you to physically lock the tablet and the switch for the Multi-touch function.

Wacom Intuos 2015 tablet: Draw Art Photo Comic - 12
At the top left is the USB port.

Stylus

Wacom Intuos 2015 tablet: Draw Art Photo Comic - 03
The stylus has two buttons by the side. There's no eraser and to me it's not really a big deal.

The stylus is thinner than the usual Intuos Pro ones. There's no rubber grip but the textured surface throughout ensures that it's not slippery even if you have sweaty hands. It has a nice weight and comfortable to hold and draw with.

Wacom Intuos 2015 tablet: Draw Art Photo Comic - 13
That's the setup on my table.

Performance


The new Intuos 2015 tablet performs well and predictably, as expected from a Wacom tablet. Installation of the tablet drivers is effortless. Wacom is usually very good with their driver support for Mac and Windows.

The 1024 levels of pressure sensitivity is a joy to work with. At no time did I feel restrained because it did not have 2048 pressure levels. The pressure curve is similar to other Intuos/Pro tablets that I've worked with. If you have used other Intuos tablets before, you'll feel right at home.

There's a nice tactile feel to the nib as it glides on the working area. There's no lag to speak of. Strokes appear instantly as dictated by the stylus movement. Quick strokes are smooth and have no jitter.

Excellent performance overall.

Multi-touch

Multi-touch feature is available. Wacom has their own preset gestures for certain functions. You might already know some of these gestures because they are quite similar to gestures that you would use on a tablet or smartphone. For example, you can pinch to zoom in, or pinch out to zoom out. Moving two fingers around will pan the drawing area, like the Hand tool in Adobe Photoshop or Illustrator. Rotating two fingers will rotate the canvas, but your software must have that Canvas Rotate feature in the first place, e.g. Illustrator doesn't.


There are many other gestures, you can also set your own gestures. Whether or not the gesture will work depends on whether your software has that particular feature.

When you're in the drawing applications, the software will not register your finger taps or swipes as strokes to draw. You still have to use the stylus to draw. Personally, I prefer to use the keyboard for shortcuts and functions because I've been using them for years and more used to using the keyboard.

Drivers

There are two places for you to change the settings.


After you installed the drivers, when you first plug in the tablet, the Wacom Desktop Center application will open. This is where you can control the more general settings, basically settings not related to drawing, such as backing up your settings, checking for updates, etc.

Under System Preferences, you get a whole lot of other settings. You can adjust the pressure curve, assign functions to shortcut buttons or gestures, and many other things. It will take a while to figure things out because there are really many things you can setup. Or you can also leave them to default in which case the tablet will work perfectly fine too.

Wireless

The wireless accessory kit is optional. I did not buy it so I can't really say anything much. You can read the many reviews for it at www.amazon.com/Wacom-Wireless-Accessory-Tablets-ACK40401/dp/B006MRAVFE

Video review

Conclusion

I think releasing the Intuos 2015 in so many models is a smart move because people can get to choose the software they want to use it with.

It's a great tablet. It performs predictably and well just like most Wacom tablets I've tried. There's nothing bad that I can say about it.

5 out of 5 stars.

Availability

You can find more reviews and the tablet from these product links below:

Intuos Draw:
Amazon.com | Amazon.ca | Amazon.co.uk | Amazon.de | Amazon.fr | Amazon.it | Amazon.es | Amazon.co.jp

Intuos Art:
Amazon.com | Amazon.ca | Amazon.co.uk | Amazon.de | Amazon.fr | Amazon.it | Amazon.es | Amazon.co.jp

Intuos Photo:
Amazon.com | Amazon.ca | Amazon.co.uk | Amazon.de | Amazon.fr | Amazon.it | Amazon.es | Amazon.co.jp

Intuos Comic:
Amazon.com | Amazon.ca | Amazon.co.uk | Amazon.de | Amazon.fr | Amazon.it | Amazon.es | Amazon.co.jp

Tags: 

Review: Huion 1060 PLUS graphics tablet

$
0
0

Huion

Huion is a company from China that makes graphic related products, specifically graphic tablets, tablet monitors and light boxes.

Selling point of many of their products is their attractive pricing compared to other products in the market, especially to the tablets from Wacom.

Huion 1060 PLUS

The Huion 1060 PLUS is one of the many tablets sold by Huion. It's the newer version of the 1060 PRO. Main difference is the 1060 PLUS can now use all the 12 physical Expresskeys instead of just 8 on the 1060 PRO, and the included storage has increased to 8GB from 4GB.

Another very close model to take note of is the Huion H610 Pro which has the same size working area but with different design to its ExpressKeys and lack of internal storage.


For this review, I had borrowed a Huion 1060 PLUS from my friend to test it out. I've used this on a Mac running OS 10.10.5 and Windows 7 Professional so I'll give you my thoughts on using the tablet on these two systems.

IMPORTANT: Before you plug in the tablet, uninstall any other tablet drivers so as not to conflict with the Huion drivers. Windows will try to install its own version of the tablet driver which will be incompatible with the 1060 PLUS. You have to go into Advanced System Settings to disable Window's auto driver update. On Mac, just uninstall other tablet drivers first. Straightforward. It's best to download the latest tablet drivers from Huion's website.


Back of the front box cover has a nice foam to protect the tablet.


These are the items inside the box.

  • Tablet
  • USB cable
  • Stylus
  • USB charging cable for stylus
  • Manual and Driver disc


The build quality is good. It's not right up compared to Wacom but it's definitely not far behind. I've nothing bad to say about the construction when the price is half of that compared to Wacom tablets of the same size.

The tablet comes with 12 ExpressKeys that act as shortcuts to preset functions. The buttons has a noticeable indent to them when pressed.

In addition, there are 16 SoftKeys on the drawing surface that you can access with the stylus.


You can set the ExpressKeys and SoftKeys to other keys on the keyboard.


Here's the side of the tablet featuring the USB port. It's those standard USB ports. There's also a small slot for a removable 8GB MicroSD card. You can replace the MicroSD card with one that has 64GB capacity. The internal storage allows you to use this tablet as a USB flash drive as well. For example, you can save files at home onto the tablet and bring the tablet to the office if you want to.


Position of the USB port on the tablet wasn't very well thought out. By placing that port at the middle, when I use the ExpressKeys, my hands are over the wire most of the time. It's not a big deal nor is it uncomfortable. It's just the way that it is, strange. A more sensible place to have the wires should be at the top left or right.

Stylus


The stylus is well built, feels light but not too light. It does feel slightly hollow. There's a slight texture on the stylus to make sure it does not slip.

There are two shortcut buttons that you can customize to keyboard presses, mouse clicks or other functions.


There's no eraser at the back because there's a charging port there. This is a wireless stylus and it's battery powered. Charging time is stated to be 2 hours for a 3 month usage period. You can use the stylus while it's charging. I find that you can charge it for a few minutes to get hours of use. I'm not sure of the durability of the stylus but a replacement stylus is cheap.


The stylus holder allows you to place the stylus in a horizontal position. Personally, I prefer to put the stylus in upright position like you do with Wacom stylus holders.


Inside the stylus holder are four replaceable nibs and the nib remover.

Drivers


This is the driver screen.

I've no problem installing the drivers though but unfortunately, drivers for this Huion 1060 PLUS can be a bit iffy at times. Let me explain.

On Mac, it works mostly well except the driver cannot detect the Option key. For example, when I try to set Cmd+Option+Z to one of the ExpressKeys, when pressing the button, I only get Cmd+Z. Another issue is when you move the stylus to the bottom of the screen, it can disappear pass the edge. Once it disappears, you can't use it to show the Auto-hide dock. Solution is to make the dock visible at all times. Overall, the strokes come out as expected, smoothly and pressure sensitivity works well.

On Windows, it's more troublesome.


With the latest Windows driver (11.0.0.5) installed, while using Photoshop CS5.1, I experienced jitter in the stroke when drawing at Zoom size 100% and smaller. For some strange reason, when zooming to 200% and larger, the strokes are smooth without jitter.

I contacted Huion on Facebook and they sent me a new driver (which is actually an old version 9 driver) and that removed the jitter problem. I was then able to draw smooth lines at any zoom sizes. However, that driver doesn't give me the option to customise the ExpressKeys nor SoftKeys. As I use keyboard for my shortcuts, it's not a big deal for me. But the tablet was advertised with 12 ExpressKeys and 16 SoftKeys and I was unable to use them. If you are buying this tablet for those shortcut buttons, take note of this.

Also sometimes when I minimise applications, e.g. Photoshop, in Windows. I find that the stylus stops being detected, cursor freezes. I have to Alt+Tab to switch to other apps to get the stylus to be detected again. It's an annoyance. Also in Ctrl+Alt+Delete Task Manager mode, the cursor also freezes (you'll really need a mouse there).

I've contacted Huion on these issues and they say they are working on these bugs.

Performance


The default level of sensitivity works very well. It's no different from any Wacom tablets I've used.

You can get the tapered strokes at the start, thick strokes, and tapered ends easily. The stylus is able to detect the slightest of contact on the surface. It supports 2048 levels of pressure sensitivity but not tilt.


These are some hatching lines drawn very quickly with the stylus.


A close up on those hatching lines shows that they are smooth. No jitter at all.

The strokes also come out without any lag.

Conclusion

The drawing functionality is more than satisfactory, very good.

However to get that excellent drawing functionality (for Windows at least), you need the correct driver installed. And it may take a few tries to find the correct driver. Even after that, there could be some issues, like not being able to customise the shortcut buttons. Argh!

For Mac users, I can still recommend this tablet because the only major issue is the driver not being able to detect the Option key. For those who use only keyboard for shortcuts, go ahead and get this tablet.

On Windows, if you want to get this tablet, just assume you're not going to get the shortcut buttons to work. If that's the case, maybe it might be better off getting other tablets instead.

If you are using this tablet and have issues, I would love to hear about them. Post them in the comments section, or maybe post some workarounds to help others.

Availability

It's quite a popular tablet. Check out more reviews on Amazon with the affiliate links below.

Amazon.com | Amazon.ca | Amazon.co.uk | Amazon.de | Amazon.fr | Amazon.it | Amazon.es | Amazon.co.jp

Check out other graphics tablet reviews at http://www.parkablogs.com/tags/drawing-tablet-reviews

Tags: 

ArtGerm's artist review of iPad Pro and Apple Pencil

$
0
0

Stanley Lau, aka Artgerm, has recently bought the iPad Pro (128gb) and Apple Pencil.

He has put out a 1hr+ video review on Livestream that you can watch or ask him questions.

If you want to save time, I've already transcribed his points regarding the idea of drawing on the iPad Pro.

ArtGerm is a digital illustrator know for his beautiful portraits, especially for the female characters. The review of the iPad Pro and Pencil is from his perspective as an artist.

His focus is on creating digital art, and he's only interesting in the production side of using the iPad Pro, for exploring ideas, doodling and drawing.

He says that the iPad is huge with a 12.9-inch screen (2732 x 2048 resolution). It's awesome as a drawing tablet. ArtGerm has applied an anti-glare matte screen protector on the screen. That removes removes the glossy look and provides a matte surface which is more comfortable to work on. It also prevents sweaty hands from sticking to the glass surface. The matte screen protector provides a natural feel to drawing, as if you're drawing on paper.

Battery life is 10 hours which is pretty good. There are minimal accessories, such as a small adapter and cable for bringing on the go. Pencil in full charge can last for 12 hours. iPad Pro does not get hot even when working on it for hours.

Whether the iPad is heavy is relative. You can't hold it with single hand for long. It's 1.57 pounds, 713g.

Dual screen mode
What's cool about the iPad Pro is the new functionality from iOS that allows you to split screen and use two apps at the same time. You can place a reference image on one side and draw on the other. Dual screen is a feature he uses a lot.

To get into dual screen mode, you just have to swipe the screen from one side, either left of right, then choose to open another application in the empty space you have just created.

Apple Pencil
The pencil is a little heavy compared to normal pencil but almost the same weight with as a Wacom Intuos pen. He added a rubber grip to the pencil for addition comfort. Just get any cheap ballpoint pen with a rubber grip and put that onto Apple Pencil. It's a cheap effective way to get better grip on the stylus.

There's no need to pair the Pencil with the tablet constantly. For the first time, just remove the end cap and charge it with the iPad Pro and it will be paired. The good thing about the Pencil is battery life. You can charge it 15 seconds for 30 minutes of drawing. Or charge a minute for 1 hour of drawing.

The Pencil has tilt function. If you tilt it, you can shade with it as if shading with real pencil. It's cool to have the tilt function but not something he uses often as it can be distracting.

How many pen pressure levels?
The number does not really matter. What matters is you're able to get thin and thick lines as and when you want it and he can do so with the iPad Pro. Procreate also allows you to change the pressure curve to get to the curve that you like.


Performance
Drawing is smooth and without any lag.

He uses Procreate for drawing on the tablet. There are layers in Procreate. Layers can be merged, additional layers can be added. There are also blend modes in layers, just like what Photoshop has. The finger gestures to undo and redo are very handy. They work without issues.

You can share the Procreate file to the computer. You can export the file as PSD to the Mac using Airdrop. The same file can then be worked on in Photoshop with layers intact. If you're using Windows, you can save to DropBox, and download the file from there.

One good feature about Procreate is its autosave. Don't have to worry about losing the file for whatever reason, e.g. crash.

Palm rejection is good. This allows you to draw in a natural hand position.

Even when using the Pencil at corner of the screen, it's precise. Other tablets don't work as well at the corner.

Colour profile seems consistent. It similar to what is shown in Procreate and Photoshop. Colour temperature and dynamic range is the same.

Artists have been creating awesome app with other iPad using Procreate but now with the Pencil, they can even do more. Just with Procreate, you can do a lot.

How does iPad Pro compare to Surface Pro
ArtGerm has used many other tablets before. He has a Surface Pro 2. He doesn't expect the mobile tablet to do everything that a desktop does. He uses the mobile tablet to do initial drawings, explore ideas, and then port the drawing over to desktop to finish it up.

He finds that Surface Pro is awesome as a small machine that he can do many stuff, for example play games, like a desktop. When it comes to art production, the applications are full versions, like Photoshop, Corel Painter. Those softwares are not optimized with touch interface. Most of the time, if you need to use shortcut keys, it would be difficult to use them on the desktop applications. You have to go back to the menu to undo and it is very tedious and not efficient.

If you use the keyboard undetached from the Surface Pro, the hand position is awkward.

Wacom Companion is better in the sense that you can customise the physical shortcut keys on the unit.

The mobile tablet should help to ease the workflow, or expand the possibility of creating artwork on the go. It's important to have the device to have an app that allows you to not use the keyboard, and yet being able to access important functions, such as picking colours. He still prefers using the keyboard but it would be great to have a way to access the same functions without using keyboards on a mobile tablet.

Is it possible to use this tablet as the only production tablet?
If you draw simple cartoons, then probably. It's great to use this when traveling, for presentation. It can be used as a mobile portfolio. The screen is big so your work will look great on the screen. Of course, there are the entertainment aspect, you can watch movies, surf the web. Without the Pencil, he would not even consider this iPad.

It's cheaper than Wacom Companion but does it replace the Wacom Companion?
Maybe not. It depends on whether you need to have the full Photoshop. He still prefers using Photoshop for detailed artworks.

The system, Microsoft, Apple, Android does not matter
ArtGerm only cares about whether the devices works and aids his workflow. The system running it is not as important.

What apps to use?
Procreate is much better than Photoshop sketch in terms of interface, touch features, ease of use.


Conclusion
This is the first attempt from Apple at a pressure sensitive stylus and it works very well. That's why he's not going to wait for the second version of the Pencil.

The iPad is good for people on the go, who wants to leave the room, draw outside.

He still uses a Intuos3 tablet and does not have a Cintiq.

Availability
Check out more reviews of the iPad Pro and Apple Pencil at
Amazon.com | Amazon.ca | Amazon.co.uk | Amazon.de | Amazon.fr | Amazon.it | Amazon.es | Amazon.co.jp

Tags: 

iPad Pro vs Surface Pro 3 vs Cintiq Companion by Spencer Nugent

$
0
0

More artist reviews for the iPad Pro are coming out. The previous one I featured was ArtGerm's take.

This video below is from Spencer Nugent, the artist and designer behind Sketch a Day. The text below is the transcript.

In the video Spencer compares the iPad Pro and Apple Pencil against the Surface Pro 3 and Cintiq Companion 2. He doesn't have the Surface Pro 4 yet.

Spencer says that whether or not the tablet will be suitable for you depends a lot on your workflow. He uses the iPad Pro for quick sketching but for the heavy lifting stuff, such as 3D work, he will go with his desktop.

Apple iPad Pro and Pencil

iPad Pro is light and very portable. It does not have a fan but does not warm up with work. Battery life is phenomenal.

The Apple Pencil is a Bluetooth stylus with capacitive touch.

The stylus has a nice tip and surface finishing. It's well made with a nice weight. It could do with a better grip because it can be slippery in hand. There's no eraser at the back of the stylus. It's not a big deal but it's would be more intuitive to have the eraser at the back. The tip feels smooth against the glossy screen.

Performance is good, responsive. Tracking is great. The stroke keeps up with tip of the pen. It does well with handwriting. There's no parallax between the tip and the stroke.

Pressure sensitivity works well. One nice feature is there's tilt sensitivity in the stylus. With Procreate, you can tilt the Pencil to draw, just like shading with a real pencil. There's something delightful about that experience. It feels natural when drawing.

There are some downsides. The Apple Pencil is designed to charge from the port of the iPad Pro. With the pencil pointing out from the iPad Pro, there's a chance of breaking it from the port if you accidentally hit it. The other downside is it's quite expensive at USD $99. Spencer however has two Apple Pencil, one at work and at home so that he does not have to bring them around. The cost adds up.

Palm rejection works typically well, but not all the time.

Microsoft Surface Pro 3

It's a similar tablet in the sense that it has a capacitive touch screen. Size is slightly smaller. 12-inch vs 12.9-inch of the iPad Pro. It is a bit thicker and slightly heavier. One good thing is it has a built in kickstand which will give you a nice angle to draw at an inclined angle. The clip on SP3 pen is good and prevents it from getting lost when you clip it to your pocket.

Spencer likes drawing in the SP3. Tracking is good but there's still some slight lag, discernible if you're looking for it.

It comes with a stylus so you don't have to spend extra on that. However the stylus uses disposable battery. There's no tilt sensitivity like the Apple Pencil so the Pencil feels more like a drawing tool if you need that dimensionality.

If you sketch really lightly, the lines may get cut out. You don't get that sensitivity level as compared to the iPad Pro and Wacom Cintiq. Palm rejection works well, but not all the time. This is an issue with most digital stylus.

One advantage of SP3 is there are shortcut buttons on the stylus. You can set the button to use the eraser without the need to get into the menu or press any buttons on screen. SP3 stylus is the most slippery of the three. The plastic tip on glass really glides. SP4's pen now has better tip and more friction.

The main advantage of SP3 is since it's running Windows, you can run full desktop software. If you want to run 3D modeling software, you can do so.

Wacom Cintiq Companion

As a drawing tool, the Cintiq Companion is most specific. It is super capable. It's a full computer just like SP3 that runs Windows so you can install desktop software. Cintiq does get hot when work's getting done. The fan cycle on and off quite a bit.

It's the heaviest tablet of the three. It has the widest screen, not the biggest screen. Check out this review.

There's a built in tip and eraser in the battery-less stylus. The texture on the screen has the best feel. It has enough texture on the screen that it feels like paper. It's a subtle thing. It totally wins hands down in this aspect.

Out of the three tablets, this has the most fine tuned stylus in terms of pressure sensitivity. There's a lot of variation you can get with the stroke. In terms of drawing ability and pressure sensitivity, the Wacom Cintiq definitely wins out. The lines tend to be a lot better.

There are physical buttons by the side of the screens. You can set them to common functions to the drawing app that you're using, e.g. Photoshop. So you can switch tools or access a function at a button press.

There are other ports like audio jack, USB, display out, which the SP3 also has.

What tablet should you buy

The tablets are not going to replace pen and paper.

If you looking to elevate your sketching, you can think of using this as an art studio on the go. If you go on a trip, it's easy to travel with a tablet. You can draw an image on the screen and show the client quickly.

The best tablet is the most accessible. And because of that Spencer prefers the iPad Pro as it's thin and light. For more serious work, he would go for the desktop.

It really depends on your workflow. If you like quick sketches, iPad Pro has great potential to be the daily use machine. Ask yourself how digital sketching fits into your workflow. It does not make sense to spend money on an expensive tablet if you don't have the foundation skills. The tablet is not going to make you draw better. You'll still need the basic drawing skills so that when you do go digital, you can produce awesome stuff.

If you're looking for something more inclusive, an all-in-one, then SP3 is your choice.

More reviews

Here are more guest artist reviews of competing products on the blog

Also check out the reviews on Amazon for iPad Pro, Apple Pencil, Surface Pro 3, Surface Pro 4 and Cintiq Companion 2.

Tags: 

iPad Pro and Apple Pencil Review - Mad ramblings from comic creator Ben Bishop

$
0
0

This guest review is written by Ben Bishop

I’m going to tell you a story with this review… Very stream of consciousness, very opinionated and probably very long… If you’re reading it I can only assume you care what I think, but if you just want to know what drawing tablet I suggest you spend your money on, scroll on down to the bottom and take a look at my final thoughts…

For everyone else, our story begins on a cold September day in Maine in my studio, sitting in my underwear, watching Apple’s keynote presentation…

When the iPad Pro and Apple Pencil were first announced, I was suspicious whether or not they would be something I would want or need. I was concerned about Apple’s first foray into the digital drawing world and I expected it would suck. Man, was I wrong.

I had been hoping for a very long time Apple would start making a drawing tablet, but was always told by people more tech savvy than myself that we are such a small niche market that they would never bother. Guess they were wrong, too.

When the iPad Pro and the Apple Pencil were first announced I was definitely wary about the obvious stuff... Pressure sensitivity, pen detection/hand deflection, and, of course, the lack of full programs that you would find on a desktop computer as opposed to simple apps on an iPad.

At the time of the announcement I already owned a giant Wacom Cintiq 24HD which was attached to a 27 inch Imac in my studio, as well as the new i5 Wacom Cintiq Companion 2, so even though this was pretty much the announcement I had been waiting on for years, I didn’t think it would be something I would even bother getting… That was until the Wacom Cintiq Companion 2 became the most frustrating and boorish piece of technology I’ve ever tried to use, mainly, but not limited to the fact that it’s Windows based. This is a review of the iPad Pro and Apple Pencil from the perspective a comic artist, not a slam piece against Windows or Wacom ( I love Wacom…) BUT this leads me into the #1 PRO on my pros and cons list for the iPad Pro…

It’s Mac.

If for nothing else, the ease of use on the iPad Pro — simply because it is not Windows based — blows the Cintiq Companion and Surface Pro away. It’s not just because it’s the newest and hottest thing and I feel obliged to think it’s the best.

For many years before I had my big Cintiq 24HD at my desk I was using the very first AXIOTRON MODBOOK. If you don’t know what that is it’s basically a white Macbook that this company Axiotron ripped the screen and keyboard off of and put a Wacom tablet where the keyboard used to be and voilà! The first and only Mac drawing tablet.

I loved it. I did all my work on that for years. It was big, heavy and got hot to the point of it actually melting and warping the battery and burning people, but it worked, and I drove it into the ground.

After getting the Cintiq Companion I actually contemplated going back to the Modbook because, even with all of it’s faults, the Modbook just worked.

The preference between Mac and Windows is just a personal preference so take what I’m saying with that in mind. If you’re more comfortable with Windows then maybe the Cintiq Companion will be fine for you ( though it is also twice as expensive than the iPad Pro and Apple Pencil ). If you’re familiar with Mac or are willing to consider it, then let’s look just at the aesthetics for a second.

As a portable machine meant for drawing remotely on the go I personally want something that’s not bulky or heavy or a pain in the butt to pull out of my bag on a whim and sketch something out. Here is the iPad Pro next to the Cintiq Companion 2 (I have a cover/stand on the Companion, which is a brilliant piece by a great company called FlipSteady.)


As you can see the Cintiq is quite a bit larger than the iPad Pro. Obviously, as artists we want a big screen to work on though, right? That’s why I’ll always use a giant Wacom Cintiq at my desk when I’m home. You can’t beat having all that screen real estate while you’re drawing. But wait…


This is the iPad Pro on top of the Cintiq. Its active screen area is almost exactly the same as the Cintiq only without all that extra trim around it. So you can see with both machines you’ll get almost the same amount of drawing area, but one is going to take up a lot more room in your carry on bag.


...A lot more room. That’s the iPad Pro width compared to the Cintiq companion. As you can see the iPad Pro is much thinner, making storing it in your bag, pulling it out and putting it away much less of a chore. I have traveled with the Companion, and never enjoyed the process of taking it out of my bag, booting it up, hoping Windows didn’t have some mandatory hour-long update to install before I could work, and so on. It never felt easy or convenient. I never got excited about using it. Not to mention these are the power cords for each.

Power Supply


Guess which is which? In addition to the larger Cintiq drawing tablet you also have to carry around this brick with 2 separate cords just to charge it. To make matters worse, the Cintiq loses its charge fast. Not taking this cord with you is out of the question. In fact, many people’s Cintiq Companions (including mine) have charging issues where they won’t even turn on unless plugged in, only to find out somehow the battery completely drained while it was off. ( I’m guessing it’s due to a little orange light that is ALWAYS on on the side of the computer… )

I know some diehard Windows people are going to go wild in the comments about how I’m just an Apple zombie or something, but I’m just trying to show you the physical differences between the two machines. One is clearly more of a hassle to be mobile with than the other, and that’s essentially what this thing is for, art on the go.

So I’ll go ahead and counter some of the points I’ve made… “But Ben, the Companion is a FULL computer, the iPad only runs APPS, of course it’s bigger and needs a bigger cord, apples and oranges man.”

Alright, I hear you. That thought crossed my mind as well in my moment of doubt against the iPad Pro after the keynote announcement… And then I realized that didn’t matter. Here’s why…

This is the iPad Pro, the Apple Pencil ( which is somewhat magnetic, though the negative reviews apparently didn’t realize this ) and my Macbook. As you can see it’s incredibly easy for me to hold them all in one hand, and in fact it’s STILL barely, if at all larger in width than the Cintiq Companion…


What does that matter? Why am I showing you this? Well because with this simple setup I’m able to work in full Adobe Photoshop or any full desktop program for that matter, on the go anywhere I want… Wait whaaaaaat?


Astropad — Using iPad Pro with full desktop software

Using an app called ASTROPAD, I can connect to and mirror any Mac via WiFi or USB. That means anything you can do on your full computer you can now do on the iPad Pro with the Apple Pencil. This is similar to how a regular Cintiq acts when hooked up to a computer, but for a much lower price and with all the benefits of the iPad itself. The Astropad app is amazing. It’s not just a screen mirroring app, this one is made for the artist.


You can see along the left edge a number of express keys which you can set to your most used functions. You can call up the SHIFT, CONTROL, OPTION, and COMMAND key as well, useful when right clicking or selecting multiple things at once. Everything you do is also being done on your computer, the iPad Pro is just a window, a beautiful, Retina display, pressure sensitive drawing window.

That means if I want to print I just press print and my computer communicates as usual with my printer. Or if I’m looking for a file, I can search the huge amount of stuff on my computer and not worry about whether or not I uploaded it on a file server or emailed it to myself to open on a different device. The Astropad app is very affordable, only $19.99 and free on any number of computers. I have it on my Macbook for when I’m out and about, and even installed a program on the laptop called INSOMNIAX which lets me close the Mac without the computer going to sleep, allowing me to actually keep my laptop in my bag while working on the iPad Pro. I also have Astropad installed on my desktop Imac for use when I am home and on the couch downstairs hanging with the family… But still working. I can literally continue on a document I was working on in my studio from anywhere in the house on the iPad Pro. I can’t say enough good things about the Astropad app. The resolution is great, images and text look 100% as crisp as they would on your actual computer, it’s great. The best part is, I’m not even using the iPad Pro version of it, they are still working on that, so I expect it will only get better when it’s released.

So what if you don’t care about full programs and don’t have 19.99 for Astropad or a Mac with Photoshop on it? You probably want to know what you can do with JUST the iPad Pro and the Apple Pencil right?

Well, I’ll tell you, if you’re a comic artist that might be all you really need. I’ve been doing a lot of my comic and freelance illustration work with an app called Procreate and I love it.


I think it’s the closest thing available ( so far ) to Photoshop. Using this App the Apple Pencil is astonishingly wonderful. There is zero latency, the pressure sensitivity is incredible and the built in brushes will make you want to just go wild.


You can upload and alter your own brushes.


You can use layers…


You can merge layers simply by squishing them together.


You can add layers, hide layers, and even change layer qualities ( Multiply, Screen, Overlay etc. ).


You can select areas, free transform them, resizing and moving, copy paste cut… You name it. I have been able to do my comic pages and freelance Illustrations almost completely in Procreate without issue.


Using the iPad Pro’s new multitasking split screen feature is awesome for looking up reference while you draw. If they were listening and I could ask them to add anything, it would be the ability to add text, and a magic wand tool. If those features are in there I haven’t found them yet.

Between Procreate and Astropad I have been able to draw and create on the go from anywhere I please. So that combined with the portability, comfort and ease of use with the iPad Pro and the Apple Pencil, I now have ultimate freedom to continue the work I normally do at home in my studio anywhere else, even if it’s just the couch downstairs.

FINAL THOUGHTS

So that’s my story. I love the iPad Pro and the Apple Pencil for use with comic creation and illustration. I don’t think they are perfect, that’s silly, technology is always improving, and again this is the first of it’s kind from Apple. But as a portable drawing solution I would say it’s the best out there.

When I’m home and in full work mode I will still go for my giant Wacom Cintiq 24HD, simply because it’s massive and makes more sense. I wouldn’t want to take that on a plane with me, the same way I don’t want to only work exclusively on the iPad Pro.

If you have a big chunk of money and are looking to get a digital drawing tablet and want some advice it’s as simple as this… First, do you want something for working at home or is portability more important to you?

If you said home, I suggest you save up and buy the biggest Wacom Cintiq you can. The screen size will change your life and Wacom knows what they are doing when it comes to drawing tablets, you won’t regret it. BUT if it’s more important for you to be mobile, I would absolutely go for the iPad Pro and the Apple Pencil. It’s a beautiful and responsive machine that when using the right apps performs just as well as you would ever hope it to.

If you love Windows and want an all in one machine, then ok, get the Cintiq Companion… You’ve seen the size comparisons and heard ( some of ) my issues with it, but when when you’re drawing on it, yes of course it works wonderfully and the pressure sensitivity and responsiveness is just as good as the iPad Pro and Pencil. ( Though depending on how much you have going on in the background, the lines can tend to lag on the companion as with any computer. ) Never experienced any lag on the iPad Pro though...

I leave you with my suggestion list for the iPad Pro, Apple Pencil, Astropad and Procreate App as far as the things I would like to see improved in future versions, as well as some additional photos I took for you to check out.

MY SUGGESTIONS TO IMPROVE THE iPad PRO AND APPLE PENCIL…

  • I’d love either Apple or a third party to make a hard felt tip for the Apple Pencil. Right now it’s a plastic material with a very slight tooth, more comparable to the plastic nib on a Wacom stylus. I always have used the hard felt nibs and would love some of those. This does feel more glossy, plastic on glass, then I would prefer, but it hasn’t been an issue. I, like most artists, am just very particular and set in my ways. Hard felt tips please.
  • Though the Pencil is somewhat magnetic, as you can see in my photos, I would love it to be more magnetic. Right now it’s alright, it hangs from the magnet inside the butt of the pencil. Until Apple improves on that, I’ll be using this awesome rubber magnet sleeve from www.moxiware.com, a good enough solution for now.
  • I have no doubt they will add this, but I am very much in the habit of flipping the Wacom stylus over to erase while I’m working… It’s not a huge deal that the Apple Pencil doesn’t have it yet, as Astropad has a quick express key to click between the eraser and brush very easily… But I would still like it on the actual Pencil.

MY SUGGESTIONS TO IMPROVE THE ASTROPAD APP…

  • Let me choose between which computer I want to connect to without having to quit out of one of them manually. Meaning it would be great to have Astropad running on my Imac and Macbook and choose which one I want to use at any time rather than running upstairs to disconnect the Imac.
  • Allow me to call up on onscreen keyboard like what we have on the iPad. Right now I’m using the onscreen keyboard of the Mac itself, but pecking the pen to type is no way to live. Also, I have heard from others who have the iPad Pro Smart Keyboard that keyboard shortcuts don’t work through Astropad, that would be an awesome fix.
  • Lastly, the colors seem a little desaturated when using the app. This isn’t a huge deal to me because I’m mostly doing comic layouts, but I would love the ability to accurately color and paint as well. I’m confident this is something They’re looking into.

MY SUGGESTIONS TO IMPROVE THE PROCREATE APP…

  • Allow for text input. ( If it’s there I haven’t found it yet. )
  • I would love a magic wand tool to be able to color flat an image and then select each section. ( Again, if it’s there I don’t know where. )
  • A shift key type solution would be great. I hold down shift in Photoshop to draw perfectly straight vertical and horizontal lines when I create panel borders in my pages. I know you have the quickline tool ( which is awesome. You can draw a willy nilly line and just keep it held and it will become perfectly straight. ) BUT that doesn’t give me absolute horizontal and vertical lines.
  • Speaking of your quickline feature, it would be amazing to be able to draw a circle free hand and have it convert to a perfect circle, similar to how the new Adobe Comp App works.

Well, that’s about it. Please check out my quick video demo using Astropad with Full Photoshop and the Procreate app in this video below:

Here are some more photos. Thanks for reading!


iPad Pro and original iPad. Fun fact, I think they weigh the same amount…


iPad Pro and New Macbook.


iPad Pro and a magazine, about the same size.


MAGNETS, how the heck do they work?


Miracles…


Using full Photoshop on the iPad Pro with Astropad wirelessly transmitting to my Imac and Wacom Cintiq 24HD.


If portability is not something you need, I can’t recommend enough getting a giant Wacom Cintiq for home...


Astropad allows you to hide your express key shortcuts at any time.


In Astropad, adjusting how much of your computer screen you see on the iPad is simple.


Astropad even lets you use two finger zooming and scrolling WHILE you are using the Apple Pencil. It pixelates only when it’s zooming and becomes crystal clear again the moment you release. Again, something they are likely working on for the iPad Pro version of the app which is coming soon.


Top: Cintiq Companion stylus
Middle: Cintiq 24hd stylus
Bottom: Apple Pencil.

The Wacom pens feel lighter and hollow, while the Apple Pencil has the weight of a real pencil, I like the weight. they also have buttons on the side which are equally as usable and convenient as they are aggravating when you accidentally hit them. I would say they are more useful than annoying, I have mine set to right click which speeds things up quite a bit. Apple could utilize this same type of function with their Force Touch feature, pushing down the tip of the Apple Pencil extra hard to right click would be cool. I believe some apps already use that feature.


DIS-A-SEMBLEDDDDDD! Here is the Apple Pencil, exploded view. That little rectangular piece actually comes with it for charging. That was nice of them. I would have expected Apple to charge another $30 bucks for that.

Charging the Pencil in the actual iPad is as awkward as it looks, but the good news is it’s darn fast. I charged from 3% to 35 in 3 minutes and it only dropped the iPad power 1%... So at least you won’t have to look like a dork for more than a couple minutes. Also the pencil charge lasts a LONG time. I used it pretty vigorously for 4 full days before I had to charge it.

I’m not affiliated with or sponsored by Apple, Wacom, Windows or any other company for that matter. These are just my honest thoughts about my experiences using all these different machines and which I think work best. Thanks!

Ben Bishop (website | Twitter | Instagram)

Availability
Check out more reviews of the iPad Pro and Apple Pencil at
Amazon.com | Amazon.ca | Amazon.co.uk | Amazon.de | Amazon.fr | Amazon.it | Amazon.es | Amazon.co.jp

Tags: 

Artist Review: Microsoft Surface Book by illustrator Magge Gagliardi

$
0
0

This review is written by Magge Gagliardi.

Hello, my name is Magge Gagliardi. I am a professional illustrator, designer and professor. I recently purchased the new Microsoft Surface Book. I have only had it for about a month now but so far I am very impressed.


Contents of original box - Surface Book, Surface Pen, Power Adaptor

Transition from Mac to Windows
Before purchasing the Surface Book I had always worked on a Mac. My setup consisted of my MacBook Pro (which is about 7 years old now), Wacom Intuos tablet and a larger monitor. I have always struggled with the disconnect in working on a tablet below and having the image appear on the screen in front. Within the last year I have made the switch to working almost exclusively digital and decided it was time to find a set up that I could really adapt to. I take on a variety of work including illustration, graphic design and scenic design projects. I needed a product that I can use on a job from start to finish and the capability to work on site as well as in my home studio.

With my previous setup I have always found sketching to be the hardest thing to do digitally without direct contact with the screen. I have an iPad mini which has served its purpose for quick on the go doodles but is impossible to do real client work on. The main programs I use are Adobe Photoshop and Illustrator which most tablets cannot run. The Surface Book is fully capable of running the programs that I need to do my work. It has proven to be a complete studio in one product. The lightweight portability of the Surface Book allows me to take it anywhere. The best part about it is that I no longer have to cart around an entire set up of laptop, tablet, cords, etc. Having the ability to do actual client work and have access to all of my files anywhere I go has been a great advantage.


Disconnecting the screen and working in tablet mode has been a positive experience. It is extremely easy to sketch on. The 13.5 inch screen is a great size and the resolution is amazing. I have found myself using Photoshop to it's full potential and it is now where I do all my preliminary sketching and design work. I then transfer my sketches directly into Illustrator where I build the final product. In the past I would draw by hand on paper and have to scan the image in or take a picture and email it to myself. For finalized illustrations I mostly work in vector in Illustrator which has also been smooth with the exception that the pen tool points are a little small and it is sometimes hard to grab the handles. I have been able to adjust to this and although I have not had to yet, I do have the option of hooking the Surface Book up to my large monitor if I feel the need to work bigger. In that case I can also install my Wacom tablet as well. Currently, my entire work process now takes place directly on the Surface Book cutting out the extra steps I used to have to take. There is also the option of working in touchscreen, simplified versions of Photoshop and Illustrator when in tablet mode. I only use this when sketching in Photoshop when the tablet is not docked.

Surface Pen
The Surface Pen itself is an awesome tool. It is the same pen used with the Surface Pro 4 and runs on a single AAAA battery. It is paired to the Surface Book via bluetooth. I only use the pen, the touch pad or touch screen as of now. I have found no need for a mouse.


Surface Pen Tip Kit

There are also additional tips you can purchase of varying type such as 2H or HB pencil for example. The pen's pressure sensitivity is on point allowing me to change line weight and value with the varying pressure of the pen. It is also lightweight and close to the feel of working with a normal pen or pencil. It also has an eraser button on the back of the pen. There is little to no lag making the experience enjoyable. Typically the stroke appears directly under the pen although sometimes when shading the stroke takes a little time to catch up. It is also magnetic and attaches to the side of the screen which makes it hard to misplace. The two finger zoom on screen is helpful when working on my illustrations, bringing two fingers together zooms in and apart zooms out. Between the Surface Pen and the zoom versatility I can get in closer than ever before making sure that I hit every detail.


Surface Pen size comparison


Diagonal lines with the Surface Pen in Photoshop


Slow and fast vertical and diagonal line strokes with the Surface Pen in Photoshop


Various lines, weight orientation of stroke in Photoshop with the Surface Pen

In the short time that I have worked on the Surface Book I have cut my work time in half. For me, the hands on approach has allowed me to work faster and more efficiently. It is especially helpful now with the amount of client work that comes during the holiday season. The hardest thing to adjust to has been going from the OSX operating system to Windows 10 and also the fact of having a right click, but I have been able to adapt and am really getting the hang of the whole layout.


Sketch in Photoshop (full version) in tablet mode

One thing I did have to get as an addition to the Surface Book is an external keyboard. I use this when I am working on the screen in docked or tablet mode as the screen itself covers the full keyboard. Despite the fact of the digital on screen keyboard I need access to shortcuts and using the keys in sync with the Surface Pen. It has easily solved the problem at hand. In tablet mode when the screen is not docked you do not have access to the full keyboard and shortcuts. The USB ports are not on the tablet itself but on the keyboard base. This makes it a little complicated to use Photoshop and Illustrator fully and as quickly. However it is perfectly fine for sketching and preliminary work.


External Windows keyboard


My Current work setup - Surface Book (in docked mode), Surface Pen and external keyboard. Pictured in Adobe Illustrator (full version).


In my time adjusting to the Surface Book there have been a few points that can be improved on. It can only run the most recent versions of the Adobe Suite, Adobe CC. When it is initially installed the most noticeable flaw is that the tool bars and layer panels are absurdly small and almost impossible to read and or work in. This is something that is only adjustable in the CC version. I was able to correct this issue in both programs allowing it to show the toolbars and everything else at their appropriate sizes. As of now the CC programs have run well but on the rare occasion they do freeze I do have to restart as the only solution. So regardless what you are working with it is always important, especially as an artist to constantly save and make sure to backup your work.


I have found that the battery life is good when it is in laptop mode at around, however, as warned when purchasing the Surface Book, it is much less during tablet mode, and even less when in tablet mode while running Photoshop or Illustrator. I am constantly working in these programs so I drain the battery fairly quickly. I would estimate around three hours in tablet mode running these programs and four in tablet mode without running them. In normal laptop mode I would estimate the battery life to be around seven hours, six while running the programs. It is good to note that the Surface Book is a bit top heavy in laptop mode. It does not extend far from a 90 degree angle, however this is not something that has bothered me as my main concern has been its tablet mode capabilities for doing my artwork.


Surface Book in laptop mode in its full extension with view of charger port (SurfaceConnect) and Mini Display Port


Close up view of the hinge and SurfaceConnect

I am not the most tech savvy person and have never had to deal with PC issues having always worked on a Mac. I have had help from others on how to correct issues that have come up. One point being that there seems to be some glitches drivers which especially have come into play when browsing the internet. Apparently Windows has begun to come up with solutions for this problem. Another issue I have encountered is that the Surface Book struggles to come out of sleep mode at times often forcing me to restart all together.

Deciding against Cintiq Companion and Surface Pro 4

In making the decision to purchase the 256 GB Surface Book over another product I made sure to do research. Before the Surface Book came out I was considering purchasing a Cintiq Companion. One major factor that pushed me towards the Surface Book was that it was a laptop as well. I was going to have to purchase laptop regardless due to my MacBook Pro getting up in its years. I figured I would go with the product that had everything I needed in one. Otherwise I would have purchased a new MacBook Pro on top of the Cintiq Companion.

I had tried out the Surface Pro 3 and 4 but I really wanted the full laptop capabilities. From a teaching perspective this is extremely important to be able to access student files, grades and other documents on the same machine that I can give digital drawing or painting demos in class on. I went with the Surface Book with more space to keep of with the variety of work that I do. After all the initial major software was installed (and working on it for a month) I have used up 42GB of the 256GB. Another point that I noted earlier was the screen size. It is larger on the Surface Book at 13.5 inches in comparison to the MacBook Pro at 13 inches and the Surface Pro 4 at 12. 3 inches. This slight size difference it actually very noticeable.

The screen itself is glass. It is smooth but I find it easy to work on. The small rubber tip of the Surface Pen works well on it. There hasn't been any scuffing or drag. The palm rejection has been fine so far, especially with me being left handed and always hitting the wrong thing. There is also an option to set up the Surface Pen to a left handed setting in which all the toolbars are placed on the right which is helpful. I make sure to clean off the screen as much as possible but unless the screen is off or in direct sunlight you cannot see any smudges. The high definition has been very clear to work with. So far I haven't seen any issue with color reproduction for the web. I have yet to have any of my illustrations printed however.

I still maintain my old set up as a backup or if I feel the need to work on a larger scale. I kept the MacBook Pro as it still contains a lot of my client files (which are also backed up on an external hard drive). The MacBook Pro is slower these days due to its age. The Surface Book is extremely fast in comparison. I feel that both machines perform well for what I am doing. The main difference between the Surface Book and the MacBook Pro is that the Surface Book allows me to work directly on the screen. There is a button which you hold down on the keyboard that releases the screen and enters into tablet mode. You can then use it as just a tablet or you can flip it around and dock it in reverse back onto the keyboard. When you do this the table covers the keyboard (hence the need for an external one) but it allows you to work in tablet mode while maintaining access to the two USB ports and charger port. This allows me to charge while working. Without the tablet aspect I feel that both the MacBook Pro and the Surface Book are very similar. The Surface Book looks and feels more like a Mac design that any other PC I have seen.


Release Button for screen detachment. Hold down until it says “Ready to Detach”, detached screen in working tablet mode


Detached keyboard revealing prongs which connect to the tablet


Tablet connection to keyboard


Tablet reversed and docked on keyboard at angle


Tablet closed

Overall I am very pleased with the Surface Book and am going to continue working on it. There are more pros than cons as far as I am concerned. The more I work on it the more comfortable I feel with it and am very happy with the art I have been able to create. I think this is a great product for a working artist who is also their own business. It has makes it possible to bring your studio wherever you go and create the caliber or art that you need.

Additional Photos


Headset Jack and USB and SD card reader


Outward facing camera and inward facing camera


SurfaceConnect charger attaches to the right side of the keyboard

Pros and Cons at a glance

+ Can run full desktop software
+ Lightweight (3.34 pounds, 1.51kg)
+ High resolution 13.5 inch screen (3000 by 2000 pixels)
+ Very fast system. SSD storage.
+ Additional tips (sold separately) for Surface Pen for different feel on screen
+ Default tip has good friction against the glass screen
+ Surface Pen has pressure sensitivity (1024 levels)
+ Eraser at back of Surface Pen
+ No parallax when drawing on screen
+ Palm rejection works fine so far
+ No lag typically, except when shading
+ Surface Pen attaches magnetically to the screen
+ 2 USB3 ports, SD card reader, MiniDisplay port
- Surface Pen uses AAAA battery
- Slow diagonal lines are (still) slightly wobbly
- When you reverse the screen, it will cover the keyboard, so you need an extra keyboard for shortcuts
- Can only run latest version of Adobe Suite, Adobe CC.
- Default size of Adobe Suite controls, tool bars are extremely small, but adjustable.
- Occasionally crash of Adobe Suite software (so save often!)
- Battery life in tablet-alone mode is around 3 hours when running graphics software
- Battery life in laptop mode is around 7 hours estimated
- The screen does not extend far beyond 90 degree angle
- Surface Book struggles to come out of sleep mode at times
- Windows OS takes up 20GB installation space

Availability

Check out more reviews on Amazon (direct links below):

Price at a glance

Tags: 

iPad Pro & Apple Pencil review by animator Jason Venus

$
0
0

This review is written by Jason Venus from Drawmill Animation.

I have been a digital artist for the past 20 years since the purchase of my first ever computer, an Apple Power Mac 7200. I have used Apple Mac computers most of my working life, although I am equally at home using Windows based PC’s. I just prefer Macs as they don’t seem to get in the way of my creativity. Currently I am ‘Head of Creativity and Overseer of fun stuff’ at Drawmill Animation. Yes that’s my official title and kind of sums up the ethos of the studio, we are a small animation studio creating silly cartoon animations for anyone silly enough to pay us.

What I use for drawing at work
Within my current arsenal of digital drawing tools my main workhorse is the Wacom Cintiq 22 inch display. I use this daily in the studio and its beautifully responsive, and above all, does not put any obstacles in the way of my creativity. When working from home I use the Wacom 13 inch HD Touch, although a smaller screen size it still packs the same resolution of the the bigger 22 inch at 1920x1080. Both these devices set a very high benchmark in terms of usability and quality.

So it is safe to say I am very familiar with the whole Pen and Screen technology and I have been waiting for an iPad that I can embrace as a true artist's companion. Until the release of the iPad Pro I have been using an iPad Air which I found quite limiting from a creative point of view. Although I have seen some amazing art created on iPads, for me it just never hit the mark in terms of usability.


The 3rd party pens with their stupid fat round rubber tips, had no real feel to them, I never felt fully in control, and it all just felt a bit gimmicky. On my previous iPad Air, i purchased the Bamboo stylus and used this in conjunction with their Bamboo Paper app. The biggest problem i found with the Bamboo stylus was the lack of pressure sensing which made it impossible to create a natural looking drawn line, making everything look a bit too neat and clinical. The Adobe Draw app has brushes that would attempt to artificially create varying line thickness, but again, this never felt like it was something you had control over. Plus the rounded tip always felt more like guess work on where to position the tip to get any level of accuracy.

Portability
The first thing I noticed when unboxing the iPad pro, is how huge it feels compared to my previous iPads. Now I know I should have been prepared for this, having read all the technical specs and watched all the videos. And having a bigger screen was actually one of its appeals, but for some reason I still expected it to feel like an iPad. That convenient piece of tech you could walk around the house with, casually surf the internet while watching the TV. It seems the iPad Pro is a very different beast. It no longer feels like a ‘go-anywhere’ convenient personal device, instead, at times feels no different than carrying around a small laptop, especially when combined with the Logitech Keyboard Cover.


Once I got over the surprise of it’s size, I was pleased at how lightweight it feels. That additional size certainly didn’t pile on too many pounds and the iPad Pro feels lovely to hold. Having now lived with the iPad Pro for some weeks I can honestly say it has become an invaluable tool. The processor speed and responsiveness are spot on and I have never experienced any lag when drawing with the Pencil.


Palm rejection
On several occasions when using the Adobe Draw App I found that the edge of my palm resting on the screen would register as a brush stroke in addition to the Pencil. I understood the ‘Palm Rejection’ technology within the new Pro was designed to remove this, but I found this to not always be the case. I usually wear a glove when working on screens, so hoped this would minimise the screen from detecting my palm, but with too much pressure applied it would still register as a brush stroke. This seems to happen only occasionally, so I have learned not to apply to much weight on the screen when drawing. I am unsure if this is software or firmware related so will wait and see if this is something that can be patched or whether it is something I will have to continue to live with.


Using desktop software
A large amount of my time is spent using Toon Boom Harmony, a 2D animation software with similarities to Adobe Flash but with more advanced animations tools. Toon Boom Harmony and it’s powerful storyboarding software ‘Story Board Pro’ is used by many of the big animation studios, such as 20th Century Fox, Nickelodeon and Disney TV. There are currently no native apps to run these programmes but I discovered recently an amazing piece of software called Astropad which is installed on your Mac along with an app that runs on your iPad. This allows you to run the iPad as a second monitor, connected to your main mac via a local WiFi connection. This took less than a minute to setup and works amazingly well. This is especially useful for anyone wanting to use their favourite software like Photoshop or like myself when using animation Software like Toon Boom. I am sure more developers will be creating cool new ways to make better use of the iPad Pro’s capabilities, but for now, Astropad removes many limitations and allows the iPad Pro to be a true graphics tablet. On the down side, which I stress is surprisingly minimal, there is a small amount of latency. Unlike using a Wacom which is directly inputting into the computer, Astropad is relying on your wifi connection. So if you are moving the Pencil very quickly doing quick strokes it can run a bit behind, but this is very minimal and doesn’t detract from what you are drawing.

Apple Pencil
Now let's talk about the Apple Pencil, this pen is not cheap, but then this is Apple so this comes with the territory, but anyone familiar with Wacom products will possibly be able to relate to this. I was honestly expecting more, now I don’t mean in terms of usability, I’ll come to that later, but more in terms of the product itself. With Wacom pens you get a stand and spare nibs, and with something like the Wacom 13HD a quality compact case, ideal for the artist on the move to protect their investment.


With the Apple Pencil, you get the box it came in, which shortly finds it’s way into the waste bin, a silly little charger adaptor which I am sure to lose and one spare nib. Now keeping in mind one of the main benefits of using an iPad Pro with Apple Pencil is it’s portability, it feels a real shame they haven’t put more thought into how the two devices can be transported together. It also astonishes me they do not even provide a cap to fit over the Pencil's’ nib to protect it when not in use.


When on the move, I am constantly thinking about where to place the pencil, it’s super smooth rounded body allows it to easily roll off uneven surfaces. The thought of the Pencil bouncing onto the floor with that expensive nib technology haunts me as i find myself constantly looking for a safe resting place to lay it down, and unlike the Wacom pens there is no pen holder. When using the Pencil, it’s movement feels very accurate and importantly it never felt like there was glass separating the Pencil from the ‘paper’. The sensitivity of the Pencil is also very impressive and seemed capable of detecting even the lightest of strokes. I wouldn’t say it was not as sensitive as the Wacom screens, but it’s pretty close.


Using the Pencil with drawing apps
I have several apps that I have experimented with, such as Graphic, Adobe Draw and Adobe Sketch; each offering their own benefits and pitfalls, but I will avoid going into my opinion on these and stay focused on how the pencil feels and performs. The Pencil is well balanced and feels lovely to hold. At first I thought the really smooth shinny Pencil surface was going to be off putting, but the more I used it the more it became natural to hold and work with. I did find myself quite often (and still do) flipping the pen around to use the top end as an eraser, so find I have to remind myself this is not a Wacom pen, but old habits die hard.

Pairing the Pencil to the iPad is quick, you simply plug in the Pencil to your charger port and a message will ask you to pair to the device via bluetooth. This took only seconds to do and worked seamlessly. The Apple Pencil is slightly longer than a Wacom pen and heavier, neither detracts from it’s usability and lives up to it’s name of feeling and looking more like a pencil than a pen. The charger port is hidden within the top end of the Pencil and can be charged by plugging this into the iPad itself. I read that around 15 seconds of charging will power the pencil for 30 minutes. This sounds great but as yet I have found no way of being able to find out how much battery life is left in the pen, perhaps it’s a mute point as the charge time is so quick it doesn’t matter. But still, the Apple geek in me would love to have seen some little green lights somewhere showing the charge.


The feel of the nib on the surface of the iPad Pro was a real concern, I know Wacom screens pride themselves on having a paper like feel when drawing and I was worried the iPad would have that slippery glass feel, which can somehow disconnect you from what you are drawing. Happily any concerns I had about the feel have been removed, largely I think this is down to the nib on the Pencil itself. Drawing is smooth with just the right amount of friction to feel like you are actually drawing onto something rather than just waving a pen around in thin air.

Although I mentioned earlier I was not commenting too much on the apps themselves, I did find using the Adobe Apps connected via the creative cloud to my main studio computer a dream to use. I was able to sketch and draw on the iPad Pro, send the files via creative cloud and continue working on the studio Mac. I know this is not groundbreaking, but for some reason with the iPad Pro and Pencil it all just felt more integrated and seamless and I always felt in control of what I was drawing, rather than working within any limitations of the technology.


As a side note I also purchased the Logitech Cover keyboard. Apple’s own keyboard was not available at the time, so opted for this as the next best thing. And whilst having the keyboard is very practical, it is far too clunky and adds too much weight to the iPad Pro, and I found myself ripping it off in frustration. So I am waiting to see what the general feedback is about Apple’s own Keyboard cover, which looks lighter and less clunky. Alternatively I may eventually resort back to a normal, thinner cover that is less obtrusive.

In summary the new iPad Pro along with the Apple Pencil are a joy to use, drawing is lag free, the iPad is light and responsive, and integrating into my creative workflow was effortless. On the down side, whilst the technology is great and works really well, this is always limited by the apps available. Using software like Astropad really opens up the potential of the iPad Pro as it allows you to access your desktop apps like Adobe Photoshop. For me personally, being able to use Toon Boom Harmony for my animation whilst away from the desk, albeit remaining within the same WiFi network, is a real plus. There are certainly some improvements that Apple could have made, such as designing a better way to store the Apple Pencil with the iPad so I would hope to see some innovation regarding this as thees two products develop.

If you are looking to purchase your first Digital Pen and Screen and work from a fixed home or office location I would personally recommend you purchase the Wacom 13HD Touch screen. This is cheaper and has one sole purpose that allows you to use your normal software and integrate more seamlessly with your workflow, and offers great value.

If however you are constantly on the move, or like me want an additional device to be creative when away from the desk, the iPad Pro and Apple Pencil offer a very professional and practical solution. Just keep in mind this is not the convenient sized, go anywhere iPad you may have previously come to love, especially when combined with the Logitech Cover, and get used to worrying about where to store that Apple Pencil.

Availability
Check out more reviews of the iPad Pro and Apple Pencil at
Amazon.com | Amazon.ca | Amazon.co.uk | Amazon.de | Amazon.fr | Amazon.it | Amazon.es | Amazon.co.jp

Tags: 


iPad Pro & Pencil artist review by Rob Sketcherman

$
0
0


This is a review by guest artist Rob Sketcherman.

If you've owned an iPad at any point, you know it can be handy for lots of things. I added sketching to that list 2 years ago, but for many of you, the artistic experience may have been touch and go. I'm pretty sure however, that things are about to shift considerably.

When rumors of a larger iPad began circulating a couple years ago, I had a feeling that it would be a milestone in the product line, largely because much as I’ve loved my iPad(s), I was now ready for...more; a bigger screen, more power - a souped-up iPad that could be a seriously amazing creative device. Early this year, the rumors started flying thick and fast, and in September, the tablet I'd been waiting for was finally officially announced. I picked mine up the moment it became available in Hong Kong, and have been playing with it for the last few weeks. Now, from the perspective of one who uses it daily for a living, here are my thoughts on Apple's latest offering.

Bear in mind - although I'm a bit of a tech nerd, I’m not big on detailed specs and numbers that include speed tests, chip names and RAM configurations. If a device is fast, what's most important to me is how it keeps up when I work. So if you want to geek out on performance-type tech specs, this isn't the review for you. I'm going to talk about how it feels to use this thing.

iPad Pro options

If you weren't already aware, there are 3 models to choose from, differentiated by disk space: 32GB and 128GB. They range from USD799 for the base model to USD1079 for top-of-the-line. The need for wifi or LTE capability will also affect your choice, although the latter is only available for the 128GB version. Finally, there are 3 colors to choose from: silver, space grey and gold. The space grey 128GB LTE version was my pick as I take my iPad everywhere and want (some say need) access to data if I can get it, especially when traveling.


The extra real estate and significantly higher resolution promises many possibilities for artists.

How big is 'Big'?

5.6 millions pixels flooding 12.9 diagonal inches. You don't need to remember that, because it hits you in other ways when you see the screen for the first time. The iPad Pro is huge! Bigger than my wife's 13" Macbook Air screen. It dwarfs my iPad Air. And it is stunning to look upon.


The screen of the iPad Pro is larger than that of a 13” Macbook Air!

At 30.5cm (12") by 22cm (8.75"), the iPad Pro's width is about 1cm less than the height of the iPad Air 1 and 2. While waiting for them to bring me mine at the Apple Store, I picked up a unit on display and was surprised at how light it was. At 713g (1.57lb), it's heavier than my old iPad Air (469g or 1lb) but because it's so much bigger, it feels lighter than it looks. The detailing is all you'd expect from Apple; machined accurately to the nanometer, a polished sliver of metal and glass that comes to life at your fingertips. The iPad Pro is slim, big and bright - like my old iPad on steroids!

What I'd been really looking forward to however, was the higher resolution (and the power to drive it of course.) My go-to creative app is Procreate - one of the few drawing apps for iOS that allows you to pick your canvas size, and create really high-resolution ones. On my iPad Air, I could create a maximum canvas size of 4096 pixels across. That's pretty good, really! You can do a lot with 4K. To compare, TVs are just beginning to brag about 4K capability and the resolution is so high most of us haven't seriously considered buying one yet because TV programming doesn't have anything with that kind of resolution to watch! Now think even higher resolution. The iPad Air 2 can create canvases of up to 8192 pixels, and the iPad Pro can do 16384.

How does this affect an artist though? And more importantly, how does it affect your creative process and art-making? When translated to print, higher definition and more pixels means a source file with a lot more information and detail. A 4000 pixel-wide image fills your 55" TV with crystal-clear clarity. I printed the following piece for an exhibition and was able to scale it up (via Perfect Resize on my Mac) to 2m (a little over 6 ft) across without seeing any pixelation. Now imagine that x4 with the iPad Pro! That should be plenty resolution for most, I reckon.

Painted on a 4000px-wide canvas in Procreate on my iPad Air, this was then upscaled in Perfect Resize on my Mac and printed 2m wide. No pixels visible as the source file was very high-res. The iPad Pro can produce artwork that is 4x higher in resolution!

Another scenario to illustrate potential: you can sit quietly with a device that's the size of an average glossy magazine, thus not needing much space at all, and be able to create incredibly detailed artwork that fills most living room walls.

Big Screens look good with anything

I sketch a lot on my iPad but I also do a lot of other stuff on it. A typical day has me doing regular stuff like email, browsing the web, writing, catching up on all kinds of reading, watching videos and working out my schedule out on my iPad. I also mindmap projects, collaborate and communicate, present work, edit photos and simple videos; all in all, enough activity to say my iPad is my primary workhorse.


I've bought a few thousand apps, but these are the ones I use almost on a daily basis. The large screen of the iPad Pro makes it a pleasure to use them all.

For all this and more, the extra screen real estate has been so very welcome, especially when viewing photos and video. Be prepared for audible sighs and exclamations of delight when people around you see the screen for the first time. Your camera roll never looked so good, and if presenting images is something integral to your workflow, I'm sure the iPad Pro will help you close that deal.

Does your iPad do the the Splits?

A new happy discovery for me, is Split View. This only works on newer devices (the iPad Air 2 and iPad Pro). I only just got to test it firsthand, and wow - this has totally changed the way I work.


Split View was invaluable to me in the process of writing this post. Swiping in from the right reveals a row of app icons. Tap any and the app opens to fill either a quarter or half of your screen, allowing you to work in both apps at the same time.

On the iPad Pro, sharing your screen with another app makes absolute sense. I don't need many windows open the way I might on my Mac. This actually helps me stay focused. To activate Split View, you swipe in from the right side of the screen to access a vertical row of apps that can work in this mode. This includes Apple's stable of apps, and a constantly growing list of others. Tap any and it fills your choice of either a quarter or half the screen. Imagine referencing figures from a page in Safari while writing a proposal, looking up something in Notes while editing a spreadsheet in Numbers, or studying an image in Photos while painting in Procreate... handy!

Hello Apple Pencil

When I began sketching seriously on the iPad, I found that I could do a lot with a Wacom Intuos Creative Stylus (1st gen) with a modified nib. That was my stylus of choice until recently, achieving the best balance of build quality, accuracy and sensitivity, in my opinion. When showing my kit to others and allowing people to try sketching on it though, I got a wide range of responses. Some people loved the iPad + pressure sensitive stylus combination and some did not.

I found that for best results, brushes in Procreate had to be calibrated to suit the needs of individuals, and preferences could vary a lot. In drawing apps that did not allow the customization of brushes for pressure sensitivity, strokes could be clumsy, making and the entire experience incredibly frustrating. Although I did not notice it when sketching, others saw an issue with lag between strokes and their appearances on-screen. I had found my sweet spot, but it still left a sour taste for some, and I suspect that this was why artists had not taken to mobile sketching technology en masse. Yet.


In the right app, the Apple Pencil is deliciously responsive and fun to use.

Enter the Apple Pencil. I rolled my eyes at the name when it was first debuted, but it's come to grow on me. It looks just like a white color pencil, and I'm sure that was intentional. Steve Jobs has been famously quoted ad nauseum that iPads and styli do not go together. When my favorite fruit company does something however, they work hard to make it a home run at first bat. And but for some pretty minor issues, I think they've done just that.

Apple's Pencil is going to change the whole mobile drawing experience.

At USD99, it's not cheap, but if you're shelling out for an iPad Pro, I can't imagine why you'd do so without also getting the Apple Pencil. I’d even go so far as to say it’s an essential accessory, whether you’re a creative professional or not. It extends the abilities of your new gadget manifold. In a nutshell, I'd say that anyone who wants digital flexibility with the organic feel of handwriting, or just doodling and making marks, will love using Apple's stylus.

I had many questions about the Apple Pencil, and have trawled the internet for answers. Here's what I found, along with what I discovered after my own testing:

  • First up, sorry older iPads. The Apple Pencil only works with the iPad Pro
  • Pressure sensitivity feels very natural - press harder and get darker, broader strokes. Keep things light with feathery strokes if you prefer. The Pencil handles all with aplomb.
  • The Apple Pencil does truly feel like a real pencil in your hand (and in keeping with that, does not magnetically stick to your iPad nor come with any hi-tech means of clip-in/hideaway storage).
  • It ships with 1 replacement nib and an adapter for the option of charging via regular lightning cable.
  • To pair your Pencil with your iPad Pro, simply plug it into your iPad. The rest is automatic. The two connect via Bluetooth, but there's no configuration necessary. This really just works :)
  • Charging itself is a cinch. Plug the Pencil directly into the iPad Pro and a 15 second charge will give you 30 minutes of use.
  • When the Pencil's battery goes below 5%, a notification pops up on your screen to warn you.
  • A full charge from that point will take about 20 minutes when plugged into your iPad, which then gives you about 12 hours of continuous usage.
  • There is no indicator on the Pencil that tells you how much juice you have left. The only way I know to tell is to enable the battery widget in iOS notifications. You can then swipe down anytime your Pencil is plugged in or when you're using it to see its charge level.
  • If you fancy, you could use the Pencil for navigation and selection purposes, but be aware - to avoid user interface conflicts, it has been programmed to not work with certain things like swiping down for Notifications or activating Split View.
  • No calibration or in-app pairing is needed to start using the Pencil. It works great in all supported apps.
  • Digital handwriting never looked so good! Hah- nobody can blame clunky styli for their chicken-scratches anymore. And fans of handwritten notes, take note: game changer!

Sketching with iPad Pro and Apple Pencil

If you're reading this post, chances are you're a creative of some sort and want to know if the iPad Pro lives up to the hype. Or perhaps you’re considering a gift for a creative you love, and want to know: How is the iPad Pro for drawing, sketching and painting?

The singular most remarkable thing I've noticed since using the iPad Pro and Apple Pencil is that when all kinds of people try it, they delight in the fact that the Pencil works the way they expect it to - like a natural pencil. They echo how I feel, and remark at how instinctive it is to draw, to write, to sketch. The process of discovering what creative apps can do has just become really fun!

I watched as friends brushed blooms of digital paint across a canvas and toyed with pastels without smudgy powder flying everywhere. Their eyes lit up. They scribbled, traced lines and made little doodles without frowning over, "How do I make this stylus work the way I want?" This changes everything. Not many people took to writing or drawing on their iPads before because of the learning curve or need for complicated calibrations. With that speed bump removed, I think we'll see a lot more people turning to the iPad Pro for artistic experimentation. (Please note however, that experiences depend very much upon the app used.)


Plug the Pencil into your iPad and get 30 minutes of use from a 15 second charge (20-30min for a full charge). Check the Pencil’s battery level in notifications. Pressure sensitivity is sweat and tilt-to-shade works a treat in tools of supported apps.

You may have seen videos and demonstrations of the Apple Pencil being used to draw, first on its tip, then tilted to the side for shading. This feature was first seen in Pencil by Fiftythree (the original digital stylus called 'Pencil'), makers of the drawing app, Paper by Fiftythree. The tilt-to-shade of their carpenter-style Pencil however, was hit-and-miss in my experience. It required a lot of getting used to, and even then, would often behave in totally unpredictable and unwanted ways. I get the feeling that although the people at Fiftythree used the 'Pencil' name first, it won't be long before Apple's version will be known synonymously as the Pencil and digital stylus to beat.

That's got a lot to do with the fact that Apple makes both iPad Pro and Pencil, allowing the company to build integration at the deepest hardware and core software level. Well, Yay for us! USD99 isn't cheap, but for what it can do, it's not expensive either. All you need to know is that it's a great buy, and you will love drawing and writing with it.

Apple's stylus has got the weight and balance right. The fine tip allows you to see what you're doing, is accurate and does not click or clack on glass. There is teeny bit of friction between the tip and the screen, with just a touch of give so that it doesn't feel like you're pushing and dragging one hard surface against another.

Styli like Adonit's Jot Touch with Pixelpoint and Wacom's 2nd generation Intuos Creative Stylus had rigid plastic tips that felt...too hard. They were durable, but natural media has some give, yielding somewhat to the substrate it's applied to. The Pencil has just enough to remove that hard-surface feel, and is the kind of little detail I would expect from Apple. I do wish they made a smart, easy way to transport the Pencil though. I've panicked more than a couple times trying to remember where I put it or whether it was safely stowed away in my bag.

Lag or No Lag

After I posted a video to my YouTube channel on my first impressions of the iPad Pro and Apple Pencil I was surprised at the number of views and variety of comments. Although I said that I saw no discernible lag, someone said they had slowed my video down and determined that there was indeed some lag. This bugged me, so I made a slow-motion video with my iPhone 6Plus to check. Normal footage is captured at 30 frames per second. I recorded this test at 240 fps, meaning time is slowed down four times when played back.

The results are in, and there is indeed some micro lag, BUT... it can't be picked up by the human eye at normal speed. So my opinion is: if the lag only bugs you in slow motion, then it's a non-issue. (Unless you are some sci-fi Time Lord who lives in slow-mo, in which case, stylus lag is the least of your worries.)

In my real-time tests, I found the iPad Pro, to be smooth, fast and accurate, keeping up with my speediest strokes.

Palm Rejection

You'll be happy to know that you can rest your hand on the screen as you draw. Over the last couple of years, I've trained my hand to hover over my iPad as I sketch. (Maybe that's why I have shoulder issues.) Since upgrading however, I've rediscovered the relief of resting the edge of my hand on the surface I'm working on. And this has worked in every app I've tested for drawing: Apple's Notes, Procreate, Paper by 53 and Adobe's iOS offerings, as well as PDF annotation apps like PDF Expert and Goodreader.

All the tools are calibrated to just work with the Apple Pencil, although in some apps, you can tweak settings even more if you wish. I love that you can fine tune and customize brushes in Procreate, but if that's not your thing, tools work pretty great out of the box too.

Outdoors Sketching with the iPad Pro

I took my new kit to a life drawing session right after I got it, and the first thing I did was open a huge canvas: 16000 x 3000 pixels, which made for one giant panorama. To illustrate how much more powerful the iPad Pro is compared to its predecessors, on my iPad Air, an A4 300 dpi document (3508 x 2480 pixels) allowed me 7 layers to work on. The iPad Pro gives me 57! I can't imagine what I'd do with 50 extra layers, but it's nice to have the option.


The Apple Pencil sang across my screen. It felt a lot more instinctive to use. Incredibly responsive, I barely needed to tweak size and opacity settings, which gave me more mental space to just draw. I would change tools and colors of course, but that's a given. I like a variety of textures in my work, and appreciated that the Pencil was long enough to easily tap through menus without me having to stretch my arm or move my injured shoulder. That makes for a much more ergonomic workflow, and is an important note for people who spend hours and hours at this on a daily basis.

A week ago, I attended a Car Show and wanted to see how the iPad Pro would hold up with all-day sketching. I began with it fully charged. The sun was brutal and for the first couple hours, I was out in the open, completely exposed and broiling slowly. The iPad Pro set itself to full brightness to compete with the glare, and handled itself well, I thought. I could see my canvas clearly enough to easily do line work. Colors would not have been as accurate, however. In any case, I'm not a fan of the heat, and have always opted for a shaded spot rather than cook under direct sun to sketch. My discomfort must have been obvious as the sympathetic owner of a 97-year old bike I was drawing, found me an umbrella and tied it to the guardrail next to me to seek refuge under!


Here’s the iPad Pro under full sun with screen brightness cranked up to maximum. As you can see, it’s fine for drawing lines. The contrast is much better than on earlier iPads. (I’m wearing a glove because it was hot and sunny. My hand was getting sweaty and the glove mopped up the moisture so I wouldn’t smudge my screen.)

All day long, I heard people chatting behind me, and some even ducked under my umbrella to see what I was doing and say “Hi”. Many recognized the iPad Pro and Pencil. Several asked what I thought about it, some wanted to test it, and yet others requested little demos.

Battery life

I started sketching at about 9:30am, and found my iPad Pro battery drained to 13% at about 2:30pm. That was the cue for lunch, and after eating, my patient wife sat in the cool interior of a nearby library to babysit the iPad while it charged. I went out and shot some video. An hour later, the battery level read 39% and I unfolded my chair to sketch again. As the sun began to set at around 5:30, the battery ran out completely, and a friend's power bank resurrected the iPad enough for me to finish my sketch and allow a few more people to test drive Apple's new tablet.

I did find that the iPad Pro used up power a fair bit faster compared to my iPad Air, and perhaps takes a bit longer to reach full charge. I've timed it at about 5 hours from 0-100%.

On the day I was out in the sun, the battery could have drained a bit faster than it normally would due to the brightness being set at full most of the time. On subsequent sketchcrawls, I'll try setting the iPad Pro to Airplane mode with just Bluetooth on to see how much that helps. That could make a big difference if I were to go on an all-day sketch-hike in the country, for instance.

When I now head out for the day, I carry the charger with me and keep my eyes peeled for juicing opportunities. You may be glad to know that the accompanying lighting cable (2m / ~6ft) is not only longer than its predecessors, but also thicker and sturdier. I'll also be on the lookout for a robust power bank for emergency juicing on the go.

Points to consider before purchase

Which should you buy if you've been toying with the idea of a new iPad Pro? I always say "Get the best you can afford". And skip the lowest-end model unless you curate content very well, have the time to do it, or want the iPad Pro mostly for show (I can see it being handy for a sales-driven position requiring a lot of presentation). If you're a creative pro, the 32GB model would be the absolute bare minimum I'd recommend. You may want to edit photos on the fly or sketch on location. With more power under the hood, you'd naturally want to floor the pedal. Apps are becoming more sophisticated, with the ability to handle larger files. Those megabytes add up very quickly. The last thing you'd want is to be somewhere gorgeous, feel your creative juices flow, then find you can't begin because you need to decide what to delete on your hard drive just to make space!

People who depend on really power-intensive desktop software from the Adobe suite or Final Cut Pro may find the iPad Pro insufficient for getting everything they want done, but it could be a supplementary tool for roughing ideas out on the go. There are many Cloud solutions that make it really easy to get files and content on and off iOS devices.

The whole combination of iPad Pro, Apple Smart keyboard and Pencil are pricey though, weighing in at USD898 for the base model iPad Pro + Pencil and USD1178 for the 128GB LTE equivalent. The Apple Smart Keyboard is handy but will add $169 to your bill if you go that route too. So... if you're a casual user and unsure about whether you want to dive down this digital path, please test thoroughly before deciding. Also remember that Apple Stores (not resellers) allow you to buy with a 14-day return window should you decide this is not for you.

You'll also need to consider the fact that the iPad Pro is pretty big. Bag needs will probably change. Case decisions will certainly be affected, especially if you don't get the Smart Keyboard. I haven't yet found the optimal solution for sketching as my preferred tablet holder doesn't come in iPad Pro size, nor does the manufacturer have plans to make one. The large screen makes me feel I need something sturdier to protect it while I get around town. In the end, I decided on Apple's Smart Keyboard as my 'case' while I await options. It's really light and hardly takes any space. I type a fair bit, and being able to use Split View means a lot more writing will get done on my iPad Pro, so the investment is justified. I’m also happy to note that the Smart keyboard is durable and repels liquids.

The other thing to be aware of is that the Apple Pencil looks much like a regular pencil and is just as easily lost, but costs a fair bit more to replace. Watch the cap, and have some sort of system to remember where you left it! Even if you don't mind forking out another $99 to get a new Pencil, stocks worldwide are currently really low, so a moment of carelessness could mean getting stuck without one for weeks.

The Final Word

After 3 weeks of use, I can conclusively say that the iPad Pro and Apple Pencil are really excellent tools if you're digitally inclined. If your activities revolve largely around email, web browsers, reading, writing (now including both handwritten and typed) and the need to mark up PDFs, this could replace a notebook.

If you draw or paint, definitely go into an Apple store or reseller and test to see how you like the iPad Pro. Lift it, wield it and give it a whirl. Apple's Notes app is a good starting place to test, and many Apple Stores will also have Paper by 53 preinstalled. These should be fine for basic drawing testing. Fair warning, though - prepare to feel an almost irresistible magnetic pull drawing your wallet out to slap down payment.

Pros

  • Huge gorgeous screen = Images and video look incredible
  • Great for personal presentations
  • Capable of creating very high resolution artwork
  • Robust sound for music and videos
  • Powerful enough to leave some notebooks in the dust
  • Apps are being written to take advantage of iPad Pro's power and screen real estate
  • Split View looks awesome and works great
  • combined with the Apple Pencil = excellent, natural writing & drawing capabilities
  • Pencil charges quickly and easily
  • Palm rejection works flawlessly

Cons

  • Not everyone will want to work in a predominantly iOS environment
  • Complex productivity apps are still lightweight versions compared to desktop counterparts
  • Bigger iPad = more weight and bulk to lug around
  • Pricey

More reviews
Check out more reviews of the iPad Pro and Apple Pencil at
Amazon.com | Amazon.ca | Amazon.co.uk | Amazon.de | Amazon.fr | Amazon.it | Amazon.es | Amazon.co.jp

Check out other graphics tablet reviews at http://www.parkablogs.com/tags/drawing-tablet-reviews

Tags: 

Review: XP-Pen Artist 22HD Pen Display Monitor (IPS)

$
0
0

This review is written by Ryan Lopez, a freelance artist, live streamer, and product reviewer.


This is a review of the XP-Pen Artist 22HD, a graphic tablet monitor that displays what you are drawing on screen as you work. In this review we will discuss the some of the positives and the negatives about this product. Also I will try my best to be as in depth for someone that is brand new to this type of product. I myself have used a few Wacom bamboo tablets, and also a few products from Ugee, like the 2150 and 1200b. I have never worked with a Cintiq, but hopefully someday. This product is known as a “Cintiq Alternative”, with sharing many similarities... but one not being the price. Without hesitation, let's get it started.

Overview

The XP-Pen 22HD is a 21.5 inch 1920 x 1080p resolution IPS drawing tablet monitor. This is your basic resolution for everything classified as High Definition.

The benefits of this being an IPS monitor are the viewing angles and the true rich colors the monitor puts out. This monitor can be viewed from many angles and really only seeing some color degradation when at the extreme side viewing angle.

The colors are spot on and there is little to zero calibration needed of the monitor when coming out of the box. This monitor has 2048 levels of pen pressure sensitivity and comes with 2 rechargeable pens in the standard package. 2048 levels of sensitivity is the standard for most pen tablets, meaning that you can apply as many points of pressure to see a difference in line or stroke size.

The pens have 2 express hot keys located on them that can be customized to about 9 assignable shortcut keys. This monitor has HDMI, DVI, and VGA ports for all of your output needs. Cables that are included in the standard package are USB, Power, DVI, HDMI, VGA. Also included is a mini-DVI adapter, cleaning cloth, a brush, screen protector, a pen stand and extra nub holder, and a XP-Pen artist glove. There is more technical terms and more specifications that could be listed above, but these are the ones I find most important.


Some of the included items.

Comparison

The recognizable name in this product field is Wacom with their Cintiq line. As for myself, a person that has never used a Cintiq, I can only comment on the differences simply on paper and from what others have previously discussed. Commonly described as a Cintiq alternative, here are some of those differences.

The Artist 22 has no express keys at all. Express keys are keys that are on the front face of the tablet to enable shortcuts to certain functions like “undo, erase, move, zoom” and more that can be customized to your liking. With the pen having 2 buttons on it I set them to erase and color picker for easy use. I also found that as long as your keyboard is near this shouldn't be a problem for the average user that has no experience with a Cintiq anyways.

The glossy glass screen is quite the contrast to the Cintiq that has more of a flat plastic surface. The gloss tends to reflect the light that you have in the room and makes it hard sometimes to see the screen clearly. The gloss also tends to stick to your hand as you try to move it for larger brush strokes, a good thing XP-Pen recognized this problem and included a very comfortable glove to help. It's a 2 finger glove that leaves your thumb, index, and middle finger free to grip the pen naturally, while covering you pinkie and ring finger to help your hand slide across the screen.

The prices between the Cintiq 22HD and the Artist 22HD are night and day. With the Cintiq HD (non-touch) coming in at $1799.95 USD, currently on Amazon, and the Artist 22HD coming in at $609.99 the price comparison isn't even close.

These three key differences are what I can see affecting a lot of consumers decisions when purchasing these similar products. With the over one thousand dollar price difference being the biggest factor of all.

Build Quality


Default stand.

So let's now talk about the monitor build itself. The stand provided works well enough, with a single latch that you hold up at the top of the monitor to have the stand slide up and down. It's made of a thick plastic and has rubber grommets on each of the four foot contacts. The only issue I have seen with the stand is I just didn't find it comfortable for extended periods of time. With my current setup I have my monitor on a movable arm so that I can bring the tablet to me instead of moving to the tablet, so yes it is VESA mount compatible also which is a plus.


VESA mount applied

Five buttons are located on the bottom right corner of the monitor, Auto, -,+, Menu, Power. The “-” and “+” being volume control for the built in speakers located on the back. I didn't test out the speakers, but it's strange that the product specifications makes no mention of them at all.


Hello glossy screen!

The screen has a glossy finish, as I mentioned earlier, and has quite a gap between the glass and the point at where your pen is displayed, which is described as parallax. The gap only becomes an issue towards sides of the screen. With most of the work you will be doing towards the center, this isn't a problem.


Slight parallax.


Cables become bunched when lowering stand.

One of the problems I ran into when using the provided stand is the cable placement located at the bottom of the monitor. When adjusting it up and down, some of the cables would get caught under the monitor and wouldn't allow it to go all the way down with out me reaching behind and pulling the cables out of the way. A minor inconvenience, but one nonetheless.

So while we are talking about the build quality we might as well discuss the similarity between this and other Cintiq alternatives. I personally own, and have been using for quite some time, the Ugee 2150. These are the exact same product. With only a difference in the packaging (much nicer than that from Ugee) it came in and the name on the front of the screen. I do not know the logistics of Chinese manufacturing, but all I know is that both of these products work great.


Ugee 2150 (left), XP-Pen Artist 22HD (right)

The pens included have a great weight to them and feel comfortable in your hand. Included are extra nubs located in the stand for the pen and two charging cables for the pens as well. A full charge on the pens will last a couple weeks, depending on how much you use them of course. The only issue I ran into is the sound that the pen sometimes makes when moving across the screen. I believe that the screen protector is included to help prevent this noise, but with me previously trying to get the screen protector applied without any bubbles on the Ugee 2150 and failing, I didn't even try on this unit. As a suggestion, I would hope that these screen protectors could come pre-installed from the manufacturer in the future.

Other than the cable placement I am impressed with the build quality of the Artist 22HD. With a solid construction and a beautiful display I can't say much bad about it.


Different positions of the stand.

Software and Drivers

Installation of the drivers and software from XP-Pen were the easiest I have ever encountered. I used the CD provided, installed and rebooted in a flash. I currently am running Windows 10 with the latest updates. This tablet is also compatible with Windows XP/7/8/8.1/Mac OS x 10.7.0 or later. I also tested this unit using Adobe Photoshop and Manga Studio Pro and had no issues at all. After the restart, I was getting ready to do the 9 point configuration tool, like I have done with other products, but realized that the configuration was already spot on. It was a very nice surprise from having so many issues from other products before. All of the other configurable areas of the software are ready from the start, with only one suggestion to turn the pen sensitivity all the way down. I felt like I had a much more consistent pressure control with the slider at the zero position.


Quick Test for jitters and inconsistencies, results none.

Breakdown

So let's breakdown the pros and the cons of the Artist 22HD.

Pros:

  • Priced at $609.99 USD currently on Amazon is an amazing deal
  • Screen size, Resolution, and Color reproduction quality
  • All of the outputs you could want. And all cables included
  • Software and Driver installation was really smooth

Cons:

  • Glossy Screen and slight Parallax
  • Cable placement at bottom of monitor
  • Stand can make it uncomfortable, but VESA mount compatible
  • No express keys

Recommendation

With the pros definitely outweighing the minor cons of this product, I can't help but have to recommend this to anyone considering this unit. Much like the Ugee 2150, well exactly like it, this product has an outstanding value that can't be beat. Stop thinking about, just buy this now

Availability

Check out more reviews on Amazon at
amazon.com/Graphics-Painting-Adjustable-Disaplay-Protector/dp/B015FP25V6

There's also a 10-inch version at
amazon.com/Artist10-Interactive-Display-Graphics-Drawing/dp/B017K6O96W

Check out other graphics tablet reviews at http://www.parkablogs.com/tags/drawing-tablet-reviews

Tags: 

Guide to the graphics tablet size to get

$
0
0

One of the most frequently asked questions from my Wacom Intuos video review is that of the tablet size to get: "What tablet size should I get?"

Generally speaking, you'll want the graphic tablet size to be close to the size of your monitor.

A good size to get is the Medium. For Wacom, this is around 6 by 8 inches, or around A5 size. I personally find that to be a comfortable size to work with.

The tablet surface is mapped to the whole screen. That means if you have a small surface, everything you draw will be magnified much larger. 1cm on the tablet surface could translate to 4-5 cm on the screen. There's a mismatch because you expect your short stroke to appear short on the screen but it will come out much longer. It will certainly take time to get used to using a small tablet.

For medium size tablets, the difference of your tablet stroke and screen stroke is not as much, and hence it feels more natural to see your strokes come out the way they are on screen.

For large tablets, the difference is even less. However, I find that it can be quite tiring to use a large tablet because your hand has more distance to cover. When you're drawing in a sketchbook, usually your hands do not have to travel that far. With a large tablet, sometimes your hand has to travel further to reach the menus, palettes which are all over the screen.

Using large tablets with a small screen, e.g. laptop screens, can feel awkward at times and will take a while to get used to it.

My recommendation

Screens below 19-inches: Get the small tablet
Screens above 19-inches: Get the medium tablet
If you want really fine detail control, get the large tablet.

If you have the budget, the medium sized tablet is one that's the all rounder. I'm very comfortable with it even when used with a 27-inch screen.

You can check out the various Wacom and Huion tablet models and reviews on Amazon.

And check out my Wacom Intuos 2015 review.

Tags: 

Artist Review: Surface 3 vs iPad Air for drawing

$
0
0

I've always been interested to find out how the Microsoft Surface 3 would compare to my old iPad Air when it comes to drawing on it. So when I saw a secondhand Surface (non-Pro) 3 on sale at a great price, I bought it. By the way, at the time of this review, the 128GB storage Surface 3 cost USD $500 while the iPad Air 2 cost $600. That's quite a significant difference. However, you have to factor in the extra $50 for the Surface Pen because it's not bundled with Surface 3.

This review compares my user experience of the Surface 3 and iPad Air because they are quite similar in size and price. There will be an artist comparison of the Surface Pro 4 and iPad Pro tablets in the future.

The unit that I bought has a 10.8 inch screen, 4GB RAM and 128GB of storage.

It came with Windows 8 but I've since upgraded it to Windows 10 for free. The tablet experience is slightly better with Windows 10 than 8. What I mean is, I find it easier to locate things on Windows 10, especially with the return of the Start menu and the visible desktop.

Specs comparison

Here's the tablet for a quick specs comparison.

Surface 3iPad Air 2
Models64GB with 2GB RAM, 128GB storage with 4GB RAM16GB, 64GB, 128GB
Size18.7 x 26.7 x 8.7cm17 x 24 x 6.1cm
Weight622g437g
Body materialMagnesiumAluminum
ColorsSilverSilver, Gray, Gold
Screen10.8-inch, 1920 by 12809.7-inch, 2048 by 1536
StylusNot includedNot included
OSWindows 10, can install tablet appsiOS
PortsUSB 3, microUSB, microSD, mDisplayPortLightning
ProcessorIntel Atom 1.6Ghz Quad CodeA8X Tri-core 1.5Ghz
Battery life10 hours as advertised10 hours as advertised
Release dateMay 2015Oct 2014

BUILD QUALITY

Build quality of the Surface 3 is fantastic. The magnesium body is sturdy, thin and has a nice matte feel to the finishing. It weighs 620g. iPad Air 2 has a significant weight advantage at 437g. The iPad Air 2 is lighter, but I don't feel that the Surface 3 is really that much heavier.


Mine has some tiny scratches already. The Windows logo at the back is a fingerprint magnet.


Surface 3 comes with an incredibly useful built-in stand because you can make the tablet prop up on its own without additional accessory.

SCREEN


The 10.8-inch screen has wonderful colour reproduction and viewing angles. Resolution is 1920 by 1280. The screen can be considered small when you need to accessing things like menus and buttons of applications that have user interfaces not optimized for tablet use. I feel that iPad's user interface and buttons there are usually bigger.

However, note that you can run Windows tablet apps as well as desktop software on the Surface. Windows tablet apps are designed with larger user interface.


Thickness comparison with iPad Air on the top. In terms of thickness, there's not much difference but Surface 3 is noticeably heavier.

IT HAS A USB PORT!

One major advantage of the Surface 3 compared to the iPad Air is the existence of the USB port. The USB port is so convenient. In actual use, I plug the USB port into my Dell monitor which acts as a USB hub where I plug in many other devices, e.g. scanner, SD card reader, keyboard, Wacom tablet.

And MICRO-SD PORT!


This is nice. If you run out of storage on the Surface 3, you can get a microSD (128GB for $50 or 200GB for $100) and plug it in.

BATTERY LIFE AND MANAGEMENT

Downside of the Surface 3 is the battery management. Tbe battery port is a micro-USB port, those commonly used by phones for charging. While it's great you can charge with phone cables plugged to the computer, it charges very slowly. If you want to charge it faster, you have to use the Surface power adapter provided, and even so it does not charge as fast as the iPad. I don't like to bring the Surface power adapter to the office so I have to make do with slow battery charging via phone cables. At home, I charge it overnight with the power adapter.

Battery life is good but not as good as the iPad Air. I get around 7-8 hours for some drawing and Internet surfing.

When the screen is off, it seems wireless communication is still on and that can drain the battery on standby mode, e.g. battery depletes 5% overnight on standby. To conserve energy, you have to set the Surface to shut down during prolong inactivity, such as at night, but that means the next time you need to use it, you have to startup and wait a short while for the booting sequence. It's like, erm, using a desktop/laptop.

DRAWING EXPERIENCE


I've used many tablet styluses and the best ones are the Surface Pen for the Microsoft Surface tablets, the S Pen for the Samsung Note tablets and the Apple Pencil for the iPad Pro. Third party styluses can be good but not as good as those made by tablet makers themselves.

The Surface Pen is not bundled with Surface 3 but thankfully it's not as expensive as the Apple Pencil. Anyway, Apple Pencil cannot be used with the iPad Air 2. The Surface Pen I got is created for Surface Pro 3. By the way, there's a new Surface Pro Pen 4 that's backwards compatible.


One AAAA battery is required to power the pen. I've not used up the battery yet but Microsoft has rate it to last for at least a year. With constant use for drawing, it would probably drain the battery faster.


Pressure sensitivity is supported and the tip is not wobbly unlike many of the third party iPad styluses.

Drawing experience depends on the drawing application.

Nice thing about the Surface Pen is it works well with many drawing applications. Unfortunately for me, it's quite buggy with the Photoshop CS6 (more on that later).

Here's the list of applications I'm using with the Surface Pen 3 and their performance

By excellent, I mean they draw without any significant lag and support pressure sensitivity. Unfortunately, only Sketchable has palm rejection.

When I installed the Wacom drivers, compatibility of the Surface Pen with the drawing apps suffer. The apps are not longer able to handle pressure sensitivity of the Surface Pen. However, I was able to use the Wacom tablet and all the drawing apps work well, including Photoshop. But I would rather prefer the Surface Pen work over the Wacom tablet because you don't want to bring an extra tablet out.

I've read in the other review by Loc Nguyen that Adobe CS apps are just not designed for tablets and touch interface. My experience is similar. I wasn't able to get pressure sensitivity to work with Photoshop CS6 and the Surface Pen. Adobe CC apps now have better touch compatibility with tablets, and also settings for scaling the user interface. Anyway, Photoshop is not the best drawing software on a small tablet like this. I also have problems accessing the menus sometimes, e.g. the mouse cursor will be at one position but some other menu further away will pop up — Photoshop is almost unusable like this.


I've read about issues with jitter with the Surface Pro 3 when drawing. It's also present here with the Surface 3 but so far I've not felt that it affects me when drawing because you have to draw really slowly to get the jitter. If you are specifically testing for jitter, then yes it will show up, just like how it shows up with some styluses on the some apps on the iPad.

SPEED AND PERFORMANCE

For artists, I recommend getting the 4GB RAM unit. The OS and the drawing apps use RAM. Also, Windows OS itself take up 20GB of storage.

The 2GB RAM unit is good for Internet browsing, playing videos.

I've not noticed any lag or significant lag in any of the drawing apps I've used. The only exception is the 3D modeling software Sketchup which is not unexpected because there's no dedicated graphics card.

I wanted to test how well it can handle photo editing so I installed Adobe Lightroom. Menus and commands are slow to appear. Edits also take a sec or two to show. Exporting photos from Lightroom with the Atom quad core 1.6ghz is slow, but it can be done. Overall, it's just not a pleasant experience with Lightroom.


It does get slow when you have a huge artwork. For example, when I'm drawing a huge scene in Mischief, I find that navigating around the artboard will start to lag. However, the strokes will still come out fast. I suspect it's the issue with not having a dedicated graphics card.


Here's the close up of the sketch above drawn with Mischief.

Overall, I'm satisfied with the Surface 3. Speed is comparable to iPad Air 2.


I was also able to plug the tablet using the mini DisplayPort (shown in the right) into my 27 inch Dell monitor that ran at 2560 by 1440 resolution and work with no lag. Working with desktop software like the Adobe CS is much better on a big screen.


When you plug in the mini DisplayPort, you can choose to work only on the big screen, or have the screen extended from the Surface. It will remember the settings and the next time you plug in the display cable, the screen you want will show up immediately. Very nice! Say you want to work on the big screen, you can still draw on the Surface as a tablet, like a Wacom Intuos. Nice x2.

A few artists said that they like to use the iPad (Pro) for quick sketches and drawing on the go before putting the details and finishing touches on their computer. They need two machines essentially. With the Surface, you need just one. Although if you want one main computer, I recommend getting the more powerful Surface Pro 4.

DOWNSIDES

One of the downsides of Windows OS is the mix of desktop and tablet OS. So there are a lot of options and customization, and the downside is it can get confusing. But mostly the confusion comes from expecting tablet features from the desktop OS, e.g. why are menus and buttons small, you can pitch and zoom on some software and they don't quite work like what you expected.

The onscreen keyboard does not come up automatically, and when it comes up, it often blocks the text box that you're typing into. Perhaps Microsoft wants to irritate you into buying the expensive Type cover.

Driver conflicts is something you have to accept especially when you install other tablet drivers, like those from Wacom and Huion. Those drivers will conflict with the Surface Pen.

The screen is really nice but small. If you want something that's really compact, this is a good choice. If you want something that's more comfortable for your eyes, especially if you need to work on the computer for long hours, I really recommend a larger screen. A small screen will make you sit closer and hunch down, and that's not good for health. If you're using it as a tablet, holding it on hand, then it's fine.

APP STORE

Microsoft's app store may not be as big as Apple's but I am always able to find an equivalent software for the one I'm using on Apple. I do miss the drawing apps Procreate and Paper by FiftyThree. I hope those apps get will a port over to Windows. That will definitely make Apple nervous because they are very popular drawing apps on the iOS. Other than that, I did not miss the iPad for the few weeks I was using the Surface 3.

CONCLUSION

Ultimately, it depends on what kind of work you want to do on your tablet.

In terms of value, I feel that the Surface 3 offers more for the money compared to the iPad.

I'm more than satisfied with the Surface 3. My quibbles are that I'm not able to use Photoshop together with Surface Pen without much troubleshooting (it worked and then stopped) and the slow charging battery.

If you're considering getting a tablet for sketching, I'll recommend the Surface 3 (4GB RAM model). For digital painting, you can use the Krita desktop app on Windows. I feel that Procreate on iPad is also a very good digital painting software so at least there's an alternative on Windows.

If you need more processing power, get the Surface Pro 4.

After using the Surface 3 for weeks, I'm still not accustomed to the small screen size especially when I know there's a larger screen tablet in the Surface Pro 4. I'll be upgrading to that soon and put out another review.

If I were to use the iPad Air exclusively, I will miss the Surface 3. For some websites I need to use, they only render the mobile version on the iPad with no way to load the desktop version.

Availability

Check out more reviews at Amazon.com | Amazon.ca | Amazon.co.uk | Amazon.de | Amazon.fr | Amazon.it | Amazon.es | Amazon.co.jp

Check out other graphics tablet reviews at http://www.parkablogs.com/tags/drawing-tablet-reviews

Tags: 

Review: Yiynova MSP19U+V5 Pen Digitizer Tablet Monitor

$
0
0

Hi, I’m Chris and this is my review of the Yiynova MSP19U+V5 tablet monitor.

I came across this particular tablet while searching for a tablet monitor to replace my old Wacom Bamboo. Besides my Bamboo, I had some experience using various models of Wacom’s Cintiq. I was looking for a cheaper alternative to the Cintiq, which is probably the most well-known and widely used tablet monitor.

After doing extensive research of various alternative tablet monitors, I decided that the MSP19U+V5 was the best option from what I had seen. I bought it on Amazon for $479, with the original price listed as $699. Since then, at the time of writing this, the price has gone down to $449. After spending several hours drawing with it, I can say that it is definitely a great alternative to the Cintiq, especially for being about a quarter of the price of the Cintiq 22 HD and over $300 cheaper than the Cintiq 13 HD.

Tablet Details

The tablet itself is 17.9 by 14.2 inches and 9.7 pounds (4.4kg), so it is not too bulky and can fit on a fairly small desk.

The stand that it comes with is sturdy and has rubber grips on the bottom so that it doesn’t slide around. I don’t feel like I’m going to slide the tablet around or break the stand when I draw on it, even if I’m pushing down hard.

The screen is smooth glass, so it doesn’t have the same paper texture feel as the Cintiq, but after using both, I’ve found that I prefer the smoother screen of the Yiynova. The smoother screen also prevents scratching and the wearing down of the pen nibs. I don’t think a screen protector is necessary and I haven’t seen mention of any need for one in the reviews I have read. The smoother screen also has more potential for glare, but I haven’t had much of a problem with this since I don’t usually have mine close to a bright window.

There are programmable buttons for different commands on the left side of the monitor, but I haven’t really used these much. The labels for the default settings are printed on the front of the monitor, while the buttons are in the back. They seem to be in an easily accessible location, but they make loud clicks when you press them, which may be annoying to people who would use them frequently. The power button and settings buttons are on the lower right side and it took me a few minutes to figure out how to maneuver through the menus to change the colors and brightness. The menus can be difficult to navigate, but I only change display settings occasionally so I wouldn’t consider it a detraction from the tablet.


The default stand setup on the back of the monitor


The programmable buttons on the back left of the monitor and the power and settings buttons on the lower right side

Display

The 19-inch screen has a resolution of 1440x900 and 4000 LPI.

The colors were a bit weird with the default settings, but after playing with the color settings for a while, I managed to get them fairly close to the colors on my laptop. I usually keep another window open on my laptop so that I can check the colors and make sure they look the way I intend. This also helps with the differing resolutions, since the tablet is 1440x900, while my laptop is 1920x1080. Even though the resolution of the tablet is a bit lower than that of my laptop, I usually zoom in enough while I’m drawing that I don’t notice the lower resolution much. The only time that the resolution is noticeable is when working with really fine detail, but even in those instances, the lower resolution is not too much of a problem.

There is a small amount of parallax (where the glass thickness causes a difference in the location of the pen tip and the cursor), but it’s usually not noticeable. Occasionally, if I am sitting in a much different position than I was when I calibrated the screen, I’ll have to recalibrate, but usually that’s not necessary.

The viewing angle isn’t the best because there is no IPS panel, so sometimes if I’m looking at the very top or bottom of the screen, I need to move my head a bit to make sure I’m looking at the screen as close to perpendicularly as possible. However, this probably wouldn’t be too much of a problem for most people because the most comfortable drawing position is directly in front of the monitor.

Accessories

When I received the tablet, it came in a fairly sturdy box that I now use if I need to transport it somewhere. It came with the manual, a disk with the latest drivers, two drawing gloves, two pen kits, all of the necessary cords, and some adapters.

The drawing gloves are well-made and comfortable, as well as reversible, so they can be used whether you are right-handed or left-handed. Although one glove is sufficient, it is nice to have the second one as a backup in case the other gets lost or worn out. Since the tablet screen is a glossy glass, drawing with a glove can prevent smudging on the screen. It can also prevent your hand from sticking when trying to move across the screen while your hand is sweaty, but since the monitor doesn’t give off too much heat, this isn’t much of a problem anyway.

The power cord detaches from the tablet, while the DVI-I input cable does not. It comes with three adapters for HDMI, VGA, and DP++. Use of the tablet requires plugging the power cable into an outlet, one branch of the input cable into a USB port, and the other branch into an input of your choice (I use HDMI). The wires take up a lot of space, but I manage to fit my laptop and tablet on a fairly small desk along with a lamp and other desk clutter.


The box can be carried by the handle without it feeling like it’s going to fall apart.


Two of these reversible gloves came with the tablet


Starting from the left: DVI-I input, USB input, HDMI adapter (I use this one), VGA adapter, DP++ adapter

The Pens

The two pen kits each consist of a P2X pen, two extra nibs (for a total of six nibs including the ones that came in the pens), a nib-remover, and a plastic case for the pen.

The pen itself is comparable to any of the other tablet pens I have used, including those of the Bamboo and Cintiq. The P2X is Yiynova’s best pen model compared to the P2H and older models. The pen has 2048 levels of sensitivity (double what my Bamboo had, but equal to the Cintiq) and does not have tilt detection, but I don’t personally need or use tilt detection, so I don’t consider this a loss.

It is battery-powered and takes one AAA battery. So far I have not had to replace the battery, and from what I have read, the pen can be used regularly for a long time (at least several months) without needing a new battery. The battery doesn’t add a very noticeable amount of weight to the pen, and the weight feels similar to the Wacom pens I have used.

The pen does not have an “eraser” on the other end, but I have not really missed it too much.

There are two programmable buttons on the side which is really my only complaint about the pen. The buttons are positioned in such a way that they are too easy to press, and I often do that accidentally while drawing and end up interrupting my stroke or switching colors unintentionally. Due to this, I often try to position my fingers on the pen differently so that I am less likely to accidentally hit the buttons. However, the buttons can be disabled in the settings menu if you don’t use them. The pen case makes a nice pen holder since it has a hole that you can stand the pen up in. It doesn’t make the best case though because the pen fits a bit too snugly and it is also really hard to pry open. The case also has a transparent ruler on the side, but I haven’t had the need to use it.

pens
The two P2X pens showing their structure and how they open for the battery


The pen cases with extra nibs and nib remover on left and right sides of the open case respectively

Use and Drawing Experience

I use the HDMI adapter with my Dell XPS L511Z laptop running Windows 7.

The software I have used for drawing with this tablet the most is Clip Studio Paint (same thing as Manga Studio), but I have also had a good experience using it with Photoshop.

Drawing is really smooth and natural and I don’t notice any lag or jitter at all.

The pressure sensitivity feels a bit different than Wacom pens, but I was able to easily get the pressure levels how I wanted them by adjusting some pen settings. There is a really nice pressure ramp and I don’t feel as though I need to press too softly or too hard in order to get the full range of pressure values that I want.

The color and resolution difference between the tablet and my laptop isn’t a problem either because I almost always have another window open on my laptop of the drawing so that I can check to make sure everything looks the way that I want it to. As I said before, as long as I calibrate the screen, I don’t have much noticeable parallax and even with a somewhat smaller viewing angle, as long as I stay close to perpendicular to the screen, I don’t need to worry about it affecting my drawing.

The tablet also stays cool for long periods of time and it hasn’t gotten uncomfortably warm, even after several hours of continual use. The tablet also makes a great second monitor, even if I’m not using it for drawing. I can have a window open for reference when using Autodesk Maya, or when using Unity, I can have the code up on one screen and the project window open on the other. Having the extra screen space can help speed things up and make things easier no matter what software I’m using. I also usually have a USB mouse plugged in when I’m using my tablet, so that I can quickly move windows between screens or just for software like Maya or Unity where a mouse is easier to use than a pen.


My setup with my laptop and the MSP19U+V5 with Clip Studio Paint open


Some of the tablet options including pen button settings and pressure sensitivity


Pen pressure sensitivity tests/demonstrations done using Clip Studio Paint

Driver Installation and Problems

I had read in some reviews that it was a good idea to make sure I had installed the tablet drivers before even plugging in the tablet, so I did so. However, I was hoping that I could at least leave my Wacom drivers on my computer so that I could use my Bamboo if I wanted to, but I was unable to get things working correctly until I uninstalled all of the Wacom drivers. This isn’t a big deal because the UC-Logic drivers for the Yiynova installed really quickly so I could uninstall and reinstall drivers in the future if for some reason I needed to use my Bamboo.

Everything was running smoothly, but when I drew with the tablet for long periods of time, the pen pressure would stop working after an hour or two and I would be unable to draw with it until I restarted my computer. This went on for a while, and I would just restart my computer every couple hours, until I finally contacted the seller, The Panda City (in the US), and emailed support. Their customer support was really helpful, responded within a day, and kept up communications until my problem was fixed.

Driver Solution

I will talk about how I solved the problem for reference for anyone else having the same issue. Part of the problem was due to the fact that I had overlooked which version of the drivers I was using. The disk that the tablet came with contained the newest version of the drivers, which were not recommended for use with Windows 7. I downloaded and installed version 5.02 from the Panda City website, but was still having problems. It turned out that my computer was using the default Windows tablet drivers instead of the UC-Logic drivers. I ended up having to create a new administrator account on my computer and reinstall the drivers, which finally solved all of my problems. This was partially my fault for not paying attention to which driver version I needed for my operating system.

I recommend that anyone getting this tablet makes sure they follow the installation instructions located on The Panda City’s Facebook page and uninstalls all other tablet drivers and installs the correct version for their operating system before even plugging in the tablet.

Conclusion

I would definitely recommend the Yiynova MSP19U+V5 to anyone who is looking for a good tablet monitor. It is a great and cost effective alternative to the Wacom Cintiq, and depending on your preference, could be an even better option than the Cintiq. As an upgrade from the Wacom Bamboo, this tablet has made drawing digitally feel much more natural and has drastically sped up my workflow. Here is a quick pros and cons list of what I feel are the most important details of the tablet:

Pros:

  • Price (at the time of writing, $449 on Amazon)
  • Very responsive and helpful customer service (at least with The Panda City)
  • Minimal lag, jitter, and parallax
  • Light but sturdy monitor and stand
  • Stand is adjustable and doesn’t slide
  • Lots of accessories: two gloves, two pens, adapters, nibs, etc.
  • Programmable shortcut buttons on the side of the monitor
  • Pen battery lasts a long time
  • Good range of pen pressure sensitivity
  • Glossy screen prevents scratching and nibs from wearing down
  • Vivid colors once properly adjusted due to lack of anti-glare surface

Cons:

  • Small viewing angle due to having no IPS panel
  • Lower resolution
  • Possible difficulties with driver installation
  • No eraser on pen
  • No tilt detection
  • Wires take up a lot of space, adapters needed
  • Glossy screen more likely to cause glare
  • Colors and brightness need some adjustment out of the box

Hopefully this review has provided you with some useful information that will make your tablet-buying choice easier!

Thanks for reading,
Chris Phillips

Availability

Check out more reviews on the following product pages at
Amazon.com | Amazon.ca | Amazon.co.uk | Amazon.de | Amazon.fr

Tags: 

Viewing all 230 articles
Browse latest View live